Garmin GPSMAP 176C Quick Start Manual
Chartplotting receiver
Hide thumbs
Also See for GPSMAP 176C:
- Owner's manual (104 pages) ,
- Owner's manual and reference manual (86 pages) ,
- Quick start manual (17 pages)
Table of Contents
Advertisement
Quick Links
Advertisement
Table of Contents

Related Manuals for Garmin GPSMAP 176C


Summary of Contents for Garmin GPSMAP 176C
- Page 1 GPSMAP 176C/176 chartplotting receiver quick start guide...
-
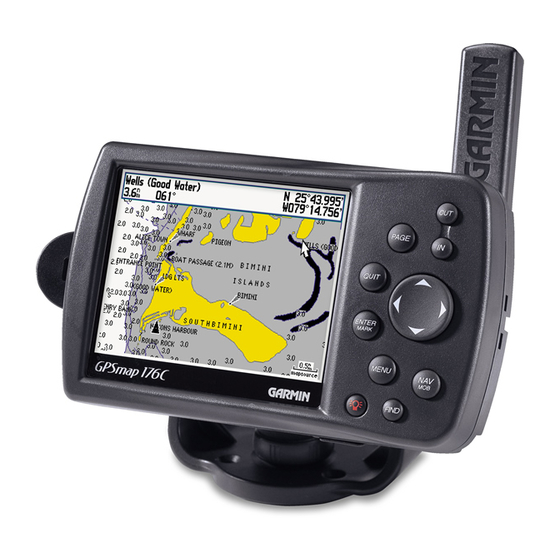
Page 2: Unit Overview
Quick Start Unit Overview GPS Antenna External Power 12-level Grayscale LCD Display with Backlight (176) and Computer Data Port 16-color Transfl ective Display with Backlight (176C) Backlit Keypad for easy night operation Battery Compartment Port for optional Data Storage Card... -
Page 3: Quick Start
Quick Start To remove the battery lid, rotate the D-ring 1/4 turn counterclockwise, and pull away. Battery Installation WARNING: It is very important to install ALL batteries with the proper polarity, positive (+) or negative (-) orientation, as indicated in the unit’s battery compartment. Batteries can leak and cause personal injury and property damage if not installed To reinstall the battery lid, place the locking pin into correctly. -
Page 4: Learning The Keypad
The IN key — adjusts the map scale to show a smaller area with more detail. (Zooms in) Quick Start The OUT key — adjusts the map scale to show a larger area with less detail. (Zooms out) Learning the Keypad The PAGE key —... - Page 5 This exercise provides you with the knowledge and skill to confi dently navigate the pages and Quick Start menus of your GPSMAP 176. As you progress through this Quick Start and the Owner’ s Manual, you will often be directed to press a specifi...
-
Page 6: Activating The Simulator
Using the GPSMAP 176 Quick Start The keys are your link with the GPSMAP 176. Let’ s take a few minutes and use each key so that you can get a feel for their use before doing any live navigation. Each time the GPSMAP 176 is turned on the GPS Info tab will be displayed showing the current Activating the Simulator satellite status. - Page 7 Main Display Pages Quick Start There are fi ve Main Display Pages: the Map Page, Compass Page, Highway Page, Active Route Page, and Numbers Page. Pressing the PAGE key will display the next Main Page. Press the PAGE key several times to look at the Main Pages. The QUIT key will allow you to cycle through the Main Pages Main Pages/ in a reverse sequence.
- Page 8 Field— The location on a page where a group of characters or an option is entered and displayed. Quick Start The cursor is placed on a fi eld (using the ROCKER KEYPAD) to begin data entry or select options. To enter data in a data fi eld: 1.
-
Page 9: Creating A Waypoint
“Marking” a waypoint: Quick Start 1. Press and hold the ENTER key. When the ENTER key is held, the ‘Mark’ function of the key is activated and the GPSMAP 176 Creating a Waypoint captures its current location, and displays the New Waypoint Page. Notice that the unit assigned a square as the default symbol and a number as the default name. - Page 10 When you have fi nished renaming the waypoint you will need to save it in the unit’ s memory. Quick Start To save the waypoint: 1. Using the ARROW KEYPAD, highlight the ‘OK’ Button and press the ENTER key. Creating a Waypoint/ These are the same steps that you will use to enter names, change numbers and select options in all Navigation of the data fi...
- Page 11 To display the map pointer: Quick Start 1. Press the ARROW KEYPAD any direction. Using the ARROW KEYPAD you can pan the Map Pointer around the map. As you move around Simulated Navigation the map, the direction and distance from the Map Pointer to the current GPS location is displayed along the top of the map.
- Page 12 The Compass Page features a Pointer and a Compass Ring. When you are moving, the Pointer will Quick Start point toward your destination (Bearing) while the Compass Ring refl ects the direction that you are traveling (Track). In short, when you are headed directly toward your destination, the Pointer will be pointed toward the top of the display, aligned with the vertical line displayed in the Compass Ring.
- Page 13 Initializing the GPS Receiver Quick Start Before the GPSMAP 176 can be used for navigation the receiver has to be initialized. This process is automatic and will only take a few minutes. Take the unit outside where it will have an unobstructed view of the sky and turn it on. Make sure Initializing the GPSMAP 176 that the antenna is pointed up.
-
Page 14: Basic Navigation
Guide. To learn more, be sure to read the information in the Owner’ s Manual. If you need more help with any of the features of the GPSMAP 176, visit the GARMIN web site (www.garmin.com; where you’ll fi nd answers to many frequently-asked questions), or talk to a GARMIN dealer or customer... - Page 16 For the latest free software updates throughout the life of your GARMIN products, visit the GARMIN web site at www.garmin.com. © Copyright 2001-2002 GARMIN Ltd. or its subsidiaries GARMIN International, Inc. 1200 East 151 Street, Olathe, Kansas 66062, U.S.A. GARMIN (Europe) Ltd.
Need help?
Do you have a question about the GPSMAP 176C and is the answer not in the manual?
Questions and answers