
Related Manuals for Gastroback 62539


Summary of Contents for Gastroback 62539
- Page 1 DESIGN BBQ ADVANCED CONTROL OPERATING INSTRUCTIONS Art.- No. 62539 » Design BBQ Advanced Control « Read all provided instructions before first usage! Model and attachments are subject to change For household use only!
-
Page 2: Table Of Contents
We attach a certain importance to your safety. Thus, we ask you to read all provided General Grilling Temperature Guide ............ 19 instructions and information in this booklet carefully and completely, before you start running the appliance. This will help you to know all functions and properties of your Grilling Meat and Fish ............... -
Page 3: Important Safeguards
We hope that you will enjoy your new DESIGN BBQ ADVANCED CONTROL. • Check the entire appliance regularly for proper operation (e.g. check Your GASTROBACK® GmbH for distortion, damaged grilling surfaces, excessively frayed or melted parts, cracks, pollution or corrosion at the pins of the electrical con- nectors). - Page 4 while the appliance is cold, do not place the appliance on sensitive • Before operation, always ensure that the appliance is assembled and valuable surfaces (e.g. coated furniture). During operation keep completely and correctly according to the instructions in this booklet. the appliance in an appropriate distance of at least 50 cm on each Only operate the appliance with both grilling plates and the drip tray side to the edge of the working space and to furniture, walls, boards,...
-
Page 5: Important Safeguards For Electrical Appliances
• Do not leave any food dry on the appliance. Always clean the appli- • Always handle power cords with care. The pins of the power plug must be smooth and clean. Always completely unwind the power ance after each use to prevent an accumulation of baked-on food cord before use. -
Page 6: Non-Stick Coating
Do not place the appliance on heat-sensitive surfaces, Model: Art.- No.: 62539 Design BBQ Advanced Control while the appliance is hot. Always ensure that the drip tray and the Power supply:... -
Page 7: Knowing Your New Contact Grill
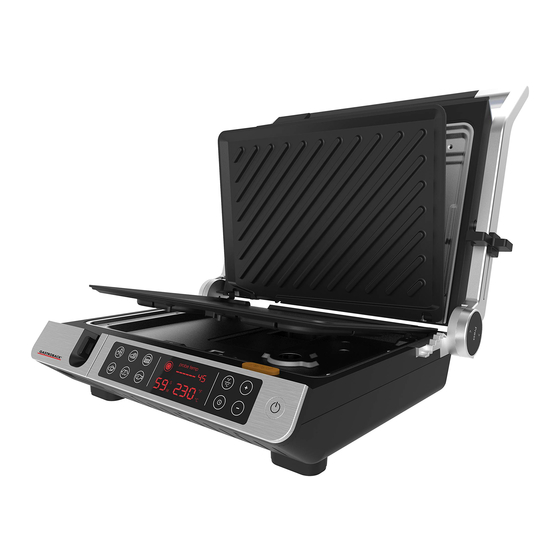
KNOWING YOUR NEW CONTACT GRILL CONTROL ELEMENTS INTEGRATED IN THE TOUCHSCREEN PROGRAM AREA Holding the icons of 6 pre-defined programs: vegetable, meat, burger and panini, poultry, kebab, fish. DISPLAY AREA Shows the currently set values: grilling time and temperature. The upper half holds the items of the core temperature control. CONTROL AREA For selecting the required function (timer or temperature unit) and/or controlling the appliance manually. -
Page 8: Properties Of Your New Contact Grill
PROPERTIES OF YOUR NEW CONTACT GRILL LOCKING THE LID TO THE BASE Your new DESIGN BBQ ADVANCED CONTROL is perfectly suited for preparing a wide variety of delicate grilling dishes. Even thin pancakes, flap-jacks, omelettes, You may carry the appliance conveniently by the lid handle. For this, simply lock the lid and waffles can be made on the flat grilling surface, while getting the typical grilling to the base of the appliance via sliding the height control clip to the “LOCK”... -
Page 9: Flat Position
Flat Position Immediately after selecting the core temperature control via the probe button, you may set the desired core temperature. When the set core temperature is reached, In the flat position, the lid is folded back completely, lying level to the base, offering an acoustic signal is given (see: ‘Operation / Controlling the Core Temperature’). -
Page 10: Grilling Timer
AUTOMATIC SHUT-OFF Grilling Program Icon Range Use it for … Temperature To ensure safe operation even in exceptional cases, after one hour of operation without any input via the touchscreen, a time-out counter will automatically shut off 180 - 240°C Each type of poultry: chicken, turkey, duck, Poultry 210°C / 410°F... -
Page 11: How To Check The Doneness Of Your Steaks
GRILLING SANDWICHES • For best grilling results, use cuts of meat of approx. 1 to 3 cm. • It is recommended not to cook cuts with thick bones such as T-bone steaks or Bread: Most types of bread can be used (white, wholemeal, wholegrain, rai- •... -
Page 12: Operation
‘General Safety Instructions’). Do not block the ventilation slits at the bottom of the Important: When using the appliance for the first time, you may notice a fine housing. During operation, the used power outlet and the operating elements must smoke haze and some smoke may escape. -
Page 13: Selecting A Program
tions’) near a suitable wall power outlet (see: ‘Important Safeguards for Electrical Note Appliances’). On each side and to the edge of the working surface, keep at least The appliance starts heating immediately after switching on. As soon as the set 50 cm of free space. -
Page 14: Adjusting The Height Control Feature
on the lower grilling surface, carefully lift the lid by the lid handle and position WARNING: During operation or some time thereafter, do not touch the grilling the lid in the stable upright position. surfaces or other hot components of the appliance with your body or any heat-sen- sitive object. -
Page 15: Setting The Grilling Time
9. For setting the grilling time: press the clock button on the control area. The def- Note ault grilling time is flashing in the display area. While the grilling time is flashing, When closing the lid, the cooking time will be shorter and you can save energy. touch the buttons “+”... -
Page 16: After Usage
2. If required, unplug the temperature probe. Note 3. Using a wooden or plastic spatula or some kitchen towel, push all residues of When the set core temperature stops flashing on the display, the buttons “+” and juices and fat to the drip spouts of the grilling plates and out. “–”... -
Page 17: Solving Problems
SOLVING PROBLEMS Most problems during use can be solved easily. Use the hints in the following table Problem The Possible Reason The Easy Solution as an assistance. The meaning of the error messages (“Er1” to “Er4”) is given at the When using the core tem- A program is selected With some programs, the range of possible core tempera-... -
Page 18: Error Messages Of The Appliance
CARE AND CLEANING ERROR MESSAGES OF THE APPLIANCE Always ensure that the appliance is out of WARNING – RISK OF BURNS: reach of young children. Before moving, disassembling, or cleaning the appliance: Note Always switch OFF the appliance (press the ON/OFF button, “OFF” flashes on the If an error message is given, the appliance will not work. -
Page 19: Cleaning The Appliance
CLEANING THE APPLIANCE ASSEMBLING THE APPLIANCE 1. Before cleaning, always ensure that the appliance is unplugged, and cooled 7. Ensure that the height control clip is in the “OPEN” position and fold up the lid down to room temperature. Then disassemble the appliance (see: ‘Operation / to the stable upright position. -
Page 20: Storage
Please check www.gastroback.de for further information. plates or in the drip tray to avoid damage by spilling juices. For technical support, please contact Gastroback Customer Care Center by phone: +44 (0) 1670 - 704 968 or e-mail info@gastroback.co.uk. For moving: after cooling down, grasp the appliance at both sides of the base. -
Page 21: Warranty
1 year. Note For repair and service, please send Gastroback products to the following address: Gastroback GmbH, Gewerbestr. 20, 21279 Hollenstedt, Germany. Please agree that we cannot bear the charge of receipt. Submission of appli- ances: Please ensure packing the appliance ready for shipment without accesso- ries and attachments.
Need help?
Do you have a question about the 62539 and is the answer not in the manual?
Questions and answers