ClearClick HD Video Capture Box Ultimate Users Manual & Quick Start Manual
Hide thumbs
Also See for HD Video Capture Box Ultimate:
- User's manual and quick manual (13 pages) ,
- Users manual & quick start manual (14 pages) ,
- Users manual & quick start manual (14 pages)

Subscribe to Our Youtube Channel
Related Manuals for ClearClick HD Video Capture Box Ultimate


Summary of Contents for ClearClick HD Video Capture Box Ultimate
- Page 1 User’s Manual & Quick Start Guide 2-Year Warranty & USA-Based Tech Support For tech support, email us at: support@clearclick.tech Extend your warranty to 3 years for free by registering at: www.clearclicksoftware.com/Register/ www.ClearClick.tech...
- Page 2 Browse All Our Products! If you’re looking for fun, unique, and easy-to-use technology, we’ve got it! Please visit our website to browse all of our products: www.ClearClick.tech Safety Precautions 1. Do not disassemble the unit. 2. Please note that the device and/or plugged in USB drives may become very warm during use.
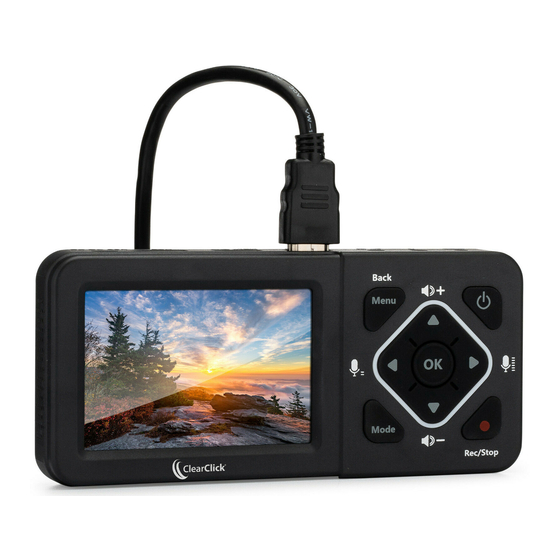
- Page 3 What’s In The Box? • 4K HD Video Capture Box Ultimate® (USB Edition) • USB Cable • USB Type C Adapter • HDMI Cable • Software License Card (UXPlayer Plus & VideoPad) • Quick Start Guide / User’s Manual NOTE: If you believe you are missing any parts, or if you received a part that is broken, please contact us directly at parts@clearclick.tech.
- Page 4 Device Diagrams & Explanation USB Type-C: Connects device to PC. Line Out: Stereo audio output port. Mic: 3.5mm microphone input port. Line In: Stereo audio input port.
- Page 5 OUT: Passes through HDMI signal (connect your HDMI source to your TV from here). AUX PWR (OPTIONAL PORT): Only use this port to connect external USB power if needed. IN: Connect your HDMI input source here.
- Page 6 ** Therefore, if you simply plug in a content-protected HDMI video source to the 4K HD Video Capture Box Ultimate, it will not detect a signal or allow you to record/stream. For gaming systems and cameras, you may need to turn off HDCP in your system/camera’s settings.
- Page 7 QUICK START – How To Set Up The Device 1. Connect the 4K HD Video Capture Box Ultimate® to your computer (Windows/Mac/Linux) using the included USB cable. (This device requires a computer to capture/stream video.) Plug in one end of the USB cable to the USB-C port next to the “Line Out”...
- Page 8 UXPlayer Plus software. Please see page 11. 1. Download & install the OBS software from www.OBSproject.com. 2. Make sure the 4K HD Video Capture Box Ultimate® is plugged in to your computer and a live signal is coming through your HDMI cable.
- Page 9 iv. Click “OK.” 7. Click Sources → +Button/Add Audio Input Capture Device → and give it a name. 8. In the Audio Input Capture Device settings, select “HDMI/Live Streaming Audio Device” and click “OK.” 9. Click the “Start Streaming” button to start streaming. Or click the “Start Recording”...
- Page 10 UXPlayer Plus software. Please see page 11. 1. Download & install the XSplit Broadcaster software from www.xsplit.com/broadcaster. 2. Make sure the 4K HD Video Capture Box Ultimate® is plugged in to your computer and a live signal is coming through your HDMI cable.
- Page 11 UXPlayer Plus software. 1. Download and install UXPlayer Plus from the below link: http://www.clearclicksoftware.com/UXPlus.zip 2. Connect your 4K HD Video Capture Box Ultimate® to your computer and make sure a live signal is coming through your HDMI cable. 3. Open the UXPlayer Plus software on your computer.
- Page 12 7. Set the Device/Recording resolution by clicking the setting button next to “Video Capture Device:”. i. To record 4K, choose “NV12: 3840x2160” for “Video format.” ii. To record with HDR at 1080P, choose “P010: 1920x1080” and “60 FPS,” and turn on “Enable HDR” at the bottom of the screen.
- Page 13 recording, press the Stop button or press F2 on your keyboard. You can also click the Snapshot button take a still image of your source. 11. To view recorded files, click on the Folder and/or Playback icons. 12. To schedule a future recording, click the “Recording schedule”...
- Page 14 Image Tab: Allows you to change settings related to snapshots. Live & VBS Tabs: Allows you to change settings related to the streaming / Video Broadcast Share features (see details below). How To Use UXPlayer’s Live Streaming Feature (Advanced Users Only) Using UXPlayer’s Live Streaming feature, you can stream video to an RTMP server such as a custom YouTube live stream server.
- Page 15 FULL LICENSE IS INCLUDED on the software card included which will fully unlock the software once you activate it. If you have any trouble with activating your software, just email us at licenses@clearclick.tech and we will assist you. 1. Download the VideoPad software from: http://www.clearclicksoftware.com/VideoPad2.zip 2.
- Page 16 an activation code. 3. Run the software and choose to activate the software. Enter the activation code that was emailed to you. 4. You can now start using the software! 5. For complete instructions on how to use the VideoPad software, please refer to this website: https://www.nchsoftware.com/videopad/tutorial.html...
-
Page 17: Troubleshooting
Troubleshooting 1. My video doesn’t show up or there is a message saying “No Signal” or “HDCP Protection.” Many HDMI video sources are encrypted with content protection called “HDCP,” even if the content is not copyrighted. Complying with laws, the 4K HD Video Capture Box® does not disable or override content protection. - Page 18 Please make sure the HDMI source input is connected properly. HDMI sources should be connected to the “IN” port (not the “OUT” port). Make sure there is a live signal coming from your video source. To confirm, try plugging your video source straight into your TV first.
- Page 19 5V USB power source to the AUX PWR port. 5. I have a question that isn’t listed here, or need further support. We would be happy to help! Please email us at support@clearclick.tech with your order number, and we will get back to you as soon as possible.
- Page 20 System Requirements & Technical Specifications PC: Windows 10, 8, 7 System Requirements (OS) Mac: OS X 10.10 or higher Linux: Ubuntu 14.04 or higher "Bare Minimum" Requirements: Intel Core i5 4th Generation or Higher NVIDIA GeForce GTX 660 (or equivalent) or higher 4 GB RAM System Requirements (Hardware)
- Page 21 support@clearclick.tech...
Need help?
Do you have a question about the HD Video Capture Box Ultimate and is the answer not in the manual?
Questions and answers