
Related Manuals for Hills Portable 170

Summary of Contents for Hills Portable 170
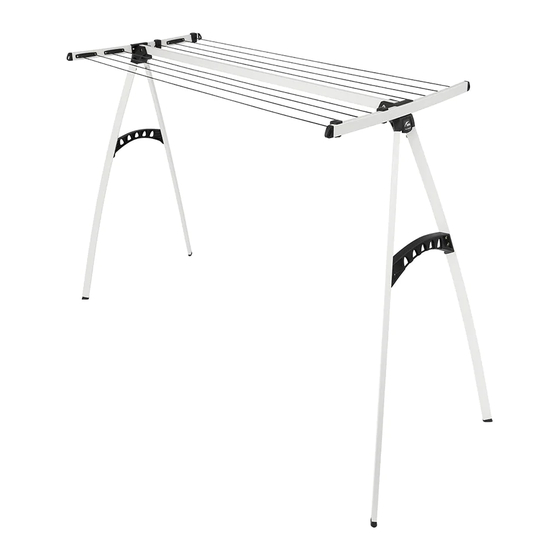
- Page 1 Portable Indoor Outdoor Clotheslines Product Manual TO SUIT MODELS: Portable Portable...
-
Page 2: Carton Contents
In this way you will benefit from all of Leg brace the design features and enjoy safe use Hanging bracket of the product. Door adaptor Thank you for choosing Hills. Line Accessory pack Warning Accessory Pack Contents • Caution: Do not push or pull your portable Part name Qty. - Page 3 Assembly The Hills Portable Clothesline is quick and easy to assemble. Just follow the steps below which are suitable for both the 170 (10 line) and 120 (8 line) models. NOTE: all diagrams in this manual show the Portable Clothesline 120.
- Page 4 Assembly Step 2 – Attach the Legs to the Hinge Assemblies. Fasten the legs as shown in Steps 1–4. Step 1 Step 2 Mount hole M6 Nyloc nut* Locate the M6 nut on to the moulded leg section of Fit leg tube (ensuring mount hole is oriented the hinge moulding.
- Page 5 Assembly Step 3 – Attach the Brace to the Legs. 3.1 Using the eight (8) M6 x 16 countersunk screws, attach the leg brace to the four (4) threaded inserts in the legs using the hex key – 4mm. 3.2 Fasten securely. 3.3 Repeat at other end.
- Page 6 Assembly Step 5 – Attach the arms. 5.1 Locate the arms into the recess in each end of the hinge assemblies ensuring the screw holes and insert fasteners align. Insert the two (2) M6 x 12 low profile screws and fasten securely using the hex key –...
- Page 7 Assembly Step 6 – Attach the line. 6.1 Fasten the line to the innermost line tensioner as shown in steps 1–4. Step 1 Step 2 Fit the cover cap onto the end of the line, (ensure Insert the line down through the front slot of the correct orientation). tensioner as shown, pull through 100mm (4”) of line. Step 3 Step 4 Loop the line around the rear groove of the tensioner...
- Page 8 Assembly 6.3 Continue to thread the line through each of the line sleeves ensuring all lines are parallel, as shown in step 6. Step 6 Line tensioner inner Line sleeve Line tensioner outer Cover cap 6.4 Tie off line to the outer line tensioner as per steps 1–4 on page 7. Do not tighten line yet. 6.4 Repeat steps for the other side. 6.5 Tighten line on each side by pulling it ‘through’ the line sleeves and repeating tie off procedure with the outer line tensioner.
- Page 9 We recommend trimming excess line after a A short video showing the attachment of line few loads of washing have been hung to allow segments is available for viewing on the Hills ‘pre-stretch’ of line to occur. website: www.hillsproducts.com.au Your Portable Clothesline is now ready to use. Step 7 – Line Tensioning To re-tension lines if required 7.1 Remove either cover cap on the arm, by rotating anti-clockwise.
-
Page 10: Operation
Operation Step 8 – Folding and Unfolding 8.1 To fold away your Portable Clothesline, pull the latch out firmly with one hand, while supporting and rotating the legs up and around with your other hand. Keep rotating until the latch ‘clicks’ back into place, locking the legs closed. 8.2 Place the folded end on the ground. -
Page 11: Step 9 - Hanging Bracket
Accessories Step 9 – Hanging bracket To hang your Portable Clothesline for convenient storage a hanging bracket has been included. 9.1 The hanging bracket can be fastened to almost any wall or vertical surface using appropriate fasteners (not supplied). 9.2 The hanging bracket and door adaptor can be used over most doors. Simply place the hanging bracket and door adaptor over your door as shown. Place the Portable Clothesline on the hanging bracket ensuring it is centered on the door and does not make contact with door handles, surrounding furniture and walls, when the door is opened and closed. - Page 12 Portable Clotheslines. We recommend or damage. If there is any damage, parts placing them over the inner lines leaving should be replaced with original Hills spares the outer lines for smaller objects. We also or the Portable Clothesline repaired before recommend spreading the load over two using again.
-
Page 13: Warranty
Hills in order to manufacture the Products. 3. Hills warrants that for the duration of the Warranty Period, all Products will be free of faults arising from defects in Workmanship or Materials, on the terms and conditions set out in this warranty. - Page 14 6. Subject to the requirements of any applicable Act or legislation and to the extent permitted by law, no liability (whether expressed or implied) of any nature whatsoever, is accepted by Hills for any consequential loss, damage or injury arising as a result of any fault in the Products. 7. This warranty does not extend to damage to Products which occurs during transit...
- Page 15 Please retain this Product Manual. Record the following information for future reference. Product Number (printed on carton): FD ® Date of purchase: Designed and tested under a Quality System that meets Hills Name and location of store: demanding quality specifications. Made in China...
- Page 16 Hills Holdings Limited A.B.N. 35 007 573 417 Issue October 2011 PD2486c...
Need help?
Do you have a question about the Portable 170 and is the answer not in the manual?
Questions and answers