
Related Manuals for MAZE PERGOLAS


Summary of Contents for MAZE PERGOLAS
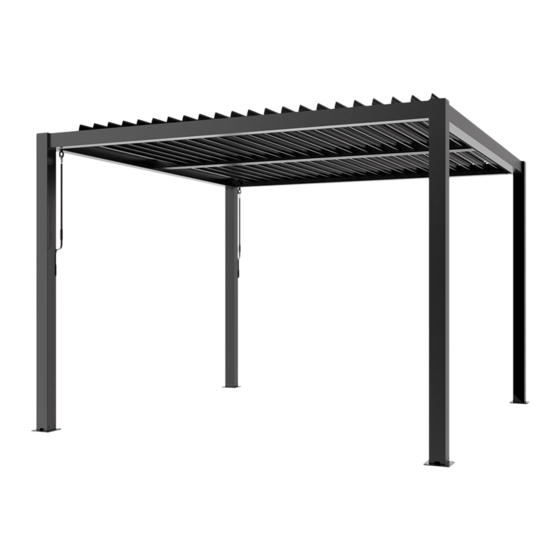
- Page 1 PERGOLAS Assembly Instructions for Pergolas (3x3m, 3x4m, 4x4m) IMPORTANT - RETAIN FOR FUTURE REFERENCE...
- Page 2 PERGOLA SPARE PARTS LIST Part Part Drawing Description A1 / Column Beam (left) Beam (right) Front and rear beams Middle beam 3x3=44 3x4=60 Slat 4x4=60 Column bottom plate Column cover plate Connectors for middle beams Hinge ring Hand crank...
- Page 3 PERGOLA SPARE PARTS LIST Part Part Drawing Description Countersunk 40+2 M6x16 head screw Pan head 20+2 M6x16 screw Flat washer D6x12 Screw and nut M4x25 - Wood-working M8x80 screw - Rawlplug 10x50 - Flat washer Silicone glue 3x3=88 Plastic jam 3x4=120 4x4=120 Remote control...
- Page 4 Pergola Assembly instructions 1. Install the bottom plate F on the column A, and tighten the screw K1; complete 4 sets in sequence. QTY: 16PCS QTY:4PCS...
- Page 5 Pergola Assembly instructions 2. Match the connector H with one side of middle beam D, then tighten the screw K1; then complete the other side. QTY:8PCS QTY:2PCS...
- Page 6 Pergola Assembly instructions 3. On the floor, place the columns and beam as shown in the figure, and note that the drain port of the column faces the same side; Drain port Drain port Drain port Drain port...
- Page 7 Pergola Assembly instructions 4. Connect B1 / B2 with the columns, respectively, using screws K1 to fasten together. Tighten screws fully. QTY:8PCS...
- Page 8 Pergola Assembly instructions 5a. Carefully erect beam B1 (with connected columns) and hold beam C in place. 5b. Carefully erect beam B2 (with connected columns) and connect to beam C. 5c. Insert and slightly tighten screws K1 (finger tight) to secure beam C to both columns (do not over tighten screws until all columns and beams are in place) QTY:4PCS...
- Page 9 Pergola Assembly instructions 6a. Raise beam C and connect to the two remaining columns. 6b. Insert and tighten screws K1 to secure beam C to both columns 6c. Secure and tighten all screws to secure all beams to columns, securing the structure in place. 6d.
- Page 10 Pergola Assembly instructions 7.The 4 column cover plates G are respectively mounted on the corner connectors of the column and the beam, and the screws K2 are tightened in turn; QTY:12PCS QTY:4PCS...
- Page 11 Pergola Assembly instructions Ensure power supply output is connect as 8a. Connect the sub end of the light bar shown on the left with the ‘T’ shaped controller on beam B2 with the female end of the connected to the power supply. Connect sub light bar on the beam C - tighten the end on beam B1 with the female end of the cap.
- Page 12 Pergola Assembly instructions 9. Use the silicone glue (M) on the joints of the beams and columns. QTY: 1PCS...
- Page 13 Pergola Assembly instructions 10. Adjust the position of the four columns so that they are perpendicular to the ground. Meanwhile, the width of the top of each two columns should be measured in accordance with the width of the bottom of each two columns. Then use a market pen to mark 16 holes on the ground, which should be corresponding to the holes in the bottom plate.
- Page 14 Pergola Assembly instructions 11. Remove the product from the mark and drill holes of 10x80 at 16 mark positions on the ground with a percussion drill. Drilling depth 10x80 Drilling quantity 16pcs Use Tool: Percussion Bit Use Tools: Percussion Drill (Self-provided by Installation workers) (not provided)
- Page 15 Pergola Assembly instructions 12. Place the plastic expansion pipe in the bottom hole of the column; then move the product back to the hole drilled, align holes of the column bottom plates with the hole drilled on the ground; then set L1 into the woodworking screw L, and fix it with the ground separately.
- Page 16 Pergola Assembly instructions 13a. Place the middle beam D between the front and rear beams C, ensuring the slat brackets are facing the same direction as the slat brackets on beams B1 and B2. 13b. Fix washer K3 with screw K2 and align with hole below beam D.
- Page 17 Pergola Assembly instructions 3. Put two hinge rings (part I) into the gearbox drive shaft on the beam D, fix the screw + nut K4 M4x25 QTY:2 SETS QTY:2PCS...
- Page 18 Pergola Assembly instructions 15. Insert first slat (E) at gear box side, between the central column D and B1 / B2. Press down on the slat as shown below, gently tapping with a rubber/plastic mallet. Secure in place with the plastic jams (N).
- Page 19 Pergola Assembly instructions 18. Continue to add slat (E), along with the plastic jams (N) until all slats are fitted. 18a. The following image shows how to insert plastic jam into foremost slat. 18b. Turn the slat to half position, insert the plastic jam N into hole of two ends of each slat in turn.
- Page 20 Pergola Assembly instructions 19. Put the hand crank J on, turn to open/close the slats.
-
Page 21: Troubleshooting
Pergola TROUBLESHOOTING Adjust according to below steps if the pergola won’t close completely. A: slat B: slat support Hole "A" and hole "B" must be concentric Adjust solution if hole"A" and hole "B" are not concentric straight screwdriver Adjusting the B slat support with Hole "A“... - Page 22 PERGOLA DROP SIDES Assembly Instructions for Pergola Drop Sides (3x3m, 3x4m, 4x4m)
-
Page 23: Getting To Know Your Product
Pergola Drop Screen (1x) Assembly instructions GETTING TO KNOW YOUR PRODUCT Components supplied. Please use this Fixtures and fittings supplied (actual size) guide if yo u require replacement parts. Visual Description Description The regulator for wire rope The handle crank The cross head screw M4x20+M4 lock nut The bracket... - Page 24 Pergola Drop Screen Assembly instructions 1. Measure 100mm from each inside leg 2. Drill 4x K3 screws, according to the size and make a pencil mark. Measure central shown in the figure below, fixing bracket M point of beam and make a pencil mark. to the centre of the beam.
- Page 25 Pergola Drop Screen Assembly instructions Part N 4. Open the tie and take out the wire rope 5. Pass the wire rope 6. Loosen internal screws Q. Pass wire through the hole rope through the middle hole of screw Q. Bar hole 7.
- Page 26 Pergola Drop Screen Assembly instructions 9c: Tighten the screws 9a: Rotate it 10. Install loop (R) and 9. Fit drop screen to the brackets (ensure secure with K1. hinge ring bracket is facing inside). QTY:1PC QTY:1PC QTY:1PC QTY:1PC...
- Page 27 Pergola Drop Screen Assembly instructions 12. Fix to column 13. Fix nut from using screw K3 Q and tighten 11. Attach the adjustable holder (O) to the wire. 14. Fix cover (P) 15. Repeat steps 1-14 for remaining 3x drop sides. QTY:2PCS QTY:2PCS QTY:6PCS...
Need help?
Do you have a question about the PERGOLAS and is the answer not in the manual?
Questions and answers
I have an Eden pergola. The roof isn’t opening and the lights aren’t coming on. There is electricity to the control. I’ve also changed the battery in the remote which Hass a light when I press the button, is there anything else I can try? Thanks
Troubleshooting steps for a MAZE Eden pergola with a non-opening roof and non-functioning lights, despite electricity to the control and a working remote battery:
1. Check Connections:
- Ensure all connectors between beams (e.g., B1, B2, C) and the controller are properly connected.
- Confirm the female and sub ends are tightly connected and screw caps are secured.
2. Inspect Power Supply:
- Verify the power supply is securely fixed to beam C using screws K7.
- Confirm the female end of beam C is correctly connected to the sub end of the controller.
3. Examine LED and Roof Mechanism:
- Ensure the LEDs and roof motor are connected to the controller.
- Check if the remote control is paired correctly and directed at the controller.
4. Apply Silicone Glue:
- Use silicone glue (M) at beam and column joints to secure connections.
5. Check Structural Alignment:
- Make sure all columns are perpendicular to the ground to prevent mechanical obstruction.
If the issue persists after these checks, further electrical testing or part replacement may be required.
This answer is automatically generated
Have ordered a Como 4m x 4m pergola in wood effect and was trying to get the ground preparations information to prepare the base. Do I need to have a fall on the patio, what are the exact dimensions/ positioning for the foot plates / concrete post foundations and do I need to install a soak away / drainage at each leg?
For the MAZE Como 4m x 4m pergola, ground preparation requires the following:
1. Base Dimensions: A solid base is needed, such as decking with supporting joists or concrete pads, sized to match the pergola’s footprint.
2. Foot Plate Positioning: Foot plates should align with joists or concrete pads to ensure solid fixing points. Providing the pergola floorplan to a landscaper helps ensure accurate placement.
3. Drainage Needs: A slight fall in the base is acceptable for drainage. For uneven ground, spacers can be used under the legs to correct level differences up to 50mm. Greater imbalances require more substantial adjustments.
This answer is automatically generated