Table of Contents
Advertisement
Quick Links
Advertisement
Table of Contents

Related Manuals for Bellhowell BH1232HD


Summary of Contents for Bellhowell BH1232HD
- Page 1 BH1232HD User’s Manual...
-
Page 2: Federal Communications Commission Interference Statement
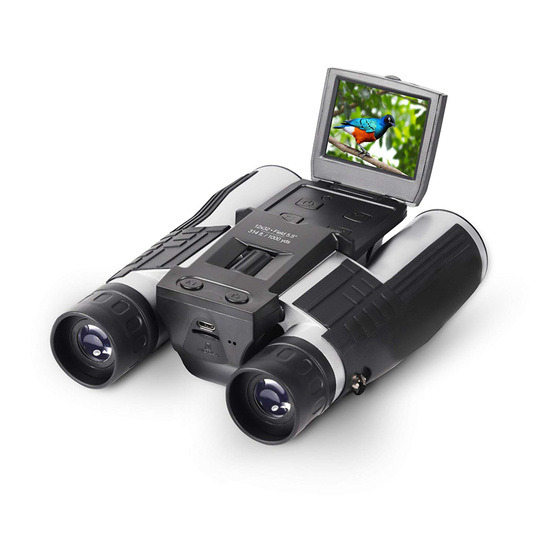
1. About Your Digital Camera Binoculars About this Manual Congratulations on purchasing the Bell+Howell BH1232HD Digital Camera Binoculars! The contents of this manual are subject to change without notice. Note that the example screens and product illustrations shown in this User’s Guide may differ somewhat from the screens and configuration of the actual camera. - Page 3 1. About Your Digital Camera Binoculars be provided with antenna installation instructions and transmitter operating conditions for satisfying RF exposure compliance. FCC: SAR standard Value: 1.6 W/Kg, Maximal Measure: 0.4 W/kg CE Mark Warning This is a Class B product, in a domestic environment, this product may cause radio interference, in which case the user may be required to take adequate measures.
- Page 4 1. About Your Digital Camera Binoculars batteries according to the instructions. • Please keep the batteries out of the reach of children to prevent from swallowing batteries, which might cause poisoning. • Once the battery's color changes or its shape is twisted, please stop using it. USB adapter Information •...
- Page 5 1. About Your Digital Camera Binoculars Digital Camera Binocular Interface...
- Page 6 1. About Your Digital Camera Binoculars...
- Page 7 2. First Use 1.2 Button Function Description Function Description Power Press once to power on or off. Mode Tap to cycle between Photo, Playback and Video modes. Menu Tap to access and exit all menus and submenus. Up | Zoom In Video or Photo: Press to zoom-in.
-
Page 8: First Use
2. First Use 2. First Use 2.1 Inserting the Memory Card Insert the included memory card to record and store your videos and photos. When the battery is low, media stored on the memory card will not be erased. Please insert the memory card by following the steps below: 1. - Page 9 2. First Use 2.2 Charging the Battery Connect your camera to the included AC adaptor with the USB cable provided for charging. Insert the small end of the USB plug into the camera’s port, and the larger end in to the included AC adaptor. 2.3 Powering the Camera On/Off Press POWER button to power the camera on.
- Page 10 2. First Use 2.6 Photo Mode Press the MODE button to switch to Photo Mode. The meaning of each icon within Video Mode is explained in the table below: 1) Photo Mode 7) Zoom Level 2) Sequence Icon 8) Anti-Shake Icon 3) Photos Remaining 9) ISO Value Icon 4) Photo Size (Resolution)
-
Page 11: Using The Binoculars
3. Using the Binoculars 3. Using the Binoculars 3.1 Adjusting Eye Piece Distance 1. Hold the binoculars to your eyes in the regular viewing position. 2. Grasp each barrel A and B firmly. Move the barrels closer together or further apart until you see a single circle through the eye pieces. 3. - Page 12 3. Using the Binoculars 3.3 For Glasses Wearers For glasses wearers, fold down the rubber flaps around the eye piece (A) and (B) to make your glasses closer to the eyepieces for a better view. 3.4 Maintenance and Cleaning 1. Only use a clean microfiber cloth to clean fingerprints and dust from the lenses.
- Page 13 3. Using the Binoculars 3.5 Quick Tips on Using the Camera Mode Options With the camera powered on, press the MODE button to select the mode you want to use: PHOTO Mode, PLAYBACK Mode and VIDEO Mode. Photo Mode The camera automatically enters on PHOTO Mode when powered ON. You can either take a photo when looking through the binocular lenses or with the LCD screen opened by pressing the Snap/Ok button.
- Page 14 4. Using the Camera and Changing Settings 4. Using the Camera and Changing Settings Photo Shooting Power the camera on and it will be ready to take pictures right away. 1. You can either look through the binocular eyepieces or line up your shot by looking at the LCD screen to see what is in the shot.
- Page 15 4. Using the Camera and Changing Settingst Use 1. In Photo Mode press the MENU button. 2. Select ‘Sequence’ using the UP or DOWN buttons and press the PHOTO button to enter the ‘Sequence’ submenu. 3. Press the UP or DOWN buttons to navigate the menu, and press the PHOTO button to confirm your selected option (Off, On).
- Page 16 4. Using the Camera and Changing Settings Press the UP or DOWN buttons to navigate the menu, and press the PHOTO button to confirm your selected filter (Normal, B&W, Sepia). 4.1.8 ISO This function adjusts the light sensitivity in your photograph. 1.
-
Page 17: Video Recording
4. Using the Camera and Changing Settings 4.2 Video Recording Power the camera on and press the MODE button to switch modes. A video camera icon will appear in the top left hand corner of the screen when you are in Video mode. 1. - Page 18 4. Using the Camera and Changing Settings 4.2.3 Audio This function allows you to record audio with the video. 1. In Video Mode press the MENU button. 2. Select ‘Audio’ using the UP or DOWN buttons. Press the PHOTO button to enter the ‘Audio’...
-
Page 19: Playback Mode
4. Using the Camera and Changing Settings 4.3 Playback Mode Videos and photos captured on your camera can be easily played back. Power the camera on and press the MODE button to switch to Playback Mode. 1. Press the MODE button to enter Playback Mode. Your last recorded image or video will appear on the screen when fist entering playback mode. - Page 20 4. Using the Camera and Changing Settings to select ‘Slide Show’ Press the PHOTO button to enter the ‘Slide Show’ submenu. 2. Press the UP or DOWN buttons to navigate the menu and press the PHOTO button to confirm your selected setting (2 Seconds, 5 Seconds, 8 Seconds).
-
Page 21: Setup Menu
4. Using the Camera and Changing Settings 4.4 Setup Menu Basic settings can be changed in the Setup menu. These include date & time, language and sound options. Power the camera on and press the MENU button two times. The setup menu will be displayed on the screen. 4.4.1 Date/Time This function allows you to set the current Date and Time on your recorded video clips and captured photos. - Page 22 4. Using the Camera and Changing Settings 4.4.5 Screensavers This setting controls the amount of time before the screen turns off to save power. 1. In Setup Mode, use the UP or DOWN buttons to select ‘Screensavers’ and press the PHOTO button to enter the ‘Screensavers’ submenu. 2.
- Page 23 4. Using the Camera and Changing Settings 4.4.9 Default Setting Factory default settings can be restored in this menu. This function will not delete the media stored on the memory card, and will only restore all of the menu’s setting back to factory default settings. 1.
- Page 24 5. How To Connect To Your Computer 5. How To Connect To Your Computer Connect the USB with the camera powered OFF. Power the camera on and the LCD screen will show two options: Storage and Camera. To download the photos and videos to your computer, select the Storage option and press the PHOTO button to enter.
- Page 25 6. Appendix Technical Specifications Model Number BH1232HD Magnification Objective Lens 32mm Diameter Optical Design Roof Prism Field of View 5.5° / 314 ft. @ 1000 yds Exit Pupil Diameter 3.8mm Eye Relief 13mm Minimum Focus Distance JPEG: 5 MP • 3 MP • 2 MP • 1.3 MP • VGA Pixels (photo) AVI: 1080p •...
- Page 26 Distributed under license of BHH LLC in the United States by: Elite Brands Inc. 40 Wall Street, 61st Floor, New York, NY 10005 USA Tel: 800-441-1100 www.elitebrands.com Copyright © 2021 Elite Brands Inc. If you’re having difficulties with your camera, or would like further assistance, please call our toll-free technical support hotline at 800-441-1100.
Need help?
Do you have a question about the BH1232HD and is the answer not in the manual?
Questions and answers