Table of Contents
Advertisement
Advertisement
Table of Contents

Subscribe to Our Youtube Channel
Related Manuals for Bush BRC100DHEB


Summary of Contents for Bush BRC100DHEB
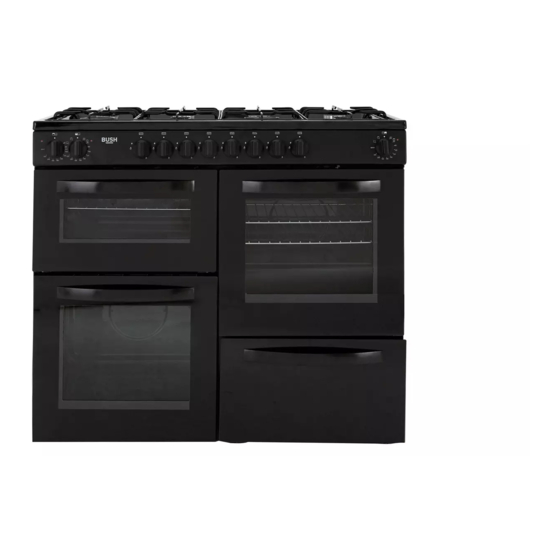
- Page 1 Instruction manual Freestanding Cookers BRC100DHEB...
- Page 2 We’re here to help you get the most from your Freestanding Cooker. Should you require any guidance, a simple solution can often be found online at: www.bush-support.com If you still require further assistance, call one of our experts on 01759 487838.
-
Page 3: Table Of Contents
Installation details Gas Conversion Using your Freestanding Cooker Controls Using the hob top burners Using the oven Cooking modes Practical advice Cooking guides or online at www.bush-support.com If you still require further assistance, call one of our experts on 01759 487838... - Page 5 Safety information...
-
Page 6: Safety Information
If you think there is a become hot during use. Care should be taken to defect, do not use the appliance and contact Bush avoid touching heating elements. Children less than 8 Product Support on 01759 487838. Packaging... - Page 7 Installation and repair work that is carried out by unauthorised technicians is dangerous and could invalidate your guarantee. or online at www.bush-support.com If you still require further assistance, call one of our experts on 01759 487838 Safety information...
-
Page 9: Getting To Know Your Freestanding Cooker
Getting to know your Freestanding Cooker... -
Page 10: Ready? Let's Begin
Getting to know your Freestanding Cooker You’ll be up and running in no time Ready? Let’s begin... Please read these instructions carefully. They contain important information which will help you get the best from your Freestanding Cooker and ensure safe and correct installation and operation. - Page 11 Auxiliary Burner Trivets Burner Control Knobs Oven light indicator Function/temperature control knob Hob top burner control knob or online at www.bush-support.com If you still require further assistance, call one of our experts on 01759 487838 Getting to know your Freestanding Cooker...
-
Page 12: Accessories
Getting to know your Freestanding Cooker You’ll be up and running in no time Oven Accessories 1. Grill pan X 1 2. Wire shelf X 3 3. Grill pan wire insert and handle X 1 Other Accessories Included Non-slip feet Gas elbow Fixing assembly LPG nozzles... -
Page 13: Installing Your Freestanding Cooker
Installing your Freestanding Cooker... -
Page 14: Installation Requirements
RISK OF ELECTRIC SHOCK DO NOT OPEN Installing your Freestanding Cooker Technical Data Bringing it all together Installation requirements Data Label THIS COOKER MUST BE INSTALLED The Data Label is located on the rear of the ACCORDING TO BS 6172: 2010 BY A SUITABLY appliance.This appliance is suitable for Natural QUALIFIED GAS SAFE REGISTERED INSTALLER Gas and Universal LPG;... -
Page 15: Installation Details
Your cooker must be set up and used in a place where it will always have ventilation. While operating, this appliance needs 2m3/h air per kw input. or online at www.bush-support.com If you still require further assistance, call one of our experts on 01759 487838. Installing your Freestanding Cooker... - Page 16 Installing your Freestanding Cooker Bringing it all together Gas Connection IMPORTANT - All Gas installations must be carried out by a suitably qualified person. For information on choosing a gas installer contact the ‘Gas Safe Register’. www.gassaferegister.co.uk The appliance can be placed close to other furniture on condition that the furniture’s height does not Figure 3 exceed the height of the cooker panel.
- Page 17 Fix the chain to the hook. You can adjust to the level of the cooke by inserting the feet provided. or online at www.bush-support.com If you still require further assistance, call one of our experts on 01759 487838. Installing your Freestanding Cooker...
- Page 18 Installing your Freestanding Cooker Bringing it all together Electrical connection IMPORTANT: Electrical connections must be carried The electrical cable should not be routed through out by a suitably qualified person and in accordance any area that may be a ected by heat from the with all relevant local building and installation oven, especially the area directly behind the oven.
-
Page 19: Gas Conversion
4. Fit the Gas type label supplied in the conversion kit next to the gas connection point and remove the existing label. or online at www.bush-support.com If you still require further assistance, call one of our experts on 01759 487838. Installing your Freestanding Cooker... -
Page 21: Using Your Freestanding Cooker
Using your Freestanding Cooker... -
Page 22: Controls
Using your Freestanding Cooker Getting the most from your appliance Controls Instructions for use (hob top burners) Control knob (Hob top Burners) The symbols on the control knobs mean the following: Maximum gas f ow or ‘high’ flame and lighting position Upper and lower left cavity Minimum gas f ow or ‘low’... -
Page 23: Using The Oven
Large (rapid 150mm 260mm Medium (semi-rapid) 130mm 180mm Small (Auxiliary) 90mm 160mm Triple Flame (Wok) 210mm 270mm or online at www.bush support.com If you still require further assistance, call one of our experts on 01759 487838 Using your Freestanding Cooker... - Page 24 Using your Freestanding Cooker Getting the most from your appliance Positioning the oven trays & shelves When fitting the trays or shelves, ensure they are fitted between the moulded edges inside the cavity that are closest together. Oven Shelves have a stop so that they are not fully withdrawn by accident.
-
Page 25: Cooking Modes
Oven light function When set to the light function this enables you to see directly into the cavity or oven. or online at www.bush-support.com If you still require further assistance, call one of our experts on 01759 487838 Using your Freestanding Cooker... -
Page 26: Practical Advice
Using your Freestanding Cooker Getting the most from your appliance Baking cakes Using the Grill When baking cakes, always place them in a Use the ‘Grill’ mode with the oven door closed, preheated oven. Make sure you wait until the oven place the food on the centre of the grill pan, has been preheated thoroughly (the indicator light insert and fit the grill pan on either the 3rd or 4th... - Page 27 For savoury roasts (especially duck and wild game), dress the meat with lard or bacon on the top. or online at www.bush-support.com If you still require further assistance, call one of our experts on 01759 487838 Using your Freestanding Cooker...
-
Page 29: Care And Maintenance
Care and maintenance... -
Page 30: Cleaning
Care and maintenance Looking after your appliance Cleaning WARNING! Isolate the power supply to the cooker and Burner Caps: Periodically, the enamelled pan support, make sure that the oven is cool. enamelled covers and burner heads must be washed with warm soapy water, rinsed and dried. Before cleaning your oven or performing After drying them thoroughly, place them back in maintenance, make sure that the cooking mode... -
Page 31: Replacing The Lamps
Replacement lamps are available from our Support Team. Replace the glass cover and reconnect the oven to the mains power supply. or online at www.bush-support.com If you still require further assistance, call one of our experts on 01759 487838 Care and maintenance... - Page 32 Care and maintenance Looking after your appliance Routine maintenance Have the condition and efficiency f the gas pipe and the pressure regulator (if installed) checked periodically. If anomalies are found, do not repair components but have the faulty component replaced. To ensure good performance and safety, the gas regulator taps must be greased periodically.
-
Page 33: Technical Specifications
We apologise for any inconvenience caused by minor inconstancies within these instructions that may occur due to product improvements and development All images and drawings are for illustration purposes only. or online at www.bush-support.com If you still require further assistance, call one of our experts on 01759 487838 Care and maintenance... - Page 35 Product support...
-
Page 36: Troubleshooting
1. If no electrical functions appear to work, check 3. DO NOT ATTEMPT TO REPAIR THIS the cooker isolation switch has not been turned COOKER YOURSELF. CALL BUSH PRODUCT SUPPORT ON 01759 487838 OR CONSULT off also check the fuse in the swi ch and the... -
Page 37: Help And Assistance
Lines open 8am-7pm Monday to Saturday and 10am-4pm Sunday. *Calls to Bush enquiry lines may attract a charge and set up fee from residential lines depending on your call plan/tariff. Mobile and other providers costs may vary, see www.bt.com/pricing for details. -
Page 38: Declaration Of Conformance To Product Standards
Product support Help is always at hand Declaration of conformance to Disposal product standards This appliance/fitting is marked according to the European directive This appliance conforms to all relavant standards 2012/19/EU on Waste Electrical applicable to domestic appliances sold in the UK and Electronic Equipment (WEEE). -
Page 39: Guarantee
Guarantor: Argos Limited - 489 - 499 Avebury Blvd. - Milton Keynes - MK9 2NW or online at www.bush-support.com If you still require further assistance, call one of our experts on 01759 487838 Product support... - Page 41 Contact: www.bush-support.com Helpline: 01759 487838...
Need help?
Do you have a question about the BRC100DHEB and is the answer not in the manual?
Questions and answers