Advertisement
Quick Links
Advertisement

Related Manuals for Topcon NORAC UC4.5


Summary of Contents for Topcon NORAC UC4.5
- Page 1 Active Roll Control Option Installation Manual...
- Page 2 Printed in Canada Copyright 2016 by NORAC Systems International Inc. Reorder P/N: 4567BC-INST Rev H (Active Roll Control Option) NOTICE: NORAC Systems International Inc. reserves the right to improve products and their specifications without notice and without the requirement to update products sold previously. Every effort has been made to ensure the accuracy of the information contained in this manual.
-
Page 3: Table Of Contents
Contents Introduction ........................ 1 Kit Parts ........................2 Position Sensor Installation ..................6 Hydraulic Installation ....................9 Electrical Installation ....................15 Software Setup ......................16 System Maintenance ....................17 ... -
Page 4: Introduction
1 Introduction Congratulations on your purchase of the NORAC UC4.5 Spray Height Control System. This system is manufactured with top quality components and is engineered using the latest technology to provide operating reliability unmatched for years to come. When properly used the system can provide protection from sprayer boom damage, improve sprayer efficiency, and ensure chemicals are applied correctly. -
Page 5: Kit Parts
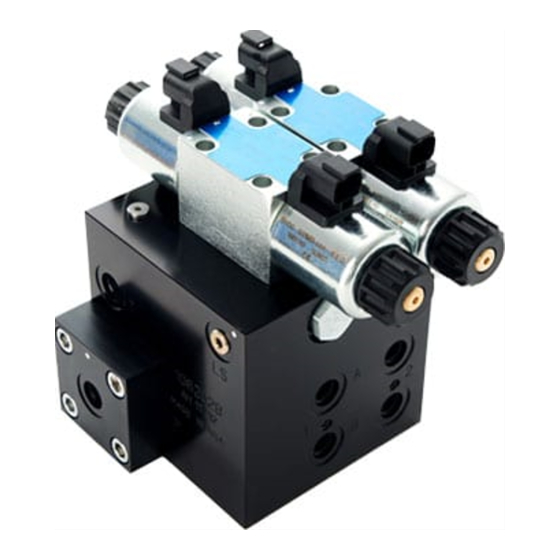
2 Kit Parts Kit Overview Figure 1: Roll Control Parts... - Page 6 Hydraulic Plumbing Figure 2: Roll Control Hydraulic Plumbing...
- Page 7 List of Parts This kit is to be used when installing the Active Roll Control option with existing John Deere installations. Item Part Number Name Quantity 45032-1 BRACKET UC5 POSITION SENSOR MOUNT V1 44695-21 PIN ACTIVE ROLL JD UPPER MOUNTING KIT 43220-0.5 CABLE UC5 NETWORK 14 AWG 0.5M 44658-46D...
- Page 8 Active Roll Hydraulic Fittings Kit Details (P/N: 44865-38) Picture Item Part Number Name Quantity 104586 TEE ADAPTER - 6FORXR 6MORT 105338 TEE ADAPTER - 12FORXOR 12MORT 44916 MALE ADAPTER - 6MB-4MOR MACHINED ORB 104694 MALE ADAPTER 4MOR 4FORX90 F07A 44928 ORIFICE INSERT .047 IN ONE WAY F07B 44935...
-
Page 9: Position Sensor Installation
Position Sensor Installation 1. Remove the rubber bumpers on both ends of the roll frame (Figure 3). Bumper Figure 3: Rubber Bumper Location 2. The position sensor (E06) should be mounted such that the largest amount of travel of the sensor can be utilized without exceeding the travel limit. - Page 10 4. Mount the brackets (B09) as shown in Figure 5. Install two (2) cable ties per bracket. Figure 5: Bracket Mounting (Looking from the Rear) 5. Install the base end of the position sensor with the cable facing the center of the sprayer in the lowest hole of the bracket possible without making contact with the boom frame.
- Page 11 Centerline Mark 4” (100mm) Figure 7: Center Mark Location...
-
Page 12: Hydraulic Installation
4 Hydraulic Installation Ensure all pressure has been bled from the system before disconnecting any lines or fittings. Hydraulic pressure will exist on the wing tilt circuits unless the wings are being supported by other means. The hydraulic installation may be performed with the wings in transport position, resting on the ground or with the tilt cylinders fully extended. - Page 13 Expansion Block Assembly 1. Loosen the existing 2-station valve block so that it can be moved and/or twisted for the installation of the expansion block. 2. Remove the four 4MBP plugs from the 2 station valve block. 3. Coat the four o-rings in hydraulic oil and install them into the expansion block. Ensure the o-rings are seated properly.
- Page 14 Roll Cylinder Installation 1. Remove the link arm (black square tube) connected between the parallel lift frame and roll frame. See Figure 10 for the link arm location. Link Arm Position Figure 10: John Deere Link Arm Location (looking towards rear of sprayer) 2.
- Page 15 5. Loosen the plastic port plugs and extend the cylinder to line up the hole in the intermediate frame and the cylinder. 6. Install B10 from the rear of the sprayer through the intermediate frame and the cylinder adding a mounting plate between both sides of the cylinder and the frame. Add the final plate to the front side of the intermediate frame.
- Page 16 10. In some cases, the bracket has failed at the weld shown in Figure 15. It is recommended that all sprayers with roll control add weld to the existing bracket to prevent failure. Some sprayers from 2005 and newer already have gussets added at the factory. Figure 15: Roll Cylinder Mount Weld Locations 11.
- Page 17 Hydraulic Plumbing From this point on in the installation the booms will be inoperative until the hydraulics are fully installed. 1. After the NORAC valve is mounted, the hydraulic hoses and fittings can be plumbed. The plumbing for the hydraulic circuit is shown schematically in Figure 2. 2.
-
Page 18: Electrical Installation
5 Electrical Installation Figure 17: Electrical Installation Only the components shown in black are included in this kit. 1. Plug the 3-pin tower on C70 to the 3-pin shroud on the valve extension cable (C11). Route C70 to the rear of the sprayer. Use cable ties to secure in place. 2. -
Page 19: Software Setup
6 Software Setup 1. Start up the sprayer and test the sprayer’s functionality. The NORAC Control Panel does not need to be powered on for the original boom function switches to operate. Unfold the booms and raise/lower each boom and the main section. Confirm that the cabling and hoses are agreeable to the entire range of motion. -
Page 20: System Maintenance
7 System Maintenance For good performance in corners, when driving over terraces or through ditches at an angle, or in hard steer situations it is important to do the following: 1. The Teflon sliding pads on the boom must not grab in dynamic situations (corners, terraces etc). -
Page 21: Cable Drawings
8 Cable Drawings ITEM C07: 43220-0.5 - CABLE UC5 NETWORK 14 AWG – 0.5M... - Page 22 ITEM C70: 44658-46D – CABLE UC4 VALVE DT ROLL WITH PIGTAIL...
- Page 23 TOPCON Agriculture Canada 3702 Kinnear Place Saskatoon, SK S7P 0A6 TOPCON Agriculture Americas W5527 Hwy 106 Fort Atkinson, WI 53538 TOPCON Precision Agriculture Europe Avenida de la industria, 35, Tres Cantos, España Spain Support Phone: 888 979 9509 E-mail: tasupportn@topcon.com...
Need help?
Do you have a question about the NORAC UC4.5 and is the answer not in the manual?
Questions and answers