Table of Contents
Advertisement
Quick Links
Advertisement
Table of Contents

Subscribe to Our Youtube Channel
Related Manuals for Core Health & Fitness Star Trac 10-TRx FREERUNNER


Summary of Contents for Core Health & Fitness Star Trac 10-TRx FREERUNNER
- Page 1 CORE HEALTH & FITNESS 10-TRx FREERUNNER OWNER’S MANUAL...
-
Page 2: Table Of Contents
TABLE OF CONTENTS IMPORTANT SAFETY INSTRUCTIONS ........................2 IMPORTANT LABEL LOCATIONS ........................4 PRODUCT SPECIFICATIONS ..............4 PART IDENTIFICATION ........................6 OPERATION - OPENHUB LCD CONSOLES ........................7 OPERATION - OPENHUB TOUCHSCREEN CONSOLES ........................12 SCREEN VIEWS ..............15 WORKOUT SELECTION KEYS AND PROGRAM DEFINITIONS ....17 PROGRAM UPLOAD .............. -
Page 3: Important Safety Instructions
IMPORTANT SAFETY INSTRUCTIONS WARNING! Before using this product, it is essential to read the ENTIRE Owner’s Manual and ALL installation instructions. The Owner’s Manual describes equipment assembly and instructs members on how to use correctly and safely. Read all warnings posted on the machine. Health related injuries may result from incorrect or excessive use of exercise equipment. - Page 4 This equipment is designed for use in a Use care when getting on or off the treadmill. commercial gymnasium or health club. To ensure Always use the handrails. Do not step off of the the proper use of the equipment in a safe manner, treadmill while it is moving.
-
Page 5: Important Label Locations
IMPORTANT LABEL LOCATIONS This page shows the location of the warning labels and communication stickers placed on the equipment as part of the manufacturing process. It is critical that owners maintain the integrity and placement of these stickers. If you find any stickers missing or damaged the replacement numbers are shown on the support site and following pages. - Page 6 731-0512 050-5685 STICKER,CAUTION,PINCH LABEL, OPER’L, IS, TRD, WHEN, AWAY, KEEP, CAUTION! 050-5766 LABEL, STARTRAC, BUMPER, FLEX, TREADMILL, 224.20mm X 33.06mm Console Warning Refer to console documentation for part replacement. Notice: images are not to scale Page 5...
-
Page 7: Part Identification
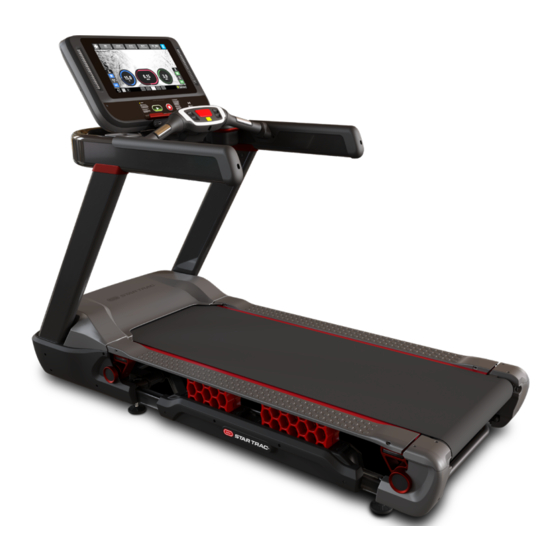
PART IDENTIFICATION Fig. 3 10-TRx Features Part Part Part Console Safety Stop (Cord) Foot Front Handlebar Moving Surface Foot Rail Heart Rate Grips Deck Elevation Frame Safety Stop (Button) Rear Roller Shroud Motor Shroud Handrail Rear Roller Page 6... -
Page 8: Operation - Openhub Lcd Consoles
OPERATION - OPENHUB LCD CONSOLES SAFETY FIRST Your treadmill is equipped with an easy to reach HOT BAR® that provides you with an additional PAUSE/STOP button and a Stop Switch. The Stop Lanyard Clip attached to the HOT BAR® is provided for your protection to stop the machine. - Page 9 DISPLAY MEASUREMENTS SPEED Displays the current speed in MPH/KPH INCLINE Displays the current incline as percent grade KCAL Displays accumulated calories burned WATTS/METS Alternates display of current user Watts and METS WORKOUT PROFILE Displays profile of past and upcoming speed levels relative to one another SEGMENT TIMER Below the Workout Profile area is a segment timer that counts down the time remaining in the current segment.
- Page 10 CONSOLE KEY FUNCTIONS Enables manual operation using a default weight, SPEED and a default time limit. QUICK START Key NOTE: Default time and weight are adjustable through Maintenance Mode. Fan Button Cycles the fan between three settings: High, Low and Off Use to enter specific values for program parameters during program setup.
- Page 11 WORKOUT SELECTION KEYS AND PROGRAM DEFINITIONS Similar to Quick Start, but allows user to enter a time goal and weight for more Manual accurate calorie measurement 5k Loop Similar to Quick Start, but is a pre-set distance Provides access to sub-menu to select from one of 7 different fitness test Fitness Tests programs: Fitness Test...
- Page 12 user’s heart rate exceeds the target HR (85% of maximum), the individual continues the evaluation for an additional 15 seconds. During this 15 second period, the evaluation remains at the stage where the target HR is exceeded, with speed or grade unchanged. If the HR does not return to or below the target HR, the evaluation ends and the final evaluation stage is recorded.
-
Page 13: Operation - Openhub Touchscreen Consoles
OPERATION - OPENHUB TOUCHSCREEN CONSOLES Fig. 5 Treadmill Hotbar CONSOLE & HOTBAR (WHERE APPLICABLE) FUNCTIONS Enables manual operation using a default weight, SPEED and a default time limit. QUICK START Key NOTE: Default time and weight are adjustable through Maintenance Mode. Press the STOP button to enter pause mode. - Page 14 Incline Adjustment Allows user to increase/decrease incline (Treadmill/Treadclimber Only) Level Adjustment Allows user to increase/decrease program level (8G and 10G Only) RunTV ST20 H.I.I.T. Main Menu Workout controls, varies by unit. See the Menu Map for complete details. Build A Workout Existing Workouts...
- Page 15 BLUETOOTH DEVICE PAIRING Pushing the button opens the bluetooth menu. After selecting the device type, the console will show all available local devices. The display will show the unique console code. Once a device is paired with the console, the light will stop flashing and remain on to indicate the connection. Visit openhubconnect.com for a list of compatible apps and demonstration video.
-
Page 16: Screen Views
SCREEN VIEWS 3.65mi 37:45 20:00 KCAL Total Distance Total Time Pace (Min/Mi) 0.15 15.0 15.0 MILES Fig. 7 Screen Elements During most workouts, users can select from multiple screen view options by tapping the icons at the bottom of screen. Screens vary by unit, all screens are shown in the Service Manual. •... - Page 17 Other controls vary by unit: Fan Button Cycles the fan between three settings: High, Low and Off Bluetooth Button is grayed out if no device is connected to the console. Adjustment Allows user to increase/decrease speed, level or incline depending on unit. Buttons This button has the same function as pressing stop button on hot bar, puts Exit/Back...
-
Page 18: Workout Selection Keys And Program Definitions
WORKOUT SELECTION KEYS AND PROGRAM DEFINITIONS On the main screen are several choices: Quick Start Program will request user information to create more accurate calorie burn and heart rate zone calculations, then begin a fixed time (default length can be adjusted in maintenance mode) manual workout Existing Workouts 5K Time Trial Manual... -
Page 19: Program Upload
PROGRAM UPLOAD Prior to starting a workout, a BlueTooth connected device can be used to upload a program to display on the console from a compatible app. The upload may contain user info such as age and weight. RunTV 1. In an App interface, select the option to Upload Program ST20 to Display and then select... - Page 20 3. Once the program has loaded, press the green start button to RunTV progress to the setup screen. ST20 H.I.I.T. NOTE: Console will return to home screen after 30 seconds Build A or if cancel is pressed. Workout Existing 4. If program fails to load, an Workouts error screen is displayed for 5 seconds before retuning to...
-
Page 21: Menu Map - Treadmill
MENU MAP - TREADMILL RunTV ST20 H.I.I.T. Build A Workout Build A Workout Custom Time Distance Calorie Improve Interval Goal Goal Goal Cardio HR Training Constant HR Dynamic HR Control Control Existing Workouts Existing Workouts Manual Random Hill Alpine Pass 5K time trial Evaluate Fitness Quick... -
Page 22: Maintenance Mode
MAINTENANCE MODE LCD OPENHUB CONSOLE Maintenance Mode allows access to service and diagnostic information, as well as provides the ability to adjust certain program default parameters. To enter Maintenance Mode: Press and hold the keys together. A beep will sound and “MAINTENANCE MODE” will display momentarily in the Information Window. Release all keys. - Page 23 Lowest Highest Item Value Value Default Notes Access to LCD Test function display test Access to program usage counts program stats 65,535 Number of miles since belt was last replaced last belt 65,535 Number of miles since deck was last replaced last deck 1 or 2 Choose Model 1 for 8-TR, Model 2 for 8-TRx...
-
Page 24: Maintenance
MAINTENANCE TOOLS Working on this product will require basic and/or sometimes specialty tools based on the type of service that will be performed at any time. To assist, we recommend having the tools listed available when performing maintenance. Tool Multi-meter Screwdriver Set, Phillips Socket Set, SAE Screwdriver Set, Flat... -
Page 25: Maintenance Schedule
MAINTENANCE SCHEDULE The safety and integrity of this machine can only be maintained when the equipment is regularly examined for damage and wear and repaired. It is the sole responsibility of the owner of this equipment to ensure that regular maintenance is performed. - Page 26 Every 6 Maintenance Schedule Daily Weekly Monthly Months Yearly Check Moving Surface and Deck Condition and replace if wear found Unplug unit and check all power connections including speed sensor Preventive Maintenance Cautions • While maintaining equipment you will want to avoid spraying any liquids directly onto any surface of the unit.
-
Page 27: Support & Service
SUPPORT & SERVICE For Technical Support, Service, Parts Orders or any Customer Service needs, please contact us direct by phone, email, or through our 24 hour support site: GLOBAL SUPPORT CENTER 4400 NE 77th Avenue, Suite 300 Vancouver, WA 98662 Tel: (360) 326-4090 •... - Page 28 © 2020 CORE HEALTH & FITNESS LLC PART NUMBER 620-8682, REV B All rights reserved. Star Trac, the Star Trac logo and StairMaster are registered trademarks of Core Health & Fitness, LLC. Schwinn and Nautilus are registered trademarks of Nautilus Inc. used under license to Core Health & Fitness LLC. Throwdown is a registered trademark of Throwdown Industries, LLC.
Need help?
Do you have a question about the Star Trac 10-TRx FREERUNNER and is the answer not in the manual?
Questions and answers