Sign In
Upload
Download
Table of Contents
Contents
Add to my manuals
Delete from my manuals
Share
URL of this page:
HTML Link:
Bookmark this page
Add
Manual will be automatically added to "My Manuals"
Print this page
×
Bookmark added
×
Added to my manuals
Manuals
Brands
Burford Manuals
Industrial Equipment
2000
Manual
Burford 2000 Manual
Electronic servo tyer model
Hide thumbs
1
2
3
4
5
6
7
8
9
10
11
12
13
14
15
16
17
18
19
20
21
22
23
24
25
26
27
28
29
30
31
32
33
34
35
36
37
38
39
40
41
42
43
44
45
46
47
48
49
50
51
52
53
54
55
56
57
58
59
60
61
62
63
64
65
66
67
68
69
70
71
72
73
74
75
76
77
78
79
80
81
82
83
84
85
86
87
88
89
90
91
92
93
94
95
96
97
98
99
100
101
102
103
104
105
106
107
108
109
110
111
112
113
114
115
116
117
118
119
120
121
122
123
124
125
126
127
128
129
130
131
132
133
134
135
136
137
138
139
140
141
142
143
144
145
146
147
148
149
150
151
152
153
154
155
156
157
158
159
160
161
162
163
164
165
166
167
168
169
170
171
172
173
174
175
176
177
178
179
180
181
182
183
184
185
186
187
188
189
190
191
192
193
194
195
196
197
198
199
200
201
202
203
204
205
206
207
208
209
210
211
212
213
214
215
216
217
218
219
220
221
page
of
221
Go
/
221
Contents
Table of Contents
Troubleshooting
Bookmarks
Table of Contents
Section 1
Safety Precautions
Disclaimer Warning
Table of Contents
Table of Flow Charts
Chapter 1: Introduction
Specifications
Models
Conveyor Requirements
Bag Neck Length Requirements
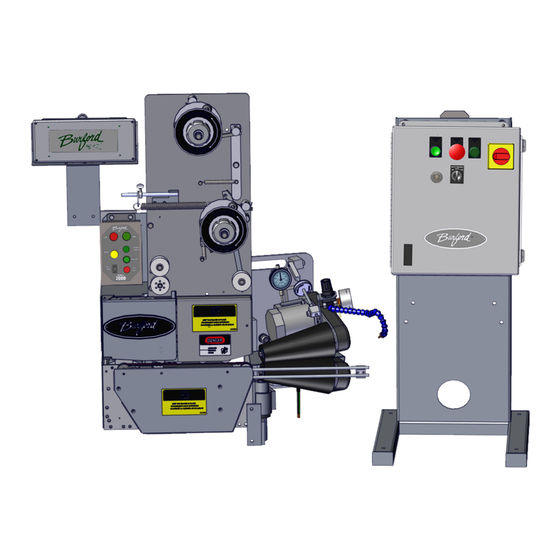
Unit Overview
E-Stop Location
Chapter 2: Key Components
Tyer Head
Control Panel
Needle
Twister Hook
Holder / Shear
Holder / Shear, Cont'D
Holder / Shear, Cont'D
Bag Switch
Ribbon Dispense Encoder
Ribbon Guide
Gathering Belts
Belt Speed Switch
Main Enclosure
Main Disconnect
Ribbon Tension Assembly
Ribbon Tension Spring
Brake
Dancer Arm
Ribbon Drop Sensor
Gathering Brush
Adjustment Knob
Pressure Regulator
Bag Stop
Optional Key Components
Package Detection Sensor
Speed Follower Encoder
Operator Display
Bag Tail Blower
Stand
Conveyor
Chapter 3: Installation
Mechanical Installation
Mechanical Installation, Cont'D
Mechanical Installation, Cont'D
Mechanical Installation, Cont'D
Electrical Interconnections
Bagger Enable Circuit (Safety Interlock)
Bagger-Active Circuit
Counter Output / External Counter Output
Installation Arrangements
Chapter 4: Operation Procedures
Theory of Operation
Control Panel
STOP" Pushbutton
RUN" Pushbutton
THREAD" Pushbutton
MOTORS ENABLED" Light
INITIALIZED" Light
TYER FAULT" Light
BELT SPEED" Push Wheel Switch
Main Enclosure
Package Recognition System
Package Detection System (PDS)
Dual Ribbon Spool System
Ribbon Tension
Changing and Threading the Ribbon
Changing and Threading the Ribbon, Cont'D
Changing and Threading the Ribbon,Cont'D
Changing and Threading the Ribbon,Cont'D
Speed Following Feature
Daily Startup
Daily Startup, Cont'D
Chapter 5: Timing and Adjustments
Bag Switch Adjustment
Holder Shear Adjustment
Shuttle Bar Alignment
Gathering Belts Tension Adjustment
Gathering Belts Speed Adjustment
Belt Guide Tension Adjustment
Gathering Belts Teeth Mesh
Proximity Sensor Adjustment
Proximity Sensor Adjustment, Cont'D
Gathering Brush Tension Adjustment
Gathering Brush Air Adjustments
Ribbon Dispenser Adjustment
Ribbon Dispenser Adjustment, Cont'D
Ribbon Dispenser Adjustment, Cont'D
Needle Roller Replacement
Needle Roller Replacement, Cont'D
Spacing of Twister Hook Shaft to Tip of Holder Shear
Adjusting Tie Tightness
Nominal Adjustment
Adjusting the Eccentric Ribbon Guide
Adjusting the Belt Pulley
Auxiliary DIP Switch Settings
CPU DIP Switch Settings
Fuse and Circuit Breaker List
Counter Output
PROM Replacement
PROM Replacement, Cont'D
PROM Replacement, Cont'D
Chapter 6: Communications
Terminal Option
Communicating with the Controller
Burford TERMINAL Program
Terminal Program in Microsoft Windows Version 3.0 or
Servo Tyer Controller and PC Communication Cable
Servo Tyer Commands
Starting the Servo Tyer
When You Start the Servo Tyer, Cont'D
TIME and DATE Commands
TROUBLE Command
QUERY Command
QUERY Command, Cont'D
RESET Command
DEBUG Command
HOME Command
DISPENSE Command
DISPENSE Command, Cont'D
(+) Command
(+) Command, Cont'D
Chapter 7: Troubleshooting
Troubleshooting Considerations
Diagnostic Led's
Diagnostic Led's, Cont'D
Seven Segment LED Error Codes
Seven Segment LED, Error Codes, Cont'D
Seven Segment LED, Error Codes, Cont'D
Audible Alarm Codes
Troubleshooting Flow Charts
Flow Chart 0-1 Unit will Not Power up and Initialize
Flow Chart 0-2 Gathering Belts will Not Run
Flow Chart 0-3 Brush Motor Not Running
Flow Chart 0-4 Motor for Gathering Brushes Won't Run
Flow Chart 0-5 Blower Motor Not Running
Flow Chart 0-6 Tyer Not Allowing Bagger to Start
Flow Chart 0-7 E001 Error Code
Flow Chart 0-8 E101 Error Code
Flow Chart 0-9 E102 Error Code
Flow Chart 0-10 E111 Error Code
Flow Chart 0-11 E112 or E113 Error Code
Flow Chart 0-12 E114 Error Code
Flow Chart 0-13 E115 or E116 Error Code
Flow Chart 0-14 E117 Error Code
Flow Chart 0-15 E121 Error Code
Flow Chart 0-16 E122 or E123 Error Code
Flow Chart 0-17 E124 Error Code
Flow Chart 0-18 E125 or E126 Error Code
Flow Chart 0-19 E127 Error Code
Flow Chart 0-20 E131 Error Code
Flow Chart 0-21 E132 or E133 Error Code
Flow Chart 0-22 E134 Error Code
Flow Chart 0-23 E135 and E136 Error Code
Flow Chart 0-24 E137 Error Code
Flow Chart 0-25 E146 Error Code
Flow Chart 0-26 E151-169 Error Codes
Flow Chart 0-27 E201 Error Code
Flow Chart 0-28 E300 Error Code
Flow Chart 0-29 Excessive Ribbon Drops
Flow Chart 0-30 Ribbon Drops During Homing Sequence
Flow Chart 0-31 Needle Punches Holes through Bag Neck
Flow Chart 0-32 Bags Drag Hard against Flight
Flow Chart 0-33 Tyer Aborts Cycle on Good Package
Flow Chart 0-34 Excessive Belt Fuse Failure
Flow Chart 0-35 Twist Tie Breaks During Tying
Flow Chart 0-36 Ties Not Centered on Product
Flow Chart 0-37 Two Packages Tied Together
Flow Chart 0-38 Ribbon Wraps Around Hook Shaft
Flow Chart 0-39 Holes Being Formed in Bag
Flow Chart 0-40 Excessive Wear on Gathering Belts
Chapter 8: Maintenance
Lubrication
Preventive Maintenance
Daily
Weekly
Monthly
Quarterly
Preventive Maintenance, Cont'D
Semi-Annually
Yearly
Month
Power Supply Board Fuse Replacement
Operating Voltages
Chapter 9: Test Procedures
Motor Encoders Test Procedure
Motor Continuity Test Procedure
Servo Motor Fuses Test Procedure
Volt DC Power for Motors Test Procedure
Proximity Switch Leds Test Procedure
And 12 Volt D.C. Power Supply Test Procedure
BCD Switch Test Procedure
Section 2
Frame Assembly
Recommended Spare Parts
Belt Drive Assembly
Bag Switch Assembly / Needle Assembly
Tyer Covers
Ribbon Tension Assembly
Tapered Brush Assembly / Regulator Mounting Bracket Kit
Tapered Brush Assembly Detailed
Install Kit
Package Detection Assembly
Operator Display
Electrical BOM
Electrical Ladder
Electrical Layout
Advertisement
Quick Links
Download this manual
ELECTRONIC SERVO
TYER MODEL
2000/2100
Copyright © 2020 by Burford
®
Corp.
Second Edition, Date: April 2016
128684-M
Manual Part No.
21575, 21576
Serial #
Table of
Contents
Previous
Page
Next
Page
1
2
3
4
5
Advertisement
Chapters
Section 1
4
Section 2
194
Table of Contents
Troubleshooting
CHAPTER 7: TROUBLESHOOTING
108
Audible Alarm Codes
115
Need help?
Do you have a question about the 2000 and is the answer not in the manual?
Ask a question
Questions and answers
Related Manuals for Burford 2000
Industrial Equipment Burford 2100 Manual
Electronic servo tyer model (221 pages)
Industrial Equipment Burford 2200 Service Manual
(157 pages)
Industrial Equipment Burford 2200M Manual
(214 pages)
Industrial Equipment Burford 8830 Service Manual
(63 pages)
This manual is also suitable for:
2100
Table of Contents
Save PDF
Print
Rename the bookmark
Delete bookmark?
Delete from my manuals?
Login
Sign In
OR
Sign in with Facebook
Sign in with Google
Upload manual
Upload from disk
Upload from URL


Need help?
Do you have a question about the 2000 and is the answer not in the manual?
Questions and answers