Advertisement
Quick Links
Advertisement

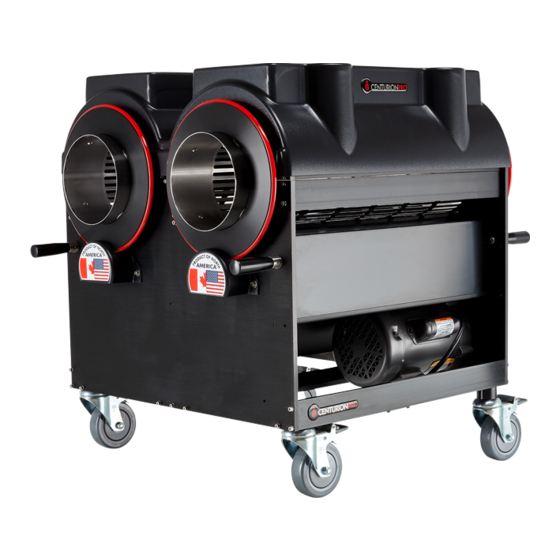
Summary of Contents for CenturionPro GLADIATOR
- Page 1 OWNERS MANUAL THE GLADIATOR...
- Page 2 CenturionPro trimming machines are intended for use on legal aromatic herbs and hops. Please check all municipal, provincial/state and federal laws and regulations before using these machines. CenturionPro Solutions does not promote or condone the use of these products in any way that may be deemed illegal.
- Page 3 The Gladiator is a high-speed trimming system, requiring that specific safety precautions are practiced during operation to reduce the risk of personal injury. Improper use of The Gladiator, or any CenturionPro product, may cause serious or fatal injury. Please ensure you read the operations manual and warning notes before using the Gladiator.
- Page 4 NOTES FOR ALL OTHER ISSUES, PLEASE EMAIL techsupport@cprosolutions.com, WE WOULD BE HAPPY TO HELP YOU. 1 855 535 0558 cprosolutions.com...
- Page 5 OWNERS MANUAL GLADIATOR TABLE OF CONTENTS WARRANTY IMPORTANT SAFETY INFORMATION NOTES SHEET TABLE OF CONTENTS COMPONENT OVERVIEW MACHINE ASSEMBLY COVER ASSEMBLY KIEF & TRIM COLLECTION LEAF COLLECTOR ASSEMBLY HOPPER ASSEMBLY CLEANING & MAINTENANCE - BLADE REMOVAL, TRIMMER CLEANING CLEANING & MAINTENANCE -...
- Page 6 COMPONENT OVERVIEW COVER UPPER FRAME BRUSH Requires Cleaning See Pg. 10 CAM FOLLOWERS TUMBLER O-RING TUMBLER BED BAR BLADE BLADE ADJUSTMENT & MAGNET BAR ASSEMBLY Requires Cleaning See Pg. 10 EXHAUST Requires Cleaning See Pg. 10 CUTTING REEL Requires Cleaning See Pg.
- Page 7 OWNERS MANUAL MACHINE ASSEMBLY GLADIATOR STEP 1: STEP 2: PLACE TUMBLER INSTALL UPPER IN GROOVES FRAME Tighten eight sealing bolts & washers. STEP 3: INSTALL COVER Place cover over Upper Frame. STEP 4: INSTALL EXHAUST - Exhaust in a separate box when shipped.
- Page 8 IT IS UNSAFE TO OPERATE THE GLADIATOR TRIMMER WITHOUT COVERS. STEP 1: STEP 2: ATTACH THE BEARING COVERS TO THE GLADIATOR ATTACH THE BELT COVER TO THE GLADIATOR 5 x WASHERS & 3/8" BOLTS 2 x WASHERS & 3/8" BOLTS BEARING 2 x WASHERS &...
- Page 9 Kief is becoming wildly popular due to the rise of extractions. Unfortunately, machines that require THE BAGS ARE EASY TO WASH WITH A sprays can contaminate and destroy your Kief, making it virtually useless. Thankfully, CenturionPro off ers an optional non-stick Quantanium coating on the tumblers. This means no spray is needed, so PRESSURE WASHER USING COLD WATER.
- Page 10 Requires Cleaning See Pg. 11 HOSE CLAMP STEP 2: STEP 3: ATTACH DIVERTER TO ATTACH DIVERTER TO LEAF COLLECTOR EXHAUST - No bolts required - Requires cleaning (pg. 11) DIVERTER LEAF COLLECTOR GLADIATOR 1 855 535 0558 cprosolutions.com...
- Page 11 SECURE HOPPER BAG CONNECT THE TO FRAME HOPPER TO THE MACHINE A) Ensure the FRAME & OPENING match. A) Ensure the FRAME & OPENING match the Gladiator machine exactly. For more information or to watch our DIY video tutorials visit cprosolutions.com...
- Page 12 YOUR BED BAR BLADE HAS BEEN FACTORY SET TO CUT PERFECTLY. PLEASE DO NOT ALTER THE SETTINGS OF YOUR MACHINE. YOU MIGHT NOTICE SLIGHT CONTACT BETWEEN YOUR ROTATING CUTTING REEL AND THE FLAT BED BAR BLADE - THIS IS NORMAL. CLEANING THE GLADIATOR For optimal performance and life, the components must be cleaned after every day of operation.
- Page 13 OWNERS MANUAL CLEANING & MAINTENANCE GLADIATOR LEAF COLLECTOR CLEANING STEP 1: REMOVE COVER & IMPELLER FROM LEAF COLLECTOR • Remove 8 screws from the side panel to uncover the leaf collector • Remove the 13mm bolt & washer located in the middle of the fan blades ONLY USE A 6"...
- Page 14 MACHINE MAINTENANCE The Gladiator's are precision machines. It is essential that they be operated and maintained with this in mind. The machine has been adjusted and tested by the manufacturer prior to shipping to ensure optimal performance. However, it is important to inspect the machine at initial start-up and after each use to ensure that no damage or plant material build-up has occurred and that the blades spin freely.
- Page 15 OWNERS MANUAL GLADIATOR QUANTANIUM COATED NON-STICK TUMBLER WHAT IS QUANTANIUM? Quantanium is a multi-coat non-stick coating that incorporates a unique mix of titanium particles. These particles are blended into the coating that stands up to almost anything and makes the tumbler resistant to scratching. The outstanding release is provided by silicone, not PTFE.
- Page 16 TROUBLESHOOTING MY PRODUCT IS STUCK IN THE MIDDLE OF MY TUMBLER AND WILL NOT COME OUT THE OTHER END. 1) The tumbler should always be 40%-60% full. You should be feeding the tumbler every 30-60 seconds; this will ensure that new product entering the machine will help push out product that is trimmed.
- Page 17 OWNERS MANUAL GLADIATOR MY MACHINE MOTOR IS HOT 1) Your machine may be overworking due to a voltage drop in your power supply. This can happen if you’re using an extension cord that is too long or undersized. You can only use an extension cord with a maximum length of 25ft.
- Page 18 There will be a 20% restocking fee and the customer will be responsible for all shipping costs. Returns must be packaged same as it arrived and CenturionPro is not liable for any shipping damage incurred on return. If damage occurs in transit on return, CenturionPro will refuse the return and customer will need to process a claim with their shipping provider.
- Page 19 OWNERS MANUAL GLADIATOR THE GLADIATOR & LEAF COLLECTOR SPECIFICATIONS THE GLADIATOR BULLET TRIMMER THE GLADIATOR LEAF COLLECTOR 7 Amp - 110V NA 22 Amp - 220V NA Input Voltage Input Voltage 3.5 Amp - 220V EU/AUS 22 Amp - 220V EU/AUS Dimensions 30"...
- Page 20 cprosolutions.com 1 855 535 0558 sales@cprosolutions.com FOLLOW US ON:...


Need help?
Do you have a question about the GLADIATOR and is the answer not in the manual?
Questions and answers