
Related Manuals for LPA Medical Dyn-Ergo S-150


Summary of Contents for LPA Medical Dyn-Ergo S-150
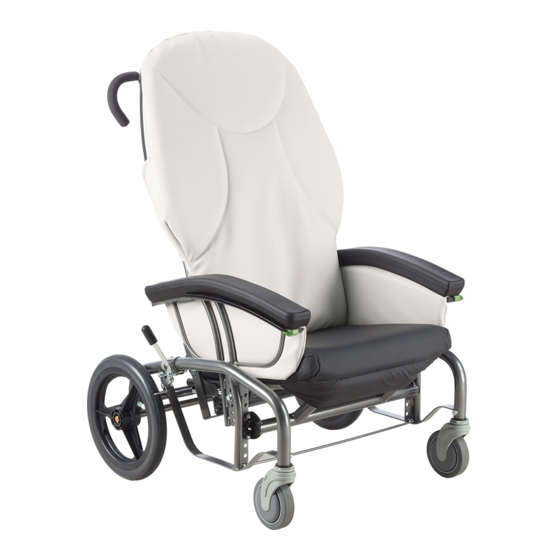
- Page 1 mobility chair Dyn-Ergo S-150 FOCUSED ON WHAT MATTERS lpamedical.com 2527 Dalton avenue, Quebec (Qc) G1P 3S6 CANADA T 418-681-1313 1-800-663-4863 F 418-681-4488...
-
Page 2: A Word Of Thanks
LPA representative, contact us directly through our website, or use our phone number, listed below. We hope that you enjoy your LPA Medical chair and we thank you for your business. Bryan Welch President LPA Medical inc. -
Page 3: Table Of Contents
TABLE OF CONTENT A Word of Thanks Replacement Parts Availability Policy General Information Definitions Safety Measures Applications Inspection Before Use Risk Prevention Improper Uses Cleaning Maintenance Operating Functions Possible Adjustments Adjustment and Operating Instructions Wheels Seat-to-Floor Height Seat Depth Seat/Backrest Angle Tilt-in-Space Armrest Height Lateral Supports –... -
Page 4: Replacement Parts Availability Policy
REPLACEMENT PARTS AVAILABILITY POLICY LPA Medical’s replacement parts availability policy ensures parts for at least 10 years after the purchase of your LPA product, which makes it: An eco-friendly purchase. If anything breaks, you know that • replacement parts will be available for a long time. Why throw your chair away when you can fix it? An economical purchase. -
Page 5: Safety Measures
In addition, LPA chairs are not designed for outdoor use. The Dyn-Ergo chair must be used with accessories specifically designed for it by LPA Medical Inc. It must be used in accordance with recognized health and safety practices. -
Page 6: Inspection Before Use
INSPECTION BEFORE USE The chair can be shipped fully assembled or partially assembled. It must be inspected when unpackaged and you must notify your supplier if there is any damage or missing parts/accessories so that the situation is remedied before taking possession. RISK PREVENTION Always apply the brakes when the wheelchair is not moving and for any transfer or repositioning maneuver. -
Page 7: Improper Uses
IMPROPER USES Manipulating the chair without proper training. • Wheeling the chair outside of designated areas. • Using it for a patient without assignment or adjustments made by • a professional. Making adjustments that require frequent repositioning. • Transferring a patient without using the tilt function. •... -
Page 8: Operating Functions
OPERATING FUNCTIONS The main components for safe use of the chair are: A. Brake on each rear wheel. B. Gas spring activation lever for the seat tilt. C. Gas spring. D. Chair control handles. POSSIBLE ADJUSTMENTS 1. The seat-to-floor height is adjustable from 13 1/2" to 18 1/2" (34 cm to 47 cm) in 1-inch increments. -
Page 9: Adjustment And Operating Instructions
ADJUSTMENT AND OPERATING INSTRUCTIONS The adjustments described on the following pages must all be made according to the user’s morphological measurements as carried out by a positioning professional. WARNING: BEFORE HANDLING THE CHAIR’S OCCUPANT, THE BRAKES MUST BE APPLIED. WHEELS The Dyn-Ergo is equipped with 2 wheels with brakes and red activating levers at the rear. -
Page 10: Seat-To-Floor Height
SEAT-TO-FLOOR HEIGHT WARNING: THE CHAIR MUST BE UNOCCUPIED WHEN MAKING THIS ADJUSTMENT. 1. Apply the brakes and tip the chair backwards until the push bar rests on the floor. 2. Using a 1/2" (13 mm) wrench, remove the 4 bolts (2 per side) that hold the seat support. -
Page 11: Seat Depth
SEAT DEPTH WARNING: THE CHAIR MUST BE UNOCCUPIED WHEN MAKING THIS ADJUSTMENT. 1. You can adjust the seat depth by sliding the backrest forward or backwards. 2. Using a 1/2" (13 mm) wrench, loosen the 4 bolts under the seat structure that go through slots that control the seat’s depth. -
Page 12: Seat/Backrest Angle
SEAT/BACKREST ANGLE WARNING: THE CHAIR MUST BE UNOCCUPIED WHEN MAKING THIS ADJUSTMENT. For this operation, it is strongly recommended to lay the chair on its side for safer maneuvering to minimize the risk of jamming fingers. It will make the operation easier. 1. - Page 13 SEAT/BACKREST ANGLE (continued) 4. Push or pull the top of the backrest as needed to change its angle. Align the holes and bolt the backrest in place at the desired angle. Don't forget the lock washers. BE SURE TO USE THE SAME HOLE ON EACH SIDE.
-
Page 14: Tilt-In-Space
TILT-IN-SPACE The seat’s tilt can be adjusted depending on the user’s needs. By varying the position of the gas cylinder on the multi-hole bracket, you can obtain: A. Significant assistance standing up. B. Slight assistance standing up. C. A backward tilt. AWARNING: THE CHAIR MUST BE UNOCCUPIED WHEN MAKING THIS ADJUSTMENT. - Page 15 TILT-IN-SPACE (continued) 1. Determine in advance the backrest tilt adjustment required. 2. Apply the brakes, hold the chair on both sides and lay it on its side. 3. Remove the locking pin from the multi-hole bracket behind the backrest. 4. Reposition the gas spring in the correct place.
- Page 16 TILT-IN-SPACE (continued) 5. Place the chair upright, then check the tilt’s full travel by activating the gas spring and letting the seat raise completely. Then, activate the gas spring and lower the seat completely by applying your weight on the push bar.
-
Page 17: Armrest Height
ARMREST HEIGHT 1. Use a 1/2-inch (13mm) wrench to remove the bolt securing the armrest on each side of the seat. 2. Position the armrest at the desired height and replace the bolt, without forgetting the flat washer and the lock washer. 3. -
Page 18: Lateral Supports - Optional
LATERAL SUPPORTS – OPTIONAL Height adjustment 1. Determine the height required for the lateral supports. 2. Using a ⁄ " (11 mm) wrench, loosen the 4 nuts slightly from the lateral support attachment, without removing them completely. Note: hold the assembly with your free hand so that it doesn’t fall suddenly. - Page 19 LATERAL SUPPORTS – OPTIONAL (continued) Width adjustment 1. Determine if the lateral supports must be widened. 2. Using a 1⁄8" Allen key, loosen the adjustable lock's two screws without removing them completely so that you can adjust the width. 3. Adjust the trunk support to the desired position.
-
Page 20: Using The Footrests - Optional
USING THE FOOTRESTS – OPTIONAL Footrests are optional on the Dyn-Ergo chair. It is recommended to use them when the chair is pushed by others to prevent injury to the lower limbs. 1. Press on the black lever on the footrest assembly and swivel the assembly 180 degrees outward, until the footrest locks into place... -
Page 21: Serial Number Location
SERIAL NUMBER LOCATION Each LPA Medical Inc. chair is identified by a serial number. Always provide your LPA chair’s serial number when ordering replacement parts. The serial number can be found on a label affixed to the rear cross tube of... -
Page 22: Options And Accessories
* Always specify the color, width, fabric pattern and serial number of the Dyn-Ergo chair when ordering replacement parts. See page 21 for the location of the serial number. Replacement parts may have slight color differences from those of the original chair. LPA Medical cannot be held responsible for these differences. -
Page 23: Additional Ergonomic Recommendations
ADDITIONAL ERGONOMIC RECOMMENDATIONS CERVICAL SUPPORT A cervical support is optional on the Dyn-Ergo chair. It can be used to increase comfort by allowing the head to rest on the back of the chair in a tilted position. The cervical support should be placed at the base of the head and neck in order to fill the space according to the user's comfort. -
Page 24: Sitting Down
SITTING DOWN To sit in the Dyn-Ergo chair safely (always do so in the presence of another person who has received training): Apply the brakes on the chair’s two rear wheels (performed by the user or • a caregiver). Raise the tilt of the chair to an upright position to prepare for the transfer •... -
Page 25: Terms & Conditions
APPLICABLE TO PRODUCTS PURCHASED AS OF SEPTEMBER 1, 2018 GENERAL LPA Medical inc. reserves the right to modify without notice or obligation the design, specifications and prices of the equipment it manufactures. Shipping is charged at the current price at the time of delivery. -
Page 26: General Warranty
* The useful lifespan of an LPA chair is estimated to be 10 years. OUR COMMITMENT LPA Medical inc. agrees to provide replacement parts for a period of 10 years after the date of purchase of the product. LPA Medical Inc. reserves the right to provide replacement parts with a different design than that of the replaced part, at its sole discretion. -
Page 27: Parts List
** Always specify the color, width, fabric pattern and serial number of your Dyn-Ergo chair when ordering replacement parts. See page 21 for the location of the serial number. Replacement parts may have slight color differences from those of the original chair. LPA Medical cannot be held responsible for these differences. -
Page 28: Exploded View
VUE ÉCLATÉE EXPLODED VIEW...
Need help?
Do you have a question about the Dyn-Ergo S-150 and is the answer not in the manual?
Questions and answers