Stihl FS 300 Instruction Manual
Hide thumbs
Also See for FS 300:
- Instruction manual (96 pages) ,
- Manual (63 pages) ,
- Service manual (62 pages)

Related Manuals for Stihl FS 300


Summary of Contents for Stihl FS 300
- Page 1 FS 300, 350, 380 2 - 44 2 - 44 Manual de instrucciones 44 - 82 44 - 82 Instruction Manual...
-
Page 2: Table Of Contents
Índice dor STIHL o directamente a nuestra empresa de distribución. Notas relativas a este manual de instruccio‐ nes.............. 2 Atentamente Indicaciones relativas a la seguridad y téc‐ nica de trabajo..........3 Combinaciones permitidas de herramienta de corte, protector, tope y cinturón de porte .............. -
Page 3: Indicaciones Relativas A La Seguridad Y Téc- Nica De Trabajo
Perfeccionamiento técnico El uso de máquinas a motor que emitan ruidos STIHL trabaja permanentemente en el perfeccio‐ puede estar limitado temporalmente por disposi‐ namiento de todas las máquinas y dispositivos; ciones nacionales o locales. - Page 4 Llevar guantes de protección robus‐ No realizar modificaciones en la máquina ya que tos de material resistente (p. ej. de eso podría afectar a la seguridad. STIHL renun‐ cuero). cia a cualquier responsabilidad por daños perso‐ nales y materiales que se produzcan al emplear STIHL ofrece una extensa gama de equipa‐...
- Page 5 2 Indicaciones relativas a la seguridad y técnica de trabajo español – Comprobar los dispositivos de protección Abrir con cuidado el cierre del depósito para que (p. ej. el protector de la herramienta de corte, se reduzca lentamente la presión existente y no plato de rodadura) en cuanto a daños o bien salga combustible despedido.
- Page 6 Controlar o corregir el ajuste del ralentí con regu‐ laridad. Si pese a ello se mueve la herramienta de corte en ralentí, encargar la reparación a un distribuidor especializado. STIHL recomienda un distribuidor especializado STIHL. Prestar atención en caso de que el suelo esté...
- Page 7 2 Indicaciones relativas a la seguridad y técnica de trabajo español visual), disminución de la audición, mareos y Antes de ausentarse de la máquina – parar el pérdida de concentración, dejar de trabajar motor. inmediatamente – estos síntomas se pueden Comprobar la herramienta de corte con regulari‐...
- Page 8 – ¡peligro de diferente ni un diámetro superior al de la herra‐ lesiones! por ejemplo, por girar la herramienta de mienta de corte de metal STIHL más grande per‐ corte en ralentí. mitida para esta máquina a motor – ¡peligro de lesiones! Utilización de herramientas de...
- Page 9 Las hojas de sierra circular se han de usar en Emplear únicamente bujías en perfecto estado, combinación con un cinturón doble provisto de autorizadas por STIHL – véase "Datos técnicos". dispositivo de soltado rápido. Inspeccionar el cable de encendido (aislamiento 2.14...
- Page 10 Al trabajar con herramientas de corte 2.15 Cabezal de corte con cuchillas de metal, existe el peligro de rebote de plástico – STIHL PolyCut cuando la herramienta incide en un obstáculo sólido (el tronco de un Para segar bordes de prados silvestres (sin pos‐...
- Page 11 – de ser necesario – equili‐ cripciones y – de ser necesario – equilibrarla brarla (STIHL recomienda acudir a un distri‐ (STIHL recomienda acudir a un distribuidor buidor especializado STIHL) especializado STIHL) 2.18...
- Page 12 español 2 Indicaciones relativas a la seguridad y técnica de trabajo El peligro de rebote es muy alto en el sector ADVERTENCIA negro: en este sector no se deberá aplicar nunca la hoja para serrar ni se deberá cortar nada. Se deberá...
-
Page 13: Combinaciones Permitidas De Herramienta De Corte, Protector, Tope Y Cinturón De Porte
Herramienta de corte Protector, tope Cinturón de porte Combinaciones permitidas 4 STIHL TrimCut 42-2 En función de la herramienta de corte, seleccio‐ 5 STIHL PolyCut 41-3 nar la combinación correcta de la tabla. 3.2.2 Herramientas de corte de metal... -
Page 14: Montar La Empuñadura Doble
español 4 Montar la empuñadura doble Montar la empuñadura 12 Hoja de sierra circular 225, dientes en cincel doble (Ø 225 mm) ADVERTENCIA No se permiten cuchillas cortamalezas, cuchillas trituradoras y hojas de sierra circular de otros materiales que no sean metal. Protectores, topes Protectores 13 Protector solo para cabezales de corte... -
Page 15: Ajustar El Cable Del Acelerador
5 Ajustar el cable del acelerador español ► Colocar el asidero tubular (4) en la placa de ► Desenroscar el tornillo (5); al hacerlo, la apriete inferior (1), de manera que la distan‐ tuerca (6) permanece en la empuñadura de cia (A) no sea superior a 15 cm mando (7) ►... -
Page 16: Acoplar Los Dispositivos De Protección
español 6 Acoplar los dispositivos de protección ADVERTENCIA El protector (2) sólo está autorizado para cuchi‐ llas cortamalezas, por lo que antes de montar una cuchilla cortamalezas se deberá montar el protector (2). ► Poner el acelerador en la posición de pleno ►... - Page 17 6 Acoplar los dispositivos de protección español Montar el faldón ADVERTENCIA En caso de emplear cabezales de corte El tope (4) que sirve de protección sólo está autorizado para hojas de sierra circular, por lo que se deberá montar el tope (4) y cambiar el anillo protector (5) antes de montar una hoja de sierra circular;...
-
Page 18: Montar La Herramienta De Corte
español 7 Montar la herramienta de corte Montar la cuchilla Piezas de fijación En función de la herramienta de corte suminis‐ En caso de emplear cabezales de corte de hilo trada en el equipamiento básico de una máquina nueva, puede variar también el volumen de suministro de piezas de fijación. - Page 19 7 Montar la herramienta de corte español El plato de presión se compone del cubo (1) y un Anillo protector para trabajos de aserrado disco protector (2) montado encima de forma imperdible. ADVERTENCIA No emplear nunca el plato de presión sin el disco protector.
- Page 20 español 7 Montar la herramienta de corte Bloquear el árbol Montar el cabezal de corte ► Aplicar hasta el tope el pasador (1) al orifi‐ cio (2) existente en el engranaje – presionarlo ligeramente ► Girar el árbol hasta que encastre el pasador Montar la herramienta de corte ADVERTENCIA Emplear el protector apropiado para la herra‐...
- Page 21 7 Montar la herramienta de corte español 7.11 Cuchilla cortamalezas ADVERTENCIA 7.11.1 Colocar correctamente la herramienta El collar (a) tiene que penetrar en el orificio (b) de corte de la herramienta de corte. 7.11.3 Fijar la herramienta de corte ► Colocar el disco de presión (2) – el abombado, hacia arriba ►...
- Page 22 español 7 Montar la herramienta de corte 7.13 Hojas de sierra circular 200 y 7.13.1 Colocar correctamente la herramienta de corte En las hojas cortahierbas (3), las aristas de corte tienen que estar orientadas en sentido horario. 7.13.2 Montar la herramienta de corte ►...
-
Page 23: Combustible
STIHL prescribe el aceite de motor de dos tiem‐ Este combustible mezclado está exento de ben‐ pos STIHL HP Ultra o un aceite de motor de alto ceno y plomo, se distingue por un alto índice rendimiento similar para poder garantizar los octano y tiene siempre la proporción de mezcla... -
Page 24: Repostar Combustible
Sin embargo, la STIHL MotoMix se puede alma‐ cenar hasta 5 años sin problemas. ► Antes de repostar, agitar con fuerza el bidón... - Page 25 10 Ponerse el cinturón de porte español Con un cinturón doble se suministra una hoja de Cinturón sencillo instrucciones adjuntada con un esquema de apli‐ cación. 10.1 Ponerse el cinturón de porte ► Ponerse el cinturón de porte (1) ► Ajustar la longitud del cinturón, de manera que el mosquetón (2) quede aplicado más o menos el ancho de la mano por debajo de la cadera derecha.
-
Page 26: Equilibrar La Máquina
español 11 Equilibrar la máquina 10.3 Desenganchar la máquina del 11.1 Herramientas de corte cinturón de porte Los cabezales de corte, las hojas cortahierbas, las cuchillas cortamalezas y las cuchillas tritura‐ doras deben tocar ligeramente el suelo. 11.2 Hojas de sierra circular ►... -
Page 27: Arrancar / Parar El Motor
12 Arrancar / parar el motor español 12 Arrancar / parar el motor 12.1.2 Empuñadura de mando en el vástago 12.1 Elementos de mando 12.1.1 Empuñadura de mando en el tubo de agarre START 1 Bloqueo del acelerador 2 Acelerador 3 Cursor del mando unificado 12.1.3 Posiciones del cursor del mando unifi‐... - Page 28 español 12 Arrancar / parar el motor ► Con la mano izquierda, presionar firmemente la máquina contra el suelo – al hacerlo, no tocar el acelerador, el bloqueo del mismo ni el cursor del mando unificado INDICACIÓN ¡No poner el pie sobre el vástago ni arrodillarse encima del mismo! ►...
-
Page 29: Transporte De La Máquina
13 Transporte de la máquina español 12.3 Parar el motor bustible – aun cuando el fuelle esté lleno de combustible ► Empujar el cursor del mando unificado en el ► Girar el botón de la mariposa de arranque sentido de la flecha que hay en la señal de parada (h) a STOP-0 ►... -
Page 30: Indicaciones Para El Servicio
español 14 Indicaciones para el servicio 13.3 Protector universal para el transporte ► Girar el estribo de sujeción hacia fuera ► Aplicar desde abajo el protector para el trans‐ ► Desenganchar el estribo de sujeción del pro‐ porte a la herramienta de corte; al hacerlo, tector para el transporte y girarlo hacia abajo prestar atención a que el tope quede centrado en el rebaje... -
Page 31: Filtro De Aire
15 Filtro de aire español ► Oprimir la brida (1) y retirar la tapa del filtro (2) durante la fase de rodaje. Durante este fase se ► Eliminar la suciedad más destacada del inte‐ tienen que adaptar las piezas móviles entre sí – rior de la tapa del filtro y del entorno del fil‐... -
Page 32: Bujía
– hacerlo antes ya si los electrodos en ralentí tras realizar el ajuste, encargar la están muy quemados – emplear sólo bujías reparación de la máquina a un distribuidor espe‐ autorizadas por STIHL y que estén desparasi‐ cializado. tadas – véase "Datos técnicos" 16.4.3 Régimen de ralentí, irregular;... -
Page 33: Comportamiento De Marcha Del Motor
(1) o si esta falta, pueden producirse chis‐ (coquización). pas. Si se trabaja en un entorno fácilmente infla‐ STIHL recomienda encargar los trabajos de mable o explosivo se pueden provocar incendios mantenimiento y las reparaciones siempre a un o explosiones. Las personas pueden sufrir lesio‐... -
Page 34: Cambiar El Cordón De Arranque / Resorte De Retracción
español 20 Cambiar el cordón de arranque / resorte de retracción 20 Cambiar el cordón de arranque / resorte de retracción 20.1 Desmontar la caja del ventila‐ ► Desenroscar los tornillos (1) ► Quitar la caja del ventilador 20.2 Cambiar el cordón de arranque ►... - Page 35 20 Cambiar el cordón de arranque / resorte de retracción español ADVERTENCIA El resorte de retracción para el rodillo del cordón puede saltar hacia fuera – ¡peligro de lesiones! ► Colocar el trinquete (4) ► Colocar la arandela (3) ► Montar la abrazadera elástica (2) presionando –...
-
Page 36: Guardar La Máquina
– si el desgaste es elevado y existen mellas, afilarlas con una afiladora o encargar el servicio al distribuidor especiali‐ zado – STIHL recomienda el distribuidor espe‐ cializado STIHL ► Afilar con frecuencia, quitar poco material: para un simple reafilado suelen ser suficientes dos o tres pasadas con la lima ►... -
Page 37: Mantenimiento Del Cabezal De Corte
Un movimiento giratorio de muesca a muesca libera unos 4 cm (1 1/2 in.) de hilo. 23.4 Sustituir el hilo STIHL PolyCut En el cabezal de corte PolyCut se puede engan‐ char también un hilo cortado en lugar de la cuchilla de corte. -
Page 38: Comprobación Y Mantenimiento Por El Usuario
25.1 Trabajos de mantenimiento STIHL recomienda encargar los trabajos de mantenimiento y las reparaciones siempre a un distribuidor especializado STIHL. 25.2 Elementos antivibradores Entre la unidad motriz y el vástago hay monta‐... - Page 39 26 Instrucciones de mantenimiento y conservación español Estas indicaciones hacen referencia a condiciones de trabajo normales. En condiciones de trabajo más complicadas (fuerte acumulación de polvo, etc.) y jornadas de trabajo más largas, deberán reducirse correspondientemente los intervalos indi‐ cados. Sustituir las piezas dañadas Empuñadura de mando...
-
Page 40: Minimizar El Desgaste Y Evitar Daños
Véase el capítulo "Comprobación y mantenimiento por medio del distribuidor especializado", apar‐ tado "Elementos antivibradores" 27 Minimizar el desgaste y STIHL recomienda encargar los trabajos de evitar daños mantenimiento y las reparaciones siempre a un distribuidor especializado STIHL. Los distribuido‐... -
Page 41: Componentes Importantes
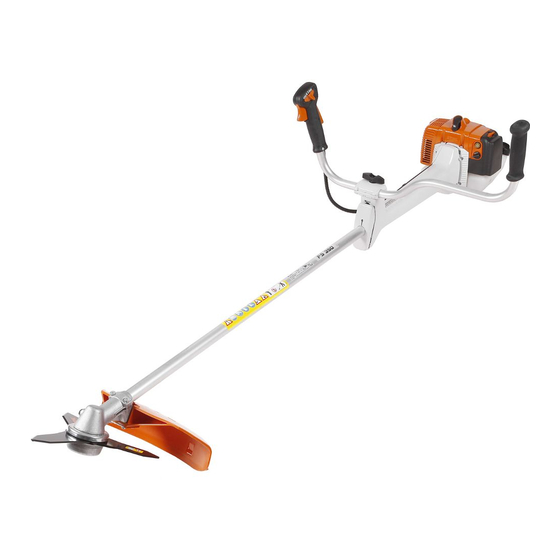
28 Componentes importantes español – Bujía – Elementos antivibradores 28 Componentes importantes 1 Asidero tubular 2 Acelerador 3 Cursor del mando unificado 4 Bloqueo del acelerador 5 Tornillo de sujeción 6 Regleta perforada 7 Bomba de combustible 1 Cabezal de corte 8 Botón giratorio para la mariposa de arranque 2 Protector (sólo para cabezales de corte) 9 Tapa del filtro... -
Page 42: Datos Técnicos
29.4 Peso 29 Datos técnicos Depósito vacío, sin herramienta de corte ni 29.1 Motor protector FS 300: 7,3 kg Motor monocilíndrico de dos tiempos STIHL FS 350: 7,3 kg FS 380: 7,3 kg FS 300 Cilindrada: 30,8 cm 29.5 Longitud total Diámetro del cilindro:... -
Page 43: Indicaciones Para La Reparación
En casos de reparación, montar únicamente pie‐ 3,0 m/s 2,5 m/s FS 350: 3,5 m/s 2,5 m/s zas de repuesto autorizadas por STIHL para FS 380: 2,8 m/s 2,5 m/s esta máquina o piezas técnicamente equivalen‐ tes. Emplear sólo repuestos de gran calidad. De Para el nivel de intensidad sonora y el nivel de no hacerlo, existe el peligro de que se produz‐... -
Page 44: Declaración De Conformidad Ue
El año de construcción y el número de máquina están indicados en la misma. Waiblingen, 03/02/2020 Los productos STIHL no deben echarse a la basura doméstica. Entregar el producto STIHL, ANDREAS STIHL AG & Co. KG el acumulador, los accesorios y el embalaje para Atentamente, reciclarlos de forma ecológica. -
Page 45: Guide To Using This Manual
Engineering improvements Please contact your dealer or our sales company STIHL's philosophy is to continually improve all if you have any queries concerning this product. of its products. For this reason we may modify... - Page 46 Only use cutting attachments and accessories defenders. that are explicitly approved for this power tool model by STIHL or are technically identical. If Wear a safety hard hat for thinning operations, you have any questions in this respect, consult when working in high scrub and where there is a your dealer.
- Page 47 2 Safety Precautions and Working Techniques English Transporting the machine splashed with fuel. If that happens, change your clothes at once. After refueling, close the fuel cap as tightly as possible. This helps reduce the risk of unit vibrations caus‐ ing an incorrectly tightened fuel cap to loosen or come off and spill quantities of fuel.
- Page 48 English 2 Safety Precautions and Working Techniques 2.6.1 For versions with bike handle To reduce the risk of personal injury, do not operate your power tool if it is damaged or not properly assembled! To prepare for emergencies when using a har‐ ness: Practice setting down the machine quickly.
- Page 49 English adjustments or repairs. STIHL recommends you impact or a fall), always check that it is in good have this work done by a STIHL servicing dealer. condition before continuing work – see also "Before Starting". Take special care in slippery conditions – damp, snow, ice, on slopes or uneven ground.
- Page 50 (shape, thickness). For manually adjustable mowing heads, always A metal cutting attachment not made by STIHL switch off the engine before adjusting the mow‐ must not have a different weight, thickness, ing line – risk of injury!
- Page 51 Check the fuel filler cap for leaks at regular inter‐ vals. Use only a spark plug of the type approved by STIHL and make sure it is in good condition – see "Specifications". Inspect the ignition lead (insulation in good con‐...
- Page 52 Metal Cutting Attachments wire or metal-reinforced line in place of the nylon line. WARNING 2.15 STIHL Polycut Mowing Head When using metal cutting attach‐ with Polymer Blades ments there is a risk of kickout when the rotating blade comes into contact...
- Page 53 – Resharpen the shredder blade regularly and from thrown parts. whenever it has dulled noticeably, and have it balanced if necessary (STIHL recommends a To reduce the risk of injury it is essential to take STIHL servicing dealer). the following precautions: –...
-
Page 54: Approved Combinations Of Cutting Attachment, Deflector, Limit Stop And Harness
These areas of the blade should only be used by experienced operators with specialized training. STIHL recommends that you use the non-sha‐ ded area of the circular saw blade. Always start the cut with this area of the blade. -
Page 55: Mounting The Bike Handle
21 Full harness may be used Cutting attachments 22 Full harness must be used 3.2.1 Mowing heads Mounting the Bike Handle 1 STIHL AutoCut 46-2 2 STIHL DuroCut 40-4 3 STIHL TrimCut 41-2 4 STIHL TrimCut 42-2 5 STIHL PolyCut 41-3 3.2.2... -
Page 56: Adjusting The Throttle Cable
English 5 Adjusting the Throttle Cable ► Take out the screw (5), the nut (6) remains in the control handle (7). ► Push the control handle onto the end of the handlebar (4) until the holes (9) line up – the throttle trigger (8) must point towards the gear‐... - Page 57 6 Mounting the Deflector English WARNING WARNING Deflector (1) is approved only for mowing heads, Deflector (3) is approved only for shredder thus deflector (1) must be attached before blades, thus deflector (3) must be attached attaching a mowing head. before attaching a shredder blade.
-
Page 58: Mounting The Cutting Attachment
English 7 Mounting the Cutting Attachment Fitting the Skirt Mounting the Blade When using mowing heads When using nylon line mowing heads The deflector for metal mowing attachments (1) The deflector for metal mowing attachments (1) must be equipped with the skirt (2) when you use must be equipped with the line limiter blade (4) mowing heads. - Page 59 7 Mounting the Cutting Attachment English Mounting hardware The thrust plate consists of the hub (1) with a captive guard washer (2) mounted on it. Dependent on the cutting attachment supplied as original equipment with a new machine, the WARNING mounting hardware supplied can also vary.
- Page 60 English 7 Mounting the Cutting Attachment ► Turn shaft until the locking pin engages Guard ring for sawing applications Mounting the cutting attach‐ ment WARNING Use the appropriate deflector for the cutting attachment – see "Mounting the deflector". Fitting the mowing head with screw mounting Keep the mowing head documentation in a safe place.
- Page 61 7 Mounting the Cutting Attachment English 7.11 Brush knives Mounting the Mowing Head 7.11.1 Position cutting attachment The cutting edges of the brush knife with 2 or 3 blades can face in any direction. Turn the cutting attachments over regularly to avoid wearing one side.
- Page 62 English 7 Mounting the Cutting Attachment ► Block the shaft ► Fit guard ring (3) ► Screw nut (4) counterclockwise onto shaft and ► Block the shaft tighten. ► Screw nut (4) counterclockwise onto shaft and tighten. WARNING WARNING Nuts that move too easily must be replaced. Nuts that move too easily must be replaced.
-
Page 63: Fuel
8.2.2 Engine oil WARNING If you mix the fuel yourself, use only STIHL two- Nuts that move too easily must be replaced. stroke engine oil or another high-performance engine oil classified as JASO FB, JASO FC, JASO FD, ISO-L-EGB, ISO-L-EGC or ISO-L- NOTICE EGD. -
Page 64: Fueling
STIHL MotoMix however can be stored for up to 5 years without any problems. ► Before fueling, clean the filler cap and the area ►... - Page 65 10 Fitting the Harness English The full harness is supplied together with an Shoulder strap information sheet showing how to fit it. 10.1 Fitting the harness ► Put on the harness (1) ► Adjust the strap length so that the snap hook (2) is approximately a hand's breadth below the right hip.
-
Page 66: Balancing The Machine
English 11 Balancing the Machine 10.3 Disconnecting the machine 11.1 Mowing attachments from the harness Mowing heads, grass cutting blades and brush knives and shredder blades should just touch the ground. 11.2 Circular saw blades ► Press the spring on the snap hook (1) and remove the perforated strip (2) from the hook 10.4 Putting down the machine in an... -
Page 67: Starting / Stopping The Engine
12 Starting / Stopping the Engine English 12 Starting / Stopping the 12.1.2 Control handle on drive tube Engine 12.1 Controls 12.1.1 Control handle on handlebar START 1 Throttle trigger lockout 2 Throttle trigger 3 Slide control 12.1.3 Positions of slide control 1 Throttle trigger lockout 4 STOP-0 –... - Page 68 English 12 Starting / Stopping the Engine NOTICE Do not stand or kneel on the drive tube. ► Set the choke knob (8) to: if the engine is cold for warm start – also use this position if the engine has been running but is still cold. ►...
-
Page 69: Transporting The Unit
13 Transporting the Unit English 13.2 Circular saw blades ► Open the throttle slightly. ► Warm up the engine for a short period. 12.5 If the engine does not start 12.5.1 Choke knob If you did not turn the choke knob to e quickly enough after the engine began to fire, the com‐... -
Page 70: Operating Instructions
English 14 Operating Instructions 14 Operating Instructions 14.1 During break-in period A factory-new machine should not be run at high revs (full throttle off load) for the first three tank fillings. This avoids unnecessary high loads dur‐ ing the break-in period. As all moving parts have to bed in during the break-in period, the frictional resistances in the engine are greater during this period. -
Page 71: Adjusting The Carburetor
16 Adjusting the Carburetor English ► Turn the choke knob to g. ► Press in the tab (1) and remove the filter cover (2). ► Clean away loose dirt from around the filter (3) and inside the filter cover. ► Remove and check the filter element – replace it if is dirty or damaged. -
Page 72: Spark Plug
– or sooner if the electrodes are badly eroded. Install only suppressed spark plugs of Arcing may occur if the adapter nut (1) is loose the type approved by STIHL – see "Specifica‐ or missing. Working in an easily combustible or tions". -
Page 73: Lubricating The Gearbox
Have the muffler checked by a servicing dealer 20.1 Removing the Fan Housing for contamination (carbonization). STIHL recommends that you have servicing and repair work carried out exclusively by an author‐ ized STIHL servicing dealer. 19 Lubricating the Gearbox Use STIHL gear lubricant (special accessory) for lubrication. - Page 74 English 20 Replacing the Starter Rope and Rewind Spring WARNING The rewind spring may pop out and uncoil during this operation – take care to avoid the risk of injury. ► Fit the pawl (4). ► Fit the washer (3). ►...
-
Page 75: Storing The Machine
► Tension the rewind spring. and rebalance them or take them to a servic‐ ► Install the fan housing. ing dealer – STIHL recommends the STIHL 21 Storing the Machine servicing dealer 23 Maintaining the Mowing If out of use for periods of about 30 days or lon‐... -
Page 76: Inspection And Maintenance By User
23.3 Feeding out mowing line ► Mount the mowing head on the machine. 24 Inspection and Mainte‐ STIHL TrimCut nance by User WARNING 24.1 Changing the Fuel Pickup Body Always switch off the engine to feed out line by hand –... -
Page 77: Inspections And Maintenance By Dealer
Have them checked in the event 25.1 Maintenance work of noticeable, constantly increased vibration. STIHL recommends that all maintenance and repairs be carried out by STIHL servicing dealers 25.2 Anti vibration elements 26 Maintenance and Care The following intervals apply to normal operating conditions only. -
Page 78: Minimize Wear And Avoid Damage
Metal cutting attachment Sharpen Gearbox lubrication Check Replenish Safety labels Replace STIHL recommends an authorized STIHL servicing dealer. see chapter "Inspections and Maintenance by Dealer", section "Antivibration Elements" 27 Minimize Wear and Avoid – Using the product for sports or competitive events. Damage –... -
Page 79: Main Parts
28 Main Parts English – Damage to the engine due to neglect or defi‐ 4 Throttle lever lock cient maintenance (e.g. air and fuel filters), 5 Clamping screw incorrect carburetor adjustment or inadequate cleaning of cooling air inlets (intake ports, cyl‐ 6 Perforated strip inder fins). -
Page 80: Specifications
FS 380: 7.3 kg 29 Specifications 29.5 Overall length 29.1 Engine without cutting attachment FS 300: 1765 m STIHL single-cylinder two-stroke engine FS 300 FS 350 1765 m Displacement: 30.8cm Cylinder bore: 35 mm FS 380: 1765 m Piston stroke: 32 mm Engine power to ISO 8893: 1.3 kW... -
Page 81: Maintenance And Repairs
EU type appro‐ val procedure is specified at www.stihl.com/co2 in the product-specific technical data. STIHL products must not be thrown in the gar‐ bage can. Take the product, accessories and The measured CO value was determined on a packaging to an approved disposal site for envi‐... -
Page 82: Ec Declaration Of Conformity
English 32 EC Declaration of Conformity Contact your STIHL servicing dealer for the lat‐ est information on waste disposal. 32 EC Declaration of Con‐ formity Dr. Jürgen Hoffmann ANDREAS STIHL AG & Co. KG Director Product Certification & Regulatory Badstr. 115... - Page 83 32 EC Declaration of Conformity English 0458-579-8721-B...
- Page 84 *04585798721B* 0458-579-8721-B...
Need help?
Do you have a question about the FS 300 and is the answer not in the manual?
Questions and answers