Table of Contents
Advertisement
Quick Links
Advertisement
Table of Contents

Related Manuals for Thermopatch HS11


Summary of Contents for Thermopatch HS11
- Page 1 Operator’s Manual 46580-03.12...
- Page 2 Copyright © 2011, Thermopatch, Syracuse, New York. No part of this publication may be reproduced by any means without the prior written permission of Thermopatch, Syracuse, New York. Thermopatch, Thermo-Seal, Alligator, Beaver, Cheetah, Deco-Print, Penguin, TruFlex and the Thermopatch logo are ® trademarks of...
- Page 3 Preface Welcome to the growing group of Thermopatch customers. The product you have purchased has been carefully designed and manufactured to ensure that you will gain the maximum benefit. All Thermopatch products are specifically designed to ensure ease of use with particular attention to safety requirements.
-
Page 4: Table Of Contents
Contents 1. Introduction 1.1 What Did You Receive? 1.2 Machine Specifications 1.3 Safety Information 1.4 Conditions of Warranty 1.5 Customer Service 1.6 Operating Specifications 1.7 Setting Up the Machine 2. Machine Operation 2.1 Operating Instructions 2.2 Applying a Patch or Emblem (Non-Embroidered) 2.3 Applying Embroidered Emblems 2.4 Removing a Patch or Emblem 2.5 Recommended Platens and Application... -
Page 5: Introduction
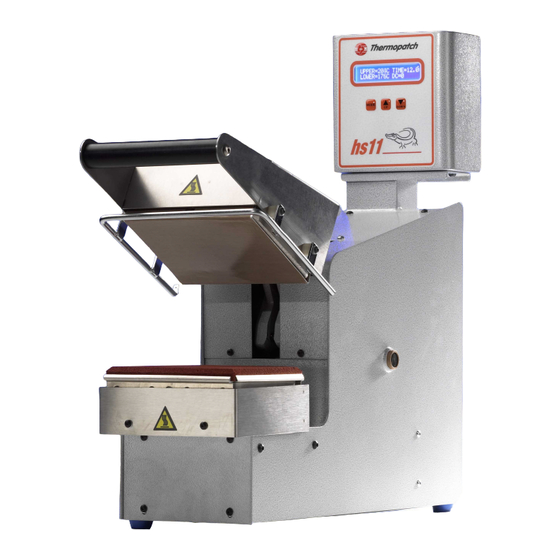
1. Introduction The HS11 is designed as a heavy-duty heat-seal machine for applying patches, emblems, hot paper transfers and identification tapes. The sealing cycle is initiated by hand, which causes the sealing head to lower. Temperature, time and sealing pressure can all be individually adjusted as required for the particular materials being sealed. -
Page 6: Safety Information
1.3 Safety Information Each HS11 is equipped with a safety-lock feature for the protection of the operator. The pneumatic sealing cycle will not start until the upper sealing plate is within 5/32” (4 mm) of the lower sealing platen. If an obstruction is met before this point, THE SAFETY LOCK FEATURE IS PRESET AND the sealing cycle will not occur. -
Page 7: Customer Service
Thermopatch markets a complete line of heat-seal and marking machines, as well as a complete line of materials and supplies. Label Print Machines – Manual, automatic and computer controlled. -
Page 8: Operating Specifications
1.6 Operating Specifications Temperature: The HS11 heat-sealing machine will require approximately 10-15 minutes for the temperature to stabilize. Check the digital readout for upper and lower platen temperatures. Time: Heat-sealing cycle time is factory set to 10.0 seconds. The sealing time can be changed as required to apply or remove a label. -
Page 9: Setting Up The Machine
1.7 Setting Up The Machine Worktable Mounting (Optional) 1. Set the machine on the worktable in the desired location. 2. Draw a pencil line on the table at the front edge of the machine, near the center. 3. Move the machine out of the way and measure back 2” (5 cm) from the pencil line. -
Page 10: Machine Operation
2. Machine Operation 2. 1 Operating Instructions 1. Turn the “Power” switch to ON. The LED on the switch will light indicating power is being supplied. 2. Adjust upper and lower sealing temperatures as needed. WARNING: THE HEATED PLATENS MAY REACH TEMPERATURES AS HIGH AS 450ºF (232ºC) DURING NORMAL OPERATION. -
Page 11: Applying Embroidered Emblems
2.3 Applying Embroidered Emblems Embroidered emblems and emblems with embroidered borders (also called Merrowed borders) are special and usually should be sealed as follows: See Section 5 “Maintenance” to remove the Teflon shield from the upper platen and to remove the sponge rubber pad from the lower platen. 1. -
Page 12: Recommended Platens And Application
(6.3) (10.6) 2.6 Start-Up Screen The HS11 heat-sealing machine is equipped with a LCD display. When machine power is switched on, the following start-up screens will show: This screen appears after the heat platens reach the default or user-set temperatures. The machine is now ready to UPPER=410F TIME 10.0... -
Page 13: Menu Screens
3. Menu Screens The default settings can be changed as required. To advance a menu screen, press the MODE key. To change the value or select an option, press the up or down key. If no button is pressed for 8 seconds, the machine will exit the menu. The following menu screens will appear in sequence: Screen 1 (Select Temperature Scale) F/C SELECT SET=F... -
Page 14: Troubleshooting
4.Troubleshooting 4.1 Touch Guard Errors TOUCH GUARD ACTIVE PRESS ANY BUTTON The touch guard has been activated by contact. Keep hands clear of touch guard and press any key to resume operation. TOUCH GUARD WIRE BROKEN-NOT FUNCTIONAL There is a fault in the touch guard wire. This prevents the machine from operating without the touch guard safety feature. -
Page 15: Problem Analysis And Solutions
4.4 Problem Analysis and Solutions Before referring to the information below, check for proper set-up and operation as outlined in Sections 2 and 3. Solutions are listed with the most probable ones listed first. Some procedures may require completion by a person with mechanical skill. -
Page 16: Maintenance
5. Maintenance Teflon/Fiberglass Shield Clean often by wiping with a soft, clean rag. A non-flammable cleaner such as “Ez-Off,” part #DH-6873, may be used according to the manufacturer’s NEVER USE A FLAMMABLE SOLVENT OR ABRASIVE CLEANER! instructions. To ensure the best heat-sealing results, regularly replace shield whenever it becomes torn or too soiled to clean. -
Page 17: Drawings And Parts Listings
6. Drawings and Parts Listing On the following pages, the reader will find technical drawings and corresponding parts listings of the HS11 Thermo-Seal machine. The technical drawing illustrating a particular sub-assembly or area of the machine will precede the parts listings. - Page 18 Electrical ...
- Page 22 Pneumatic...
- Page 25 Mechanical...
- Page 27 HS11 Parts Listing Electrical Thermostat Preset 20018-11 Thermocouple 36" 20018-14 Line Cord, 15A, 125V, IEC - CSA 20080-99 LCD/Electronics Module 46566 Wiring Harness, Machine 46570 Wire Harness, Power Entry 47281 Microswitch w/Cover D-3230-1 Pneumatic Air Regulator/Filter With Gauge 22045-91 Solenoid Valve...
- Page 28 F +1 315 445-8046 sales@thermopatch.com Thermopatch European Headquarters The Netherlands T +31 36 549 11 11 F +31 36 532 03 98 sales@thermopatch.nl Thermopatch Australia Pty Ltd Australia T +61 395325722 F +386 2 80 55 232 marktpatchaust@bigpond.com.au Thermopatch Canada Inc Canada...
Need help?
Do you have a question about the HS11 and is the answer not in the manual?
Questions and answers