Table of Contents
Advertisement
Quick Links
SERVICE
AIR CONDITIONER
DC18/24/30BTSA
DC18BTSX
DC24BTSX
DC36/42BTSX
Refer to the service manual in the GSPN(see the rear cover) for the more information.
All manuals and user guides at all-guides.com
DC36/42/48BTSA
DC30BTSX
DC48BTSX
SYSTEM AIR CONDITIONER
Basic : DC18BTVA(X)/DC24BTVA(X)/DC30BTVA(X)
DC36BTVA(X)/DC42BTVA(X)/DC48FTVA(X)
Model:DC18BTSA(X)/DC24BTSA(X)/DC30BTSA(X)
DC36BTSA(X)/DC42BTSA(X)/DC48BTSA(X)
Model Code : DC18BTSA(X)/UMG
DC24BTSA(X)/UMG
DC30BTSA(X)/UMG
DC36BTSA(X)/UMG
DC42BTSA(X)/UMG
DC48BTSA(X)/UMG
Manual
THE FEATURE OF PRODUCT
Easier Installation
:Slim Size
Convenent Control Functions
Advertisement
Table of Contents

Related Manuals for Samsung DC18BTVA


Summary of Contents for Samsung DC18BTVA
- Page 1 All manuals and user guides at all-guides.com SYSTEM AIR CONDITIONER Basic : DC18BTVA(X)/DC24BTVA(X)/DC30BTVA(X) DC36BTVA(X)/DC42BTVA(X)/DC48FTVA(X) Model:DC18BTSA(X)/DC24BTSA(X)/DC30BTSA(X) DC36BTSA(X)/DC42BTSA(X)/DC48BTSA(X) Model Code : DC18BTSA(X)/UMG DC24BTSA(X)/UMG DC30BTSA(X)/UMG DC36BTSA(X)/UMG DC42BTSA(X)/UMG DC48BTSA(X)/UMG SERVICE Manual AIR CONDITIONER THE FEATURE OF PRODUCT Easier Installation :Slim Size Convenent Control Functions ...
-
Page 2: Table Of Contents
5-1 Indoor Unit ............................5-2 Outdoor Unit ............................. 5-3 Ass’y Control Out 5-13 ..........................16. Electrical Parts List ........................17. Wiring Diagram ..........................7-1 Indoor Unit ............................7-2 Outdoor Unit ............................ 18. Schematic Diagram ........................8-1 Indoor Unit ............................Samsung Electronics... - Page 3 All manuals and user guides at all-guides.com...
-
Page 4: Precautions
An all pole disconnection from the power supply must be incorporated in the fixed wiring with a contact opening of >3mm. ● Do not extend an electric cord to the air conditioner. ● The air conditioner must be plugged in after you complete the installation. Samsung Electronics... -
Page 5: Disposing Of The Unit
● Young children or infirm persons should be always supervised when they use the air conditioner. ● Max current is measured according to IEC standard for safety. ● Current is measured according to ISO standard for energy efficiency. Samsung Electronics... -
Page 6: Product Specifications
All manuals and user guides at all-guides.com 2. Product Specifications 2-1 The Feature of Product Easier Installation :Slim Size Various Useful Functions - Wired Remote Controller - Long Piping:max.30~50m Samsung Electronics... -
Page 7: Product Specifications
1*20*1.4 2*24*1.4 2*28*1.5 mm(inch) 548(21.57) 548(21.57) 638(25.12) Dimension mm(inch) 720(28.35) 790(31.10) 880(34.65) mm(inch) 265(10.43) 280(11.0) 310(12.2) Weight Liquid mm(inch) 6.35(1/4”) 6.35(1/4”) 9.52(3/8”) Pipe O.D Size mm(inch) 12.7(1/2”) 15.88(5/8”) 15.88(5/8”) Piping Connection Method Flare Height Between Pipe Length m Samsung Electronics... - Page 8 2*42*1.5 2*52*1.5 2*52*1.5 mm(inch) 931(36.65) 931(36.65) 1128(44.41) Dimension mm(inch) 880(34.65) 880(34.65) 932(36.7) mm(inch) 320(12.2) 320(12.2) 375(14.76) Weight Liquid mm(inch) 9.52(3/8”) 9.52(3/8”) 9.52(3/8”) Pipe O.D Size mm(inch) 15.88(5/8”) 19.05(3/4”) 19.05(3/4”) Piping Connection Method Flare Height Between Pipe Length m Samsung Electronics...
-
Page 9: The Comparative Specifications Of Product
Design Outdoor Unit Indoor Unit 32.0kg 31.0kg Net Weight Outdoor Unit 39.0kg 39.0kg 260*1150*480 Indoor Unit 1100*199*600 Outer Dimension (W x H x D) 548*720*265 Outdoor Unit 548*720*280 Indoor Unit 41dB↓ 43dB↓ Noise Level Outdoor Unit 60dB↓ 61dB↓ Samsung Electronics... -
Page 10: Accessory And Option Specifications
Descriptions Code-No. Q'TY Remark Owner's Manual DB98-28323A Installation Manual DB98-28322A DB62-03440H Insulation DB62-03439H Insu Pipe Joint Out DB62-03439J DB72-00143D Insu Pipe Joint In DB72-00143E Ass'y Holder Drain Pipe DB90-02064A Ass'y Drain Hose Joint DB94-00758A DB97-06421A Wired Remote Controller Samsung Electronics... -
Page 11: Alignment And Adjustments
Push the button to set the display panel to . Every time you push the button, the display panel reads . . . repeatedly. Samsung Electronics... - Page 12 If all lamps of indoor unit are flickering, Plug out, plug in power plug again and press ON/OFF key to retry. If the unit is not working properly or all lamps are continuously flickering after setting the option code, see if the correct option code is set up for its model. Samsung Electronics...
- Page 13 All manuals and user guides at all-guides.com Operating Instructions and Installation Alignment and Adjustments OPTION ITEMS REMOCON SEG1 SEG2 SEG3 SEG4 SEG5 SEG6 SEG7 SEG8 SEG9 SEG10 SEG11 SEG12 MODEL DC18BTS DC24BTS DC30BTS DC36BTS DC42BTS DC48BTS Samsung Electronics...
-
Page 14: Disassembly And Reassembly
Blower & Motor screws, detach Ass'y Cabi Bottom Blower. 2) Detach from Ass'y Control In the capacitor connection wire between the Motor Fan and housing connector. 3) After disassembling 2 places indicating screws, detach the 2 Fan Case. Samsung Electronics... - Page 15 Remark 4) After disassembling 2 places indicating screws, detach Fan Motor and Blower from the set. 1) After disassembling 1 Indicating screw, Control In detach the Cover control. 2) Detach the Motor-Fan and Sensor Connector from the PCB. Samsung Electronics...
- Page 16 Parts Procedure Remark 3) Disassemble 4 indicating screws and detach Control In from the set. Drain Pan Work is possible when Disassembling the Ass'y Cabi Bottom Blower. 1) Disassemble 7 indicating screws and detach Ass'y Cabi Bottom Drain. Samsung Electronics...
- Page 17 Remark 2) Disassemble 4 indicating screws and detach the Drain Pan. (2 screws each at left and right side) Work is possible when Disassembling the Evap Ass'y Drain Pan. 1) Disassemble 5 indicating screws to detach Cover Pipe. Samsung Electronics...
- Page 18 Parts Procedure Remark 2) Disassemble Sensor on the Evap. 3) Disassemble 4 indicating screws which are in the near of Hanger Plate to detach the Evap. (2 screws each at left and right side) It needs 2 peoples. Samsung Electronics...
-
Page 19: Outdoor Unit
1) Loosen 1 fixing screw of the Cover-Control and detach the Cover Control. 2) Loosen fixing screws and detach the Cabinet-Upper. 3) Loosen 1 screw fixed to assemble Control Box with Cabinet-Side RH. 4) Loosen 6 fixing screws and detach the Cabinet-Side RH. Samsung Electronics... - Page 20 Motor screw is left-handed.) 2) Detach the Fan Propeller. 3) Loosen 4 fixing screws to detach the Motor. 4) Disconnect the wire between Ass’y Control Out and Motor. 5) Loosen 5 fixing screws and detach the Bracket Motor. Samsung Electronics...
- Page 21 4) Detach the Heat Exchanger. Compressor 1) Loosen the fixing nut and detach the Compressor Lead Wire. 2) Disassemble the Felt Comp Sound. 3) Loosen the 3 bolts at the bottom of Compressor like the picture on the right side. Samsung Electronics...
- Page 22 Cabinet-Side edge and a fixing screw on the Cabinet-Front lower to detach the Cabinet-Front. 3) Loosen the fixing screws of the Ass’y-Control out. 4) Loosen the fixing screws of the Cabinet-Side RH. 5) Loosen the fixing screws of the Cabinet-Side LF. Samsung Electronics...
- Page 23 Motor. Heat Exchanger 1) Loosen 3 fixing screws of the Bar Steel. 2) Loosen 2 fixing screws on both sides. 3) Disassemble the pipe in both inlet and outlet with welding torch. 4) Detach the Heat Exchanger. 4-10 Samsung Electronics...
- Page 24 Front RH and attach the Cabinet Front RH. 3) Loosen 6 fixing screws (CCW) of the Cabinet Back Rh and attach the Cabinet Back RH. 4) Loosen 2 fixing screws (CCW) of the Bracket Wire and attached the Bracket Wire. Samsung Electronics 4-11...
- Page 25 2) Detach the Fan Propeller. 3) Loosen 4 fixing screws(CCW) to detach the Motor 4) Disconnect the wire between Ass’y Control Out and Motor. 5) Loosen 2 fixing screws (CCW) and detach the Bracket Motor 4-12 Samsung Electronics...
- Page 26 Compressor 1) detach the Compressor Lead Wire. (Push and pull up the Button) 2) Disassemble the Felt Comp Sound 3) Loosen the 4 bolts (CCW) at the bottom of Compressor like the picture on the right side. Samsung Electronics 4-13...
- Page 27 All manuals and user guides at all-guides.com Operating Instructions and Installation DC48BTSX 4-14 Samsung Electronics...
- Page 28 All manuals and user guides at all-guides.com Operating Instructions and Installation Samsung Electronics 4-15...
-
Page 29: Exploded Views And Parts List
All manuals and user guides at all-guides.com 5. Exploded Views and Parts List 5-1 Indoor Unit DC18/24/30/36/42/48BTSA �� �� Samsung Electronics... - Page 30 DB61-02287A CASE PCB 15-3 DB26-00080A TRANS POWER ASSY 2301-001370 C-FILM ASSY 15-4 2301-001368 C-FILM ASSY 2301-001367 C-FILM ASSY 15-5 DB95-01110B TERMINAL BLOCK ASSY 15-6 DB95-01110C TERMINAL BLOCK ASSY 15-7 DB61-00250A HOLDER WIRE ASSY 15-8 DB93-05074A ASSY PCB ASSY Samsung Electronics...
- Page 31 DB90-01992A ASSY CASE CONTROL ASSY 15-2 DB61-02287A CASE PCB 15-3 DB26-00080A TRANS POWER ASSY 15-4 2301-001381 C-FILM ASSY 15-5 DB95-01110B TERMINAL BLOCK ASSY 15-6 DB95-01110C TERMINAL BLOCK ASSY 15-7 DB61-00250A HOLDER WIRE ASSY 15-8 DB93-05074A ASSY PCB ASSY Samsung Electronics...
- Page 32 All manuals and user guides at all-guides.com Exploded Views and Parts List MEMO Samsung Electronics...
-
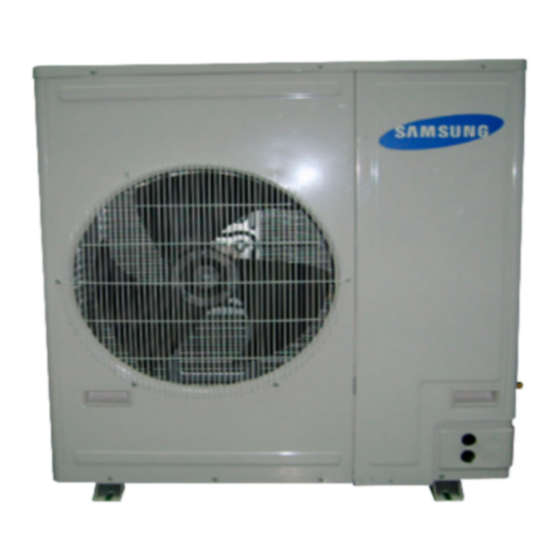
Page 33: Outdoor Unit
All manuals and user guides at all-guides.com 5-2 Outdoor Unit DC18/24BTSX Samsung Electronics... - Page 34 55A240ITBEN COMP ASSY DB96-03888K ASSY COND UNIT ASSY DB96-08763A ASSY TUBE CAPILLARY ASSY DB96-09219A ASSY TUBE CAPILLARY ASSY DB96-07794B ASSY TUBE DISCHARGE ASSY DB96-08772A ASSY TUBE DISCHARGE ASSY DB96-07793A ASSY TUBE SUCTION ASSY DB96-08771A ASSY TUBE SUCTION ASSY Samsung Electronics...
- Page 35 All manuals and user guides at all-guides.com Exploded Views and Parts List DC30BTSX 12-1 12-2 12-3 Samsung Electronics...
- Page 36 DC24BTVX/UMG,SSEC DB96-05950A DB96-05950A ASSY COND-BEND ASSY COND-BEND DC24BTVX/UMG,SSEC DC24BTVX/UMG,SSEC DB90-10616G DB90-10616G ASSY CABI-UP ASSY CABI-UP APE2468,CHINA(ALL) APE2468,CHINA(ALL) DB63-00692A GUARD COND-(PAINT) W1-PJT,SECC-P,T=1.6,SC-90073T,SSEC DB64-00798A CABINET-SIDE RH PAINT W1-PJT,SECC-P,T=0.8,SC-90073T,SSEC DB90-40176B DB90-40176B ASSY COVER-CONTROL AS-126-/1210 ASSY COVER-CONTROL AS-126-/1210 DB61-00821B GUIDE-SCREEN AP-L1540,P.E.H 100%,T2.5,1025,600,BLK Samsung Electronics...
- Page 37 All manuals and user guides at all-guides.com Exploded Views and Parts List DC36-42BTSX Samsung Electronics...
- Page 38 Guard Fan ASSY DB70-00163A Plate Cond ASSY DB96-08378A Assy Tube Discharge ASSY DB96-08191A Assy Tube Discharge ASSY DB96-08379A Assy Tube Suction ASSY DB96-08192A Assy Tube Suction ASSY DB96-06108A Assy Capillary ASSY DB96-08194A Assy Capillary ASSY DB64-01231A Handle Samsung Electronics 5-10...
- Page 39 All manuals and user guides at all-guides.com Operating Instructions and Installation DC48BTSX 5-11 Samsung Electronics...
-
Page 40: Assy Control Out
Assy Tube Suction ASSY DB63-00691A Guard Fan ASSY DB70-00163A Plate Cond SGCC-M DB93-04036A Assy Control Out ASSY DB90-01539B Assy Bracket Motor ASSY DB90-01637B Assy Cabi Back Rh ASSY DB97-02613A Assy Bracket Valve ASSY DB61-01910A Bracket Wire ASSY DB64-01231A Handle Samsung Electronics 5-12... - Page 41 All manuals and user guides at all-guides.com (DC18/24/30BTSX) (DB18BTSA) (DC18/24BTSA) 2301-001369 (DC30BTSA) 2301-002368...
- Page 42 All manuals and user guides at all-guides.com Model: A:DC36BTSA B:DC42BTSA C: DC48BTSA DB26-00080A 2301-001367 (DC36BTSA) (DC42/48BTSA) 2301-001381...
- Page 43 All manuals and user guides at all-guides.com...
- Page 44 All manuals and user guides at all-guides.com...
- Page 45 All manuals and user guides at all-guides.com...
- Page 46 All manuals and user guides at all-guides.com DC18BTSX DC24BTSX DC30BTSX DC36BTSX DC42BTSX DC48BTSX...
- Page 47 All manuals and user guides at all-guides.com...
- Page 48 All manuals and user guides at all-guides.com...
- Page 49 All manuals and user guides at all-guides.com Model “A” Max.Length Max.Height 15g/m 30mm 15mm DC18BTSX 15g/m 30mm 15mm DC24BTSX 35g/m 30mm 15mm DC30BTSX 20g/m 50mm 30mm DC36BTSX 50mm 30mm 20g/m DC42BTSX 35g/m 50mm 30mm DC48BTSX...
- Page 50 All manuals and user guides at all-guides.com MEMO Samsung Electronics...
- Page 51 All manuals and user guides at all-guides.com...
- Page 52 All manuals and user guides at all-guides.com...
- Page 53 All manuals and user guides at all-guides.com...
- Page 54 All manuals and user guides at all-guides.com Wash...
- Page 55 All manuals and user guides at all-guides.com Error of wireless remote communication with indoor PBA...
-
Page 56: Indoor Unit
(open / short) Error of heat exchanger sensor in the indoor unit EEPROM option error Flickering X Off If you turn off the air conditioner when the LED is flickering, the LED is also turned off. Samsung Electronics 12-2... - Page 57 All manuals and user guides at all-guides.com...
- Page 58 All manuals and user guides at all-guides.com...
- Page 59 All manuals and user guides at all-guides.com...
- Page 60 All manuals and user guides at all-guides.com...
- Page 61 All manuals and user guides at all-guides.com...
- Page 62 All manuals and user guides at all-guides.com...
- Page 63 All manuals and user guides at all-guides.com...
- Page 64 All manuals and user guides at all-guides.com...
- Page 65 All manuals and user guides at all-guides.com...
- Page 66 5. When you have finished, insert the filter into the unit. 6. Clean the outdoor unit with a vacuum cleaner or a brush once a month. Note : • After cleaning the air conditioner, press the Filter Reset button. Samsung Electronics 14-6...
- Page 67 All manuals and user guides at all-guides.com...
- Page 68 All manuals and user guides at all-guides.com...
- Page 69 All manuals and user guides at all-guides.com...
- Page 70 All manuals and user guides at all-guides.com...
- Page 71 Mideast & Africa http://mea.samsungportal.com © Samsung Electronics Co., Ltd.Dec 2007. This Service Manual is a property of Samsung Electronics Co., Ltd. Any unauthorized use of Manual can be punished under applicable Printed in China. International and/or domestic law. Code No. DB98-29195A(1)
Need help?
Do you have a question about the DC18BTVA and is the answer not in the manual?
Questions and answers