
Subscribe to Our Youtube Channel
Related Manuals for Canon IMAGE FORMULA DR-7550C


Summary of Contents for Canon IMAGE FORMULA DR-7550C
- Page 1 Reference Guide DR-9050C/DR-7550C DR-6050C Please read this manual before using the scanner. After you finish reading this manual, keep it in a safe place for future reference.
- Page 2 In consideration of the right to use the SOFTWARE, you agree to abide by the terms and conditions of this Agreement. 1. GRANT OF LICENSE: Canon grants you the personal, non- exclusive right to use the SOFTWARE only on a single computer.
- Page 3 NO AMENDMENT TO THIS AGREEMENT SHALL BE EFFECTIVE UNLESS SIGNED BY A DULY AUTHORIZED REPRESENTATIVE OF CANON. Should you have any questions concerning this Agreement, or if you desire to contact Canon for any reason, please write to Canon’s local affiliate.
- Page 4 If such changes or modifications should be made, you could be required to stop operation of the equipment. Canon U.S.A. Inc. One Canon Plaza, Lake Success NY 11042, U.S.A. Tel. No. (516)328-5000 RADIO INTERFERENCE REGULATIONS (For 120 V models)
- Page 5 DR-9050C: Model M11068 Trademarks • Canon and the Canon logo are registered trademarks of Canon Inc. in the United States and may also be trademarks or registered trademarks in other countries. • imageFORMULA is a trademark of Canon Electronics Inc.
-
Page 6: Manuals For The Scanner
Preface Thank you for purchasing the Canon imageFORMULA DR-6050C/DR-7550C/DR-9050C Document Scanner. Please read this and the following manuals thoroughly before using the scanner to become acquainted with its capabilities and make the most of its many functions. After reading the manuals, store them in a safe place for future reference. -
Page 7: Symbols Used In This Manual
WARNING Indicates a warning concerning operations that may lead to death or injury to persons if not performed correctly. To use the scanner safely, always pay attention to these warnings. CAUTION Indicates a caution concerning operations that may lead to injury to persons, or damage to property if not performed correctly. -
Page 8: Table Of Contents
Preface... v Manuals for the Scanner ...v Symbols Used in This Manual ... vi How This Manual is Organized... vi Chapter 1 Before You Start Using the Scanner 1. Important Safety Instructions ... 2 Installation Location... 2 Power ... 2 Moving the Scanner... - Page 9 Chapter 1 Before You Start Using the Scanner 1. Important Safety Instructions ... 2 Installation Location ...2 Power ...2 Moving the Scanner ...3 Handling ...3 Disposal ...5 2. Features... 6 3. Names and Functions of Parts... 10 Front View, Feeder Inlet, and Eject Outlet ...10 Rear View...11...
-
Page 10: Important Safety Instructions
Important Safety Instructions To ensure the safe operation of this scanner, be sure to read the safety warnings and precautions described below. Installation Location The performance of this scanner is affected by the environment in which it is installed. Make sure that the location where the scanner is installed meets the following environmental requirements. -
Page 11: Moving The Scanner
● If you have any questions regarding the power supply, contact your local authorized Canon dealer or service representative for further information. Moving the Scanner ● The scanner weights about 50 lbs (22.5 kg). - Page 12 OFF, and disconnect the power plug from the power outlet. Then, contact your local authorized Canon dealer or service representative to have the unit serviced. ■ Do not locate the scanner in a humid or dusty location.
-
Page 13: Disposal
■ Do not wear loose clothing or jewelry that may get caught in the scanner while you are using it. This may result in personal injury. Be extra careful of neckties and long hair. If anything becomes caught in the scanner, immediately disconnect the power cord to stop the scanner. -
Page 14: Features
* Advanced Text Enhancement can clarify scanned text by processing background or foreground colors. ● Fast Document Feeding The scanner can scan up to 90 document sheets per minute of LTR/A4-size paper in black and white, grayscale, and color scanning modes. (For the DR-... - Page 15 The scanner stops feeding when a double feed is detected by comparing document lengths. * Using the length of the first document page as a reference, the scanner detects a double feed when a page of a different length is fed. ● Prescan...
- Page 16 Image with Binding Holes Image without Binding Holes ● Skip Blank Page The scanner scans both sides of a document and skips saving the image of any side it determines to be a blank page. Two-Sided Documents...
- Page 17 Other Functions ● Rapid Recovery System When this function is activated and a sensor detects a misfeed due to a paper jam or double feed, which causes feeding to stop, scanning pauses to allow you to correct the cause of the misfeed, after which scanning continues from the document page on which the abnormality was detected.
-
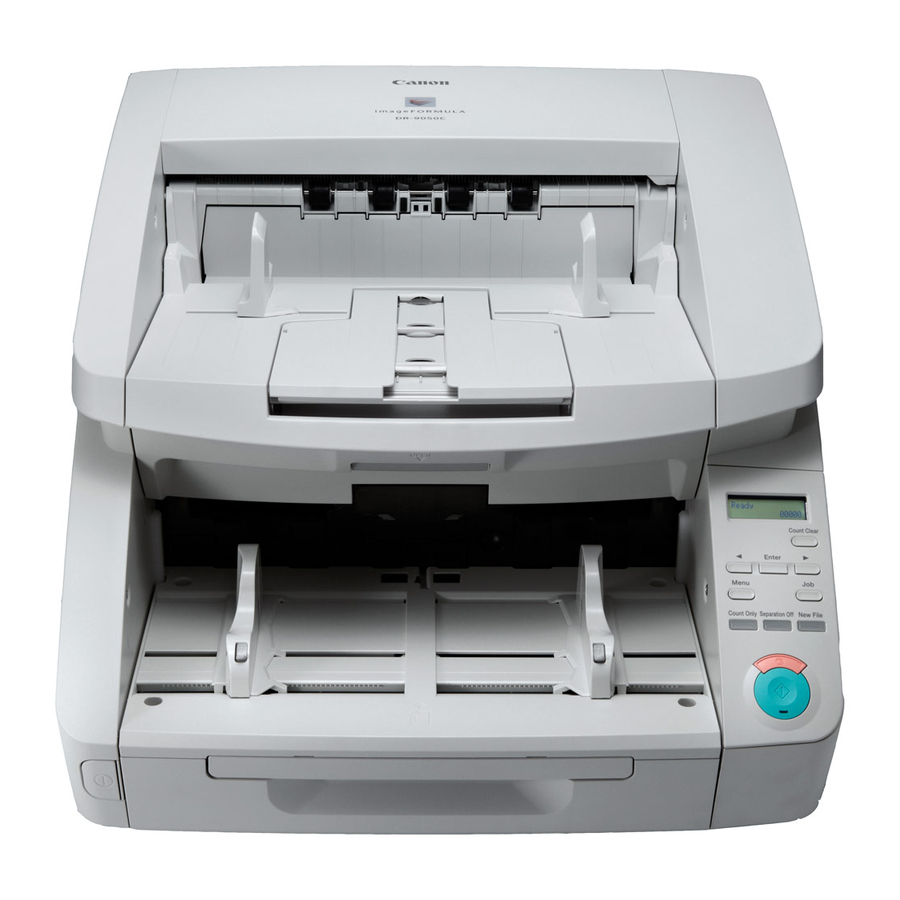
Page 18: Names And Functions Of Parts
Scanned documents are output here. d Control Panel (See p. 12.) e Power Switch Turns the scanner ON and OFF. f Document Eject Tray Extension Open the Document Eject Tray Extension when documents look like they are going to fall off of the eject tray. -
Page 19: Rear View
SCSI Connector (50-pin half-pitch D-sub receptacle) Connect the SCSI cable here. e DIP Switches (SCSI ID) Selects the scanner’s SCSI ID. CAUTION Do not block the ventilation holes. Doing so could cause the scanner to overheat, creating a fire hazard. -
Page 20: Control Panel
Control Panel a Display Panel Displays the user mode, job info, messages, and counter. b Count Clear Key Clears the counter on the display panel. c Enter Key Selects the user mode, and accepts settings. Keys Selects the user mode and job. e Menu Key Displays the user mode. -
Page 21: Chapter 2 Basic Operation
Chapter 2 Basic Operation 1. Turning the Power ON and OFF ... 14 About the Power Switch ...14 2. Documents... 15 Acceptable Documents ...15 3. Document Feed and Eject Trays ... 18 Preparing the Document Feed Tray...18 Adjusting the Document Guides...20 Preparing the Document Eject Tray ...22 4. -
Page 22: Turning The Power On And Off
• After turning the scanner OFF, wait at least ten seconds before turning it back ON. • If the scanner is connected via SCSI cable, always turn the scanner ON before turning the computer ON. If you turn the computer ON before the scanner, it may not recognize the scanner properly. -
Page 23: Documents
Documents The scanner can scan documents ranging in size from business cards and checks to 11" × 17"/A3 size. The size and type of paper that can be fed depends on the feeding method. Acceptable Documents The scanner can feed the following document sizes. - Page 24 • Note that scanning the following types of documents can cause a paper jam or malfunction. To scan such a document, make a photocopy of the document and then scan the photocopy. Wrinkled or creased Carbon paper documents Curled documents Coated paper Extremely thin, Torn documents...
- Page 25 Confirm your settings. [ON2]: When the [Auto Detection] or [Scanner’s Maximum] page size setting is selected, document page lengths up to 118.11" (3 m) can be detected. [ON1]: When the [Auto Detection] or [Scanner’s Maximum] page size setting is selected, document page lengths up to 39.37"...
-
Page 26: Document Feed And Eject Trays
Document Feed and Eject Trays Before scanning, prepare the Document Feed and Eject Trays for the desired paper size. Preparing the Document Feed Tray ■ Document Feed Tray The height of the Document Feed Tray can be adjusted according to the number of document pages to be loaded (the default setting is the lowest position). - Page 27 Press [Enter]. Enter Key The current setting is indicated by blinking square brackets [ ]. Press the [ ] or [ ] key to select [0], [1] or [2]. Press [Enter] to accept the selection. The Document Feed Tray moves to the selected height. Press the Stop key to exit the User Mode.
-
Page 28: Adjusting The Document Guides
Gently open the extension wire. Hint Use the extension wire if the document extends beyond the edge of the document tray. Adjusting the Document Guides The document guides normally extend at equal distances from the left and right of the center of feeding so that your documents are centered in the feed inlet. - Page 29 Lock the right document guide (a), and unlock the left document guide (b). Slide the left document guide to the left edge of your documents. ■ Resetting the Document Guides To reset the guides so that they are equidistant from the center, perform the following procedure to spread the guides to the left and right as far as they will go.
-
Page 30: Preparing The Document Eject Tray
Unlock the left document guide. Preparing the Document Eject Tray The Eject Tray includes two Document Eject Guides, the Eject Tray Extension and Eject Paper Stopper, to be adjusted to fit the width and length of your documents. ■ Document Guides Slide the document eject guides to fit the width of your documents. -
Page 31: Document Feeding Methods
Document Feeding Methods Two document feeding methods are available: Continuous Feeding, which feeds documents automatically from the document tray by the pickup roller; and Manual Feeding, which requires one document at a time to be positioned manually for transport by the feed roller, while the pickup roller is disabled. - Page 32 User Mode, make sure to disable it (set to OFF) when finished scanning. Otherwise, normal continuous feeding will be disabled the next time someone uses the scanner. Hint For Manual Feeding, you must feed document one page at a time.
- Page 33 Press [Enter]. Enter Key The current setting is indicated by blinking square brackets [ ]. Press the [ ] or [ ] key to select [ON] or [OFF], and press [Enter] to accept the selection. Press the Stop key to exit the User Mode.
-
Page 34: Scanning
Scanning operations can be controlled by a scanning application program such as the CapturePerfect 3.0 software included with the scanner, or directly from the control panel of the DR-6050C/7550C/9050C, using the Job Function. This section describes the Job Function and provides an overview of CapturePerfect 3.0. -
Page 35: Captureperfect 3.0
CapturePerfect 3.0 CapturePerfect 3.0 is an ISIS-compatible application developed for Canon document scanners. CapturePerfect 3.0 includes the following modes. Select the desired scan mode from the Scan menu to perform scanning. For more information on CapturePerfect 3.0, refer to the CapturePerfect 3.0 Operation Guide. -
Page 36: Using Captureperfect
[Pictures]. Scan To Presentation This mode is convenient when a compact scanner is used in an environment such as a conference hall, where it is connected to a large display or projector. By setting CapturePerfect for full-screen display before scanning, scanned images are displayed at full size on the screen. - Page 37 Select [CANON DR-XXXX] and click [Settings]. (XXXX varies depending on the model you are using) IMPORTANT If [CANON DR-XXXX] is not displayed in the list of scanners, you must re-install the ISIS/TWAIN driver. Select the default page size and click [OK].
- Page 38 • If a Feed Option other than [Standard Feeding] or [Manual Feeding] is selected, once you have started scanning, each document placed in the Document Feed Tray is scanned, and when no document is loaded, the scanner enters the standby state.
- Page 39 • If the [Automatic Feeding] Feed Option is enabled, scanning is performed automatically whenever a sensor in the Document Feed Tray detects a loaded document, and pressing the Stop key causes the Continue Scanning dialog box to appear. • If the [Panel-Feeding] Feed Option is enabled, the Start key lamp is lit.
-
Page 40: Clearing A Paper Jam Or Double Feed Error
• When removing jammed paper, take care not to cut your hands on the edges of the paper. • Make sure to remove all of the jammed paper. Torn paper remaining in the scanner may cause future jams or damage to the scanner. -
Page 41: Handling A Double Feed
Check to verify the last saved image, and resume scanning. ■ When “Press Start Key” Appears When the Rapid Recovery System is enabled in the ISIS/ TWAIN driver settings, the following message appears on the display panel after you remove the jammed paper. IMPORTANT The Rapid Recovery System setting in the ISIS/TWAIN driver causes the following process to occur after a paper jam. - Page 42 IMPORTANT When a double feed is detected, the following process occurs, and messages appear according to the Rapid Recovery System setting in the ISIS/TWAIN driver. • When the Rapid Recovery System is disabled, images scanned before the double feed are saved as files, scanning finishes, and the following error message is displayed.
-
Page 43: Chapter 3 Maintenance
Chapter 3 Maintenance 1. Regular Maintenance... 36 Cleaning the Scanner... 36 Cleaning the Sensors... 36 Cleaning the Scanning Glass and Rollers...37 Power Outlet ...38 2. Replacing the Transport Rollers ... 39 Roller Replacement Cycle...39 Checking and Resetting the Page Counter...39... -
Page 44: Regular Maintenance
• Do not use spray cleaners to clean the scanner. Precision mechanisms may get wet and malfunction. • Never use paint thinner, alcohol, or other organic solvents to clean the scanner. Such solvents may deform or discolor the exterior of the scanner, and cause other damage. -
Page 45: Cleaning The Scanning Glass And Rollers
Scratches on the scanning glass may cause spots or streaks on scanned images, as well as feeding errors. If you find a scratch on the scanning glass, contact your local authorized Canon dealer or service representative to have the glass replaced. -
Page 46: Power Outlet
Wipe the rollers using a moistened and firmly wrung- out cloth while rotating the rollers. The rollers are located at the positions indicated in the figure below. Pickup Roller Feed Roller Transport Roller Retard Roller Remove the Pickup Roller, Feed Roller, and Retard Roller. -
Page 47: Replacing The Transport Rollers
(See “Checking and Resetting the Page Counter” on p. 39.) ■ Roller Replacement Kit The Roller Replacement Kit consists of replacement pickup, feed, and retard rollers. For details, contact your local authorized Canon dealer or service representative. Product Name: Roller Replacement Kit Product Code: 4009B001 Pickup Roller... - Page 48 Press the Menu key on the control panel to activate the User Mode. Menu Key Press the [ ] key twice to display [Roller Counter]. Check the number of pages fed by the rollers, and press [Enter]. Enter Key The counter reset mode is activated. Press the [ ] key to select [RESET], and press [Enter].
-
Page 49: Removing And Reinstalling The Rollers
Removing and Reinstalling the Rollers Follow the procedure shown below to remove and reinstall the rollers when you need to clean or replace the Pickup, Feed, or Retard Rollers. CAUTION • Turn OFF the power switch, and disconnect the power plug from the power outlet when you remove or reinstall the rollers. - Page 50 Open the roller holder, and insert the new pickup roller. IMPORTANT Install the Pickup Roller so that side with the gear is on the left. Gear Close the roller cover. Check that it makes a latching sound and that it is securely returned to its original position.
- Page 51 Slide the feed roller to the right, and then pull them towards you. Remove the feed roller. Place the new feed roller on the pin. Put the feed roller in place (a), and align the notch in the roller’s axle with the shaft on the scanner (b).
- Page 52 Push the roller lock lever up to lock the feed roller. Close the roller cover. Check that it makes a latching sound and that it is securely returned to its original position. IMPORTANT Failure to firmly close the roller cover may cause a feed error. Always be sure to check that the roller cover is closed.
- Page 53 Push the roller lock lever up (a) and move it to the left (b) to unlock the roller. Remove the retard roller. Set the retard roller into place in the scanner. Align the notches in the roller with the shaft pins in the scanner, then slide the roller lock lever in the direction indicated by the arrow.
- Page 54 (b). CAUTION Make sure that the hook is completely latched and the roller cover is not loose. If the roller cover is loose, the Document Feed Tray will catch on it causing the scanner to malfunction.
-
Page 55: Chapter 4 Practical Examples
Chapter 4 Practical Examples 1. Messages... 48 2. Troubleshooting ... 51 Status Display ...48 Error Messages...49 Trouble Categories...51 Problem and Solution... 51... -
Page 56: Messages
Messages There are two types of display panel messages: “status indicator messages” and “error messages” that appear when the scanner encounters a problem. Status Display The following messages appear on the display panel to indicate the scanner’s operating state: ■ Counting... -
Page 57: Error Messages
Problem: Internal scanner error. Solution: Turn the power OFF, and restart the scanner. If this does not solve the problem, make a note of the error code, and contact your Canon service representative. ■ Skew Detected Error Code: J018 Problem: A skewed document page contacted the wall of the transport path. -
Page 58: Double Feed
■ Tray Error Error Code: E021 Problem: An error has occurred with the Document Feed Tray. Solution: Turn the power OFF, and restart the scanner. ■ Count Mismatch Error Code: U001 Problem: The specified count has not yet been reached. -
Page 59: Troubleshooting
Troubleshooting This section describes the problems that may occur during use of the scanner and how to solve them. Trouble Categories The following trouble categories are addressed: • The Scanner Does Not Turn ON (See p. 51) • The Scanner Is Not Recognized (Connecting via USB) (See p. -
Page 60: Scanning Is Not Performed
Job Registration Tool. IMPORTANT • If the scanner does not operate because of a system error, turn the scanner OFF and wait at least 10 seconds before turning it back ON. If errors continue to occur, reboot the scanner and computer. - Page 61 • Replacement rollers can be purchased as consumables. If performance is not improved after cleaning the rollers, contact your local Canon dealer or service representative to purchase a Roller Replacement Kit, and replace the rollers (pickup, feed and retard rollers). (See “Replacing the Transport Rollers” on p.
- Page 62 If lines still appear on the image even after you clean the scanning glass and rollers, the scanning glass inside the scanner may be scratched. Contact your local authorized Canon dealer or service representative. Problem The scanned image is abnormal for certain documents. Cause...
- Page 63 Chapter 5 Appendix 1. Specifications... 56 Unit Specifications...56 Consumables ...57 External Dimensions ...58 2. Index ... 59...
-
Page 64: Chapter 5 Appendix 1. Specifications
Specifications Unit Specifications Type Desktop sheet-fed scanner Scannable Document Requirements Width: 2" to 12.01" (50.8 mm to 305 mm) Length: 2.76" to 17.01" (70 mm to 432 mm) Weight: Continuous Feeding: 14 lb to 56 lb bond (52 g/m to 209 g/m ) (0.06 mm to 0.25 mm) -
Page 65: Consumables
If this happens, replace the rollers, regardless of the page count. • For information about the roller replacement kit, contact your local authorized Canon dealer or service representative. Ink Cartridge: Blue (Product Code: 3693A002) This blue ink cartridge is used by the imprinter. -
Page 66: External Dimensions
External Dimensions 20.91" (531 mm) 23.62" (600 mm) 28.27" (718 mm) -
Page 67: Index
Job Function ...26 Long Document Mode ... 16 Maintenance ... 36 Manuals ... v Messages ... 48 Moving the Scanner ... 3 Paper Jams ... 32 Part Names and Functions ... 10 Power ... 2 turning ON/OFF ... 14 Power Switch ... 14 Preface ... - Page 68 CANON ELECTRONICS INC. 1248, SHIMOKAGEMORI, CHICHIBU-SHI, SAITAMA 369-1892, JAPAN CANON U.S.A. INC. ONE CANON PLAZA, LAKE SUCCESS, N.Y. 11042, U.S.A. CANON CANADA INC. 6390 DIXIE ROAD, MISSISSAUGA, ONTARIO L5T 1P7, CANADA CANON EUROPA N.V. BOVENKERKERWEG 59-61, P.O.BOX 2262, 1180 EG AMSTELVEEN, THE NETHERLANDS CANON LATIN AMERICA, INC.
Need help?
Do you have a question about the IMAGE FORMULA DR-7550C and is the answer not in the manual?
Questions and answers