Advertisement
Available languages
Available languages
Quick Links
(D) Bedienungsanleitung
Digitales Nachtsicht-Nachsatzgerät
LW-510 (per Bajonett abnehmbar)
Art.-Nr. 32156
Bitte lesen Sie diese Bedienungsanleitung vor der In-
betriebnahme komplett und aufmerksam und bewah-
ren Sie sie für späteres Nachlesen bzw. Weitergabe
des Nachtsichgerätes an andere Personen auf.
1
Advertisement

Summary of Contents for Berger & Schroter LW-510
- Page 1 (D) Bedienungsanleitung Digitales Nachtsicht-Nachsatzgerät LW-510 (per Bajonett abnehmbar) Art.-Nr. 32156 Bitte lesen Sie diese Bedienungsanleitung vor der In- betriebnahme komplett und aufmerksam und bewah- ren Sie sie für späteres Nachlesen bzw. Weitergabe des Nachtsichgerätes an andere Personen auf.
- Page 2 Sicherheitshinweise 1. Schauen Sie nicht direkt in das IR-Infrarotlicht. 2. Richten Sie das Infrarotlicht beim einschalten nicht auf brennbare Gegenstände, da diese sonst Feuer fangen können. Schalten Sie das Infrarotlicht nach dem Gebrauch aus oder schalten Sie es in den Ruhemodus.
- Page 3 Gerätebeschreibung Langes Drücken: Aufnehmen/Aufnahme stoppen Kurzes Drücken: OK Kurzes Drücken: zoom Langes Drücken: und Vergrößerung IR Modus Ein/Aus Kurzes Drücken: IR Modus einstellen Kurzes Drücken: Menü öffnen Kurzes Drücken: Menü schließen Ein-/Aus Schalter Kurzes Drücken: Zoom –, Verkleinerung, Langes Drücken: Wifi Ein/Aus TF-Karte HDMI-Anschluss...
- Page 4 Installation: 1. Batterie: Benutzen Sie die wiederaufladbare Lithium Batterie 3,7V, 18650, 3200 mAh. Schrauben Sie den Deckel des Batterie- fachs auf und legen Sie die Batterie mit dem Pluspol zuerst ein. Achtung: Batterieentladeschutz: vor dem Einlegen die Klebefolie am Batteriepol entfernen! Schrauben Sie nun das Batteriefach wieder zu.
- Page 5 4. IR-Infrarotmodus: Schalten Sie das Gerät ein und wechseln Sie in den Schwarz/Weiß- Modus indem Sie die IR-Taste lange gedrückt halten. Sie können den Modus (IR1-3) wechseln oder wieder ausschalten, wenn Sie die IR- Taste kurz drücken (Das Symbol oben rechts im Bildschirm zeigt die IR-Stufe, und ändert sich mit der Einstellung).
- Page 6 5. Autorecord: Gehen Sie in das Untermenü „Auto Record“ und drücken Sie „OK“. Wählen Sie mit den Pfeiltasten An, Aus“ aus. Bestätigen Sie die Ein- gabe mit „OK“. 6. Loop Aufnahme: Gehen Sie in das Untermenü „Loop Aufnahme“ und drücken Sie „OK“.
- Page 7 11. Datum/Uhrzeit: Gehen Sie in das Untermenü „Datu/Uhrzeit“ und drücken Sie „OK“. Wählen Sie die Eingabewerte für Jahr, Monat, und Tag mit den Pfeil- tasten aus und bestätigen mit „OK“. Wählen Sie die Uhrzeit Stunde/Minute/Sekunde aus und bestätigen mit „OK“. Wählen Sie das Datumformat „YY/MM/DD, MM/DD/YY, DD/MM/YY“...
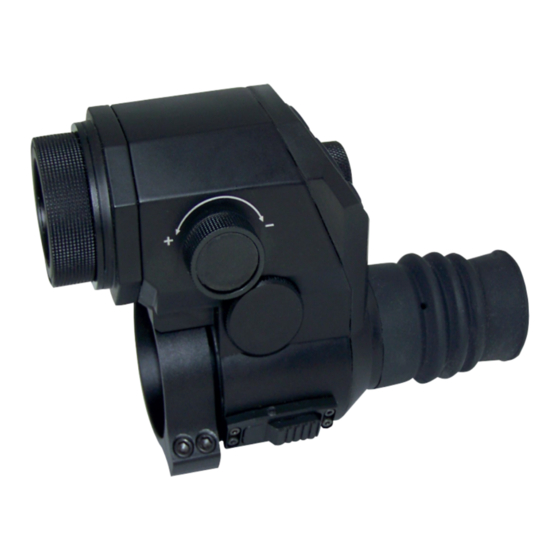
- Page 8 Technische Daten: Clip-on digitales Nachtsichtgerät (per Bajonett abnehmbar). Nachsatzgerät mit mehrsprachiger Menüführung, D, GB, F, ES, P , I. Es kann gleichzeitig als Beobachtungsgerät (Monokular) und als Nachtsicht- Aufsatzgerät (Nachsatzgerät) für das Fernglas, Spektiv oder ähnlich verwen- det werden, Verbindung mit Bajonettverschluss. Der eingebaute Infrarot-Strahler (IR-LED) hat drei Stufen und ermöglicht eine Sicht bis zu 200 Meter in Dunkelheit, fokussierbar.
- Page 9 Laden und Installation der WIFI App auf ein Smartphone und Einstellung der Kamera nach Ihren Wünschen. 1. Suche die App „ricam” im App Store für die IOS Version und im Play Store für die Android Version: 2. Installieren Sie die App „ricam” auf Ihrem Smartphone und drü- cken Sie lange die Nachtsicht- taste...
- Page 10 (GB) User`s Manual Digital night vision add-on device LW-510 (removable by bayonet) Item no. 32156 Please read these user`s manual completely and ca- refully before commissioning and keep them for later reading or passing on the Night Vision Device to...
- Page 11 Safety instructions: 1. Do not look directly into the IR infrared light. 2. Do not point the infrared light at flammable when switched on Objects, otherwise they could catch fire. Turn that on Turn off infrared light after use or turn it on sleep mode. 3.
- Page 12 Device description: Long press: record / stop recording Short press: OK Short press: zoom Long press: and magnification IR mode on / off Short press: Set IR mode Short press: Open menu Short press: Close menu On / off switch Short press: Zoom -, reduce, Long press:...
- Page 13 Installation: 1. Battery: Use the rechargeable lithium battery 3.7V, 18650, 3200 mAh. Uns- crew the cover of the battery compartment and insert the battery with the positive pole first. Attention: Battery discharge protection: the adhesive film before inserting remove at the battery pole! Now screw the battery compartment again to.
- Page 14 4.IR infrared mode: Switch on the device and switch to black / white mode by holding down the IR button for a long time. You can change the mode (IR1- 3) or switch it off again by briefly pressing the IR button (the symbol at the top right of the screen shows the IR level and changes with the setting).
- Page 15 5. Autorecord: Go to the “Auto Record” submenu and press “OK”. Use the arrow keys to select “On, Off”. Confirm the entry with OK". 6. Loop recording: Go to the “Loop recording” submenu and press “OK”. Use the arrow buttons to select “Off, 1 minute, 3 minutes, 5 minutes”. Confirm the entry with OK".
- Page 16 11. Date / time: Go to the “Date / Time” submenu and press “OK”. Select the input values for year, month and day with the arrow buttons and confirm with "OK". Select the time hour / minute / second and confirm with "OK".
- Page 17 Technical specifications: Clip-on digital night vision device (detachable via bayonet). Add-on device with multilingual menu navigation, D, GB, F, ES, P , I. It can be used at the same time as an observation device (monocular) and as a night vision add-on device (add-on device) for binoculars, spotting scope or similar, connection with bayonet lock.
- Page 18 Loading and installing the WIFI app on a smartphone and setting the camera to your liking. 1. Search the app "ricam" in the App Store for the IOS version and in the Play Store for the Android version: 2. Install the "ricam" app on your smartphone and long press the night vision button "-"...
Need help?
Do you have a question about the LW-510 and is the answer not in the manual?
Questions and answers