
Related Manuals for MOKO MKGW2-LW


Summary of Contents for MOKO MKGW2-LW
- Page 1 Datasheet MKGW2-LW Configuration Guide MOKO LoRaWAN Gateway (MKGW2-LW) Configuration Guide MOKO TECHNOLOGY LTD. Version 1.1 www.mokosmart.com...
-
Page 2: Table Of Contents
Contents 1 About This Guide..................5 2 Product Introduction .................. 5 2.1 Product Description......................... 5 2.2 Main Specifications........................5 2.3 Hardware Interfaces and Indicator..................7 2.4 Mechanical Size........................8 2.5 Package Information ........................ 9 2.5.1 Package List........................9 2.5.2 Package Information......................9 3 Installation....................10 4 Connecting the Hardware ................ - Page 3 Table3 MKGW2-LW Package List....................9 Table4 Default Frequency......................31 List of Figures Figure1 MKGW2-LW Interface....................7 Figure2 MKGW2-LW Mechanical Size..................8 Figure3 MKGW2-LW Package..................... 9 Figure4 MKGW2-LW Installation 1................... 10 Figure5 MKGW2-LW Installation 2................... 10 Figure6 MKGW2-LW Installation 3 ................... 10 Figure7 MKGW2-LW Botton Silk....................11...
- Page 4 Figure8 MKGW2-LW Side Silk....................11 Figure9 Gateway SSID.......................12 Figure10 Log in WEB.........................12 Figure11 Gateway Status......................12 Figure12 Ethernet / Automatic IP ..................... 13 Figure13 Ethernet / Static IP....................14 Figure14 WiFi / Automatic IP....................15 Figure15 WiFi / Automatic IP Select a Wireless Router............15 Figure16 WiFi / Static IP......................
- Page 5 Figure41 TTN Device Uplink Data.....................30...
-
Page 6: About This Guide
Semtech’s high performance multi-channel transceiver SX1301/SX1257 and MTK platform. It is for indoor use and easy for installation. MKGW2-LW includes 2 modes: AP and STA as router, offers 2.4Ghz Wi-Fi and wired Ethernet for connecting internet. The gateway built-in OpenWRT operating system, users can flexibly configure network parameters and LoRaWAN protocol parameters through the Web management platform. - Page 7 MOKO LoRaWAN Gateway MKGW2-LW Semtech UDP Packet forwarder Configuration Web-based interface via Wi-Fi WIFI 130M (Open Space) Wireless coverage LoRa 3km (City Environment) Power Supply DC Jack DC 12V-1A POE (IEEE 802.3af), 42~57VDC Micro USB 5V/2A Stand By Power Stand By Average Current ≤ 200mA@12V...
-
Page 8: Hardware Interfaces And Indicator
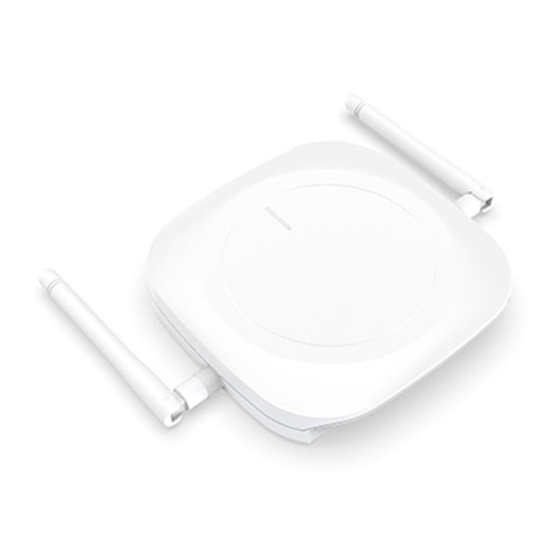
Installation Installation On the desktop or Fixed on the wall Enclosure Standard Moulded plastic housing Warranty 1-Year warranty Table1 MKGW2-LW Main Specifications 2.3 Hardware Interfaces and Indicator Figure1 MKGW2-LW Interface Type Function Remark Reset button 1.Reset to factory setting 1.Reset: Insert and press the button 2.Firmware upgrade... -
Page 9: Mechanical Size
Solid blue 2.LoRa COMM x, Server COMM √: Solid yellow 3.LoRa COMM √, Server COMM √ : Solid green 4.LoRa COMM x, Server COMM x: Solid Table2 MKGW2-LW Hardware Interfaces 2.4 Mechanical Size Figure2 MKGW2-LW Mechanical Size www.mokosmart.com... -
Page 10: Package Information
Remark MKGW2-LW Gateway WiFi Antenna Lora Antenna Micro USB cable Positioning screws Used for fixing on the wall Expansion rubber plug Used for fixing on the wall PET localizer Table3 MKGW2-LW Package List 2.5.2 Package Information Figure3 MKGW2-LW Package www.mokosmart.com... -
Page 11: Installation
1: Use 5mm drill head, drill 2 holes on the wall according to the PET localizer following picture and then plug the screw anchors in the wall. Figure4 MKGW2-LW Installation 1 Step 2: Install the screw into the wall and keep about 3 mm of clearance. -
Page 12: Connecting The Hardware
1. Follow the silk screen on the enclosure and connect WiFi and LoRa antennas. Refer to Antenna Configuration for additional information. Figure7 MKGW2-LW Botton Silk 2. Connect the power supply (Refer to Chapter 4.2 Power up and Turn ON/OFF for additional information.). -
Page 13: Log Into The Gateway
2. Using your PC or phone connect the SSID of the gateway. The default SSID format is "MKGW2-LW-xxxx” such as " MKGW2-LW-91D8 ", “91D8” is the last two bytes of the gateway MAC address. verify the password (Default: Moko4321) and connect to the gateway. -
Page 14: Internet Setting
MOKO LoRaWAN Gateway MKGW2-LW Noted:It is recommended to use the latest version of the mainstream browsers such as IE11, Chrome, Firefox, Safari, etc. 6 Internet setting The gateway can access the Internet through Ethernet(ETH) or WiFi, and can access the network by Automatic IP or Static IP. -
Page 15: Wifi To Internet
MOKO LoRaWAN Gateway MKGW2-LW Figure13 Ethernet / Static IP 6.2 WiFi to Internet Connect to a Wireless Router via WLAN to access the Internet. Select a wireless router and connect to it. After the configuration is complete, the gateway will restart.And the network status can be check in the STATUS page www.mokosmart.com... -
Page 16: Figure14 Wifi / Automatic Ip
MOKO LoRaWAN Gateway MKGW2-LW Figure14 WiFi / Automatic IP Figure15 WiFi / Automatic IP Select a Wireless Router Figure16 WiFi / Static IP www.mokosmart.com... -
Page 17: Wifi Setting
MOKO LoRaWAN Gateway MKGW2-LW Figure17 Network Status Check 7 WiFi Setting You can modify the SSID of the gateway, whether to hide the SSID, encryption mode, and password. After the configuration is complete, the gateway will be restarted for the configuration to take effect. -
Page 18: Lan Setting
MOKO LoRaWAN Gateway MKGW2-LW Supported encryption methods: WPA1PSKWPA2PSK/TKIPAES(Default) WPA1PSKWPA2PSK/AES WPA2PSK/TKIPAES WPA2PSK/AES WPA2PSK/TKIP WPAPSK/TKIPAES WPAPSK/AES WPAPSK/TKIP NONE(No encryption) 8 LAN Setting You can modify the gateway LAN IP and subnet mask. After the configuration is complete, the gateway will be restarted for the configuration to take effect. -
Page 19: Diagnostics
Figure20 Gateway Network Diagnostics 10 Server Access MKGW2-LW LoRaWAN gateway only support Semtech UDP Packet Forwarder to access the LoRa server now. You need to fill in the LoRa Server Address,Server Up Port,Server Down Port,and select the Frequency,Channel and HeartBeat. -
Page 20: Figure21 Gateway Server Configuration
MOKO LoRaWAN Gateway MKGW2-LW Figure21 Gateway Server configuration Figure22 Gateway Server Connection Check www.mokosmart.com... -
Page 21: System Setting
MOKO LoRaWAN Gateway MKGW2-LW 11 System setting 11.1 Device setting 11.1.1 Modify Login Password User can modify the password for logging in configuration web UI; The login user name is”Admin”(unmodifiable); The length of password is 1-64 characters and needs to be verified with the old password. -
Page 22: Restart
Once the user finds the device abnormal during use, the system Log File and LoRa Packet Log file can be downloaded to the local. Please send the log file to MOKO to check the system error. Figure26 Gateway Log File 11.1.5 LED Configuration... -
Page 23: Backup & Upgrade
Figure29 Gateway Firmware Upgrade On-line USB upgrade method: Step1. Copy the upgrade file named “MKGW2-LW-Upgrade.bin” to the USB flash drive; Step2. Insert the USB flash drive into the gateway USB Port, short press the RESET button, and power LED will blink green that indicate the device upgrading now. With USB upgrade, the gateway will automatically save the current system configuration parameters. -
Page 24: Configuration With Ttn
MOKO LoRaWAN Gateway MKGW2-LW need to be configure again. 13 Configuration with TTN Before setting up a gateway with TTN server, we need configure Server Address,Server Up Port,Server Down Port in the gateway configuration WEB, and get the gateway ID.We use EU868 as a examples in below instructions. -
Page 25: Register Your Gateway With Ttn
MOKO LoRaWAN Gateway MKGW2-LW Figure31 TTN Login Page 13.2 Register your gateway with TTN 1. After login your TTN account, go into the CONSOLE page.And click the gateway. www.mokosmart.com... -
Page 26: Figure32 Ttn Console Page
MOKO LoRaWAN Gateway MKGW2-LW Figure32 TTN Console Page Figure33 Register gateway 2. Fill in the gateway ID obtain from gateway Web(Examples gateway ID: 68B9D3FFFED191D8),forwarder:Semtech packet forwarder,and frequency plan. www.mokosmart.com... -
Page 27: Figure34 Register Gateway
MOKO LoRaWAN Gateway MKGW2-LW Figure34 Register gateway 3. After the gateway register successfully, you can check the status. www.mokosmart.com... -
Page 28: Create An Application With Ttn
MOKO LoRaWAN Gateway MKGW2-LW Figure35 Gateway Status Check 13.3 Create an Application with TTN 1. Click Applications in the top menu of TTN website and Add Application. 2. Fill in the application information and click Add application. Figure36 Add Application... -
Page 29: Register Your End-Device With Ttn
MOKO LoRaWAN Gateway MKGW2-LW 13.4 Register Your End-device with TTN 1. After create the application,click the register device in the application screen. Figure37 Application Screen 2. Fill in the device ID and EUI in the Register Device page. We will use our end device LW004-PB as an example in below. -
Page 30: Figure38 Register Device
MOKO LoRaWAN Gateway MKGW2-LW Figure38 Register Device 3. TTN server will generate the Application EUI and App Key after register the device.We need to configure the end device and keep the same the Application EUI and App Key. For the end device parameter configuration please refer to our actual device user manual. -
Page 31: Figure40 Ttn Device Status Check
MOKO LoRaWAN Gateway MKGW2-LW 4. After device parameter configure to the same with TTN and connect the TTN server successfully, you can check the device status and data in the TTN device page. Figure40 TTN Device Status Check Figure41 TTN Device Uplink Data... -
Page 32: Gateway Default Frequency
MOKO LoRaWAN Gateway MKGW2-LW 14 Gateway Default Frequency Frequency Channel NO. Uplink Frequency(MHZ) EU868 868.1, 868.3, 868.5, 867.1, 867.3, 867.5, 867.7, 867.9 IN865 865.0625, 865.4025, 865.985, 865.2625, 865.6625, 866.185, 866.385, 866.585 US915 0-7,64 902.3, 902.5, 902.7, 902.9, 903.1, 903.3, 903.5, 903.7, 903.0 8-15,65 903.9, 904.1, 904.3, 904.5, 904.7, 904.9, 905.1, 905.3,904.6... -
Page 33: Revision
MOKO LoRaWAN Gateway MKGW2-LW normal temperature, moisture can form inside the device and damage the device. ·Do not drop ,knock, or shake the device. Rough handing would break it. ·Do not use strong chemicals or washing to clean the device. -
Page 34: Moko Technology Ltd
The contents of this documents are subject to change without prior notice for further improvement. MOKO team reserves all the rights for the final explanation. Please contact MOKO sales team or visit https://www.mokosmart.com to get more related information if needed. MOKO TECHNOLOGY LTD.
Need help?
Do you have a question about the MKGW2-LW and is the answer not in the manual?
Questions and answers