Table of Contents
Advertisement
Quick Links
Advertisement
Table of Contents

Subscribe to Our Youtube Channel
Related Manuals for Graphic Products DuraLabel 9000 Print Station

Summary of Contents for Graphic Products DuraLabel 9000 Print Station
- Page 1 QUICKSTART GUIDE 800.788.5572 DuraLabel.com...
- Page 2 Graphic Products, Inc. Products and corporate names appearing in this manual may or may not be registered trademarks or copyrights of their respective companies, and are used only for identification or explanation and to the owners’...
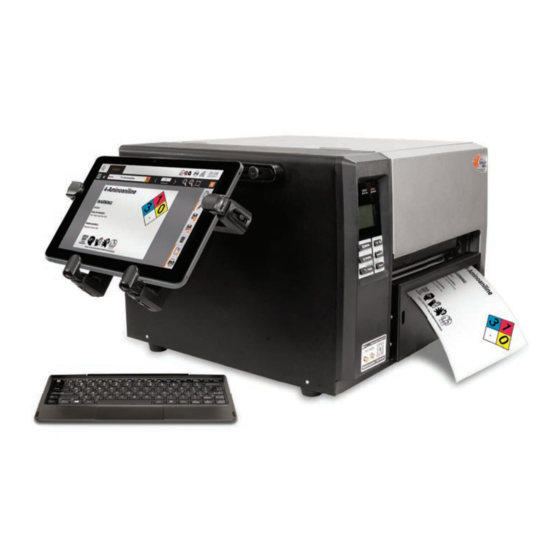
- Page 3 1. Introduction Congratulations on the purchase of your new DuraLabel 9000 Print Station ® (DL9000 PS). You'll soon be on the road to IT independence! DuraSuite™ and LabelForge™ Labeling Software that comes with your DL9000 PS will make labeling faster and easier than you ever imagined. NOTE: These instructions apply to print stations received after June 2018.
- Page 4 INTRODUCTION QUICKSTART PROCEDURE To start designing and printing labels, follow these quick steps: Unpack the DL9000 PS and inspect all items for damage. Install the tablet into the tablet holder. Connect USB to tablet (See section 1.3) Attach the tablet holder to the bracket by sliding it onto the mounting plate.
- Page 5 INTRODUCTION Installing the Tablet To get started, the tablet needs to be installed into the tablet holder: Remove the tablet and tablet holder from Printer USB Connector DC-In Power Plug their packaging. On/Off Switch Micro SD Card Slot Undock the keyboard from the tablet, if connected.
- Page 6 Print Station tablet with the power switch on the tablet’s left edge. Designing and Printing Labels The DuraLabel 9000 Print Station includes a variety of common software applications, but two of them are specially designed for creating and editing label designs. These programs are DuraSuite and LabelForge.
- Page 7 CONNECTING PRINT STATION COMPONENTS 2.1.2 LABELFORGE For creating new label designs from scratch, LabelForge (the “LF” icon in the toolbar) is your best choice. Using a simple interface, you can adjust a design’s size, add text and standardized symbols, include both linear and 2D barcodes, and insert your own images or even data from a spreadsheet.
- Page 8 800.788.5572 | DuraLabel.com © 2011, 2018 Graphic Products, Inc. All Rights Reserved 06/07/18...
Need help?
Do you have a question about the DuraLabel 9000 Print Station and is the answer not in the manual?
Questions and answers