
Related Manuals for CR Remeha Avanta 12v


Summary of Contents for CR Remeha Avanta 12v
- Page 1 Great Britain High-efficiency wall-hung boilers Avanta 12v - 15v - 18v - 24v - 30v Installation and service manual 120579-130711...
-
Page 2: Table Of Contents
page 1 Benchmark places responsibilities on both manufacturers and installers. The purpose is to ensure that customers are provided with the correct equipment for their needs, that it is installed, commissioned and serviced in accordance with the manufacturer's instructions by competent persons and that it meets the requirements of the appropriate Building Regulations. - Page 3 2.3.10 Connecting the 'CH return' 2.3.11 Connecting 'CH flow' 2.3.12 Connecting condensate drain 2.4 Gas-side connections 2.4.1 Additional guidelines for gas connections 2.4.2 Adjusting boiler to other gas-type 2.4.3 Connecting the gas supply 2.5 Flue terminal and air supply connections 2.5.1 Flue terminal positions 2.5.2 Room sealed flue 2.5.3 Connecting the flue terminal and air supply...
-
Page 4: Introduction
3.1.1 Checking the flue pipes and air supply pipes for leaks 3.1.2 Checking the condensate siphon 3.1.3 Checking the ignition electrode 3.1.4 Checking the combustion 3.2 Maintenance 4 ERRORS 4.1 General 4.2 Error codes 4.3 Control stop or lock-out 4.4 Error code memory 4.4.1 Error read outs 4.4.2 Deleting errors 5 SERVICE PARTS... - Page 5 These technical instructions contain useful and important information for the correct installation, operation and maintenance of the Remeha Avanta boiler. Read these instructions carefully before putting the boiler into operation, familiarise yourself with their control functions and operation, strictly observing the instructions given.
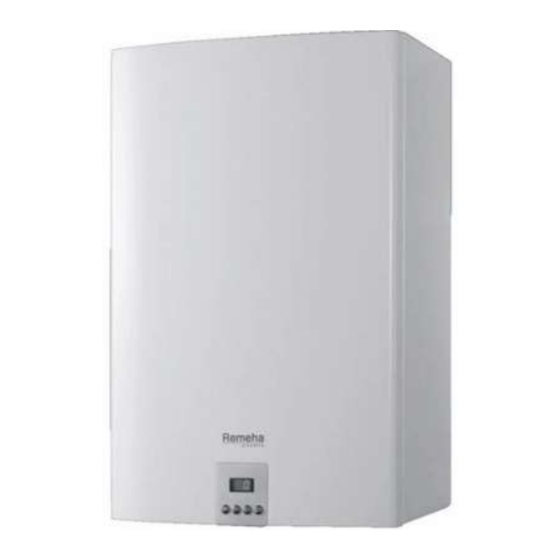
- Page 6 fig. 01 Remeha Avanta 59970LTGBW7H046 On commissioning the certificate in the Benchmark Checklist within the installation + service manual must be completed and left on site with a copy send on to Remeha for registration purposes. If you have any questions, require an engineer to call on site, or if you need more information about specific subjects relating to this boiler, or it's installation please do not hesitate to contact our technical help line 0118 974 3070.
-
Page 7: Safety
The data published in these technical instructions is based on the latest information (at date of publication) and may be subject to revisions. We reserve the right to continuous development in both design and manufacture, therefore any changes to the materials or technology employed may not be retrospective nor may we be obliged to adjust earlier supplies accordingly. -
Page 8: Safety During Installation, Inspection And Maintenance
For any issues or circumstances not addressed within these instructions, please call our After Sales Department 0844 879 7690. Remeha Avanta OV - PIN: 0063BQ3009 Gas Council numbers: Remeha Avanta 12v: 41-288-09 Remeha Avanta 15v: 41-288-13 Remeha Avanta 18v: 41-288-06 Remeha Avanta 24v: 41-288-10 Remeha Avanta 30v: 41-288-14 Classification type for evacuation of the combustion products;... -
Page 9: Mounting The Boiler
- the boiler + mounting bracket; - nylon plugs and screws for fixing mounting bracket; - gas cock with gasket + 90° gas pipe ( 22 mm); - olives and nuts; - spacers; - cable glands; - Wiring diagrams; - Warranty Leaflet (The terms and conditions of the warranty are included in the warranty leaflet, on installation of the boiler please fill in the registration card and return to Remeha);... -
Page 10: Installation / Maintenance Clearance Requirements
guidelines and instructions for the connection of gas, water, electricity, safety devices, the regulator, control unit, flue discharge and air supply. 2.2.1 Installation / maintenance clearance requirements The gas connection is located on the bottom of the boiler whilst the water connections, air inlet and flue gas outlet are located on the top of the boiler. -
Page 11: Dimensions And Connection Points
fig. 03 Clearance requirements 59970LTGBW7H047 Clearances shown are for ease of installation - once fitted it is possible to enclose the boiler in a cupboard with 25 mm clearances around the casing provided a door is included to allow the front cover to be removed completely for maintenance and allowance is made to access the gas valve and flow / return connections. - Page 12 Gas connection Ø22 mm Combustion air inlet Ø100 mm (concentric) Flue duct Ø60 mm (concentric) Condensate drain connection ¾" (standard overflow pipe size) • Based on the guidelines and the required installation space, determine where to mount the Remeha Avanta. •...
-
Page 13: Mounting The Remeha Avanta
fig. 04 Dimensions and connection points of the Remeha Avanta 59970.LT.GB.W7H.001 2.2.3 Mounting the Remeha Avanta • Remove template from the box. • Using the template determine and mark the position of the mounting bracket and flue outlet. • Drill the (Ø8 mm) holes. •... - Page 14 • The boiler should be mounted on a suitable vertical wall which is able to support the weight of the boiler. • The boiler should be mounted in a room which, even during severe cold weather, remains frost-free, or frost protection controls MUST be fitted. •...
-
Page 15: Water-Side Connections
fig. 05 Mounting the Avanta 59970.LT.GB.W7H.002 page 8 2.3 Water-side connections 2.3.1 Water flow... -
Page 16: System Pump
0,19 0,91 0,25 0,88 0,24 1,14 0,32 1,05 0,29 1,37 0,38 1,41 0,39 1,82 0,51 1,76 0,49 2,28 0,63 table 01 Required water flow 2.3.3 Pressure loss of the boiler 1. Avanta 12v, 15v, 18v 2. Avanta 24v, 30v... -
Page 17: Open-Vented System
fig. 06 Pressure loss graph T002539-A page 9 2.3.4 Open-Vented System The feed and expansion tank must be situated at a minimum height of 1 metre and a maximum height of 30 metres above the boiler to provide the correct operating head pressure. -
Page 18: Additional Guidelines For The Domestic And Ch Water
fig. 07 Open-Vented system 59970.LT.GB.W7H.004 2.3.6 Additional guidelines for the domestic and CH water • Flush the pipes and radiators thoroughly before connecting the boiler to the central heating system in accordance with BS 7593 (1992). -
Page 19: Water Treatment
• The temperature of the central heating pipes and the radiators can rise to 95°C. • Use untreated tap water only to fill the CH system. • The pH value of the system water must be between 6 and 9. •... -
Page 20: Safety Valve Discharge
For the correct dosage and the suitability of inhibitors for use with our boilers and for further information on water treatment or system cleaning we advise direct contact with either of the following companies: 'F1®' manufactured by: Fernox, Cookson Electronics Forsyth Road Sheerwater Woking... -
Page 21: Connecting 'Ch Flow
fig. 08 Connecting CH return 59970.LT.GB.W7H.005 2.3.11 Connecting 'CH flow' • Remove the dust cap from the 'CH flow' connection at the top of the boiler. • Fit the flow pipe to the 22 mm Ø compression fitting. -
Page 22: Connecting Condensate Drain
fig. 09 Connecting CH flow 59970.LT.GB.W7H.007 page 12 2.3.12 Connecting condensate drain • Connect the condensate drain outlet to a suitable waste water drain point using acid resisting pipe work (i.e. - ¾" overflow). To enable the siphon in the boiler to be removed / serviced, the connection should not be a permanent one (i.e. -
Page 23: Gas-Side Connections
• If connecting into an internal discharge branch (i.e. sink waste etc) the connection must be down stream of the existing waste trap. • Fill the boiler siphon with water before operation, to prevent flue gasses discharging into the room. •... -
Page 24: Adjusting Boiler To Other Gas-Type
Before installation, check that the gas meter has sufficient capacity for the demand. Remember to consider the consumption of all household appliances. 2.4.2 Adjusting boiler to other gas-type The Avanta boiler is suitable for both natural gas and propane firing. For propane a kit with restrictor is required. -
Page 25: Flue Terminal And Air Supply Connections
fig. 11 Connecting gas supply 59970.LT.GB.W7H.035 2.5 Flue terminal and air supply connections The Remeha Avanta is only suitable for room sealed operation with a standard concentric connection 60/100 mm Ø or the optional 80/125 mm Ø connection. Detailed recommendations for air supply and flue terminals are given in BS 5440. It should not be necessary to provide compartment ventilation when the boiler is used with a standard concentric flue. - Page 26 The boiler will produce a water vapour plume during normal operation. Positions for the Remeha Avanta are shown in the figure and table The principle of the 1:1 gas valve ensures the Avanta range is able to deliver it's full output at inlet pressure down to 17 mbar.
-
Page 27: Room Sealed Flue
Below the eaves 200 mm Below a balcony or carport roof 200 mm Above ground, roof or balcony level 300 mm From vertical drain/soil pipe work 150 mm From an internal or external corner 300 mm From a surface or boundary facing the terminal 1500 mm Vertically from a terminal on same wall 1500 mm... -
Page 28: Connecting The Flue Terminal And Air Supply
Eq. Length of 45° elbow 0.65 LT W6H 000 032 table 03 Maximum pipe lengths for flue duct and air supply in room sealed application page 15 For flue installations not covered by this booklet, please contact our Technical Enquires: 0118 974 3070. 2.5.3 Connecting the flue terminal and air supply •... - Page 29 • Flue components must be installed in accordance with the instructions supplied with them. • All connections must be airtight, waterproof and well supported. • Horizontal extension sections should slope towards the boiler (at least 5 cm per metre).
-
Page 30: Electrical Connection
fig. 13 Connecting flue terminal and air supply 59970LTGBW7H010 page 16 2.6 Electrical connection • Connect the boiler to the fused (3 amp) switch spur unit adjacent to the boiler. • The switch unit must always be accessible. When the switch spur is on the following components of this appliance can be live (230 V): •... -
Page 31: The Control Unit
fig. 14 Electrical components with live 230 V 59970LTGBW7H011 2.6.1 The control unit The Remeha Avanta has an electronic regulation and control unit with an integrated ionisation flame detector. The heart of the boiler control unit is a microprocessor, the 'abc®', which controls and protects the boiler. - Page 32 fig. 15 The control unit LTALW7H000023 Manufacturer Sit Controls Supply voltage 230 V - 1ph - 50 Hz Pre-purge time Post-purge time Ignition time 2.5 s Safety time Anti-cycling time 3 till 10 min. Fuse value F1 (230 V) 2 AT DC fan 24 VDC table 04 Control unit characteristics...
-
Page 33: Connecting External Controls
2. On/off control - 230 V switching - The boilers internal control will modulate the output to achieve the flow temperature set point of the boiler. This contact is on the X2 terminal strip (230 VAC only). 3. Modulated control - Open Therm - The external controls will modulate the boiler's output to achieve the flow temperature determined by the modulating regulator. - Page 34 fig. 16 Connecting external controls R000158-A page 18...
-
Page 36: Connecting An On/Off Control - Room Temperature (Volt Free Switching)
NOTE: Terminal blocks are not in line as shown - diagramatic only fig. 17 Boiler External Connection terminal details R000159-A 2.7.1 Connecting an on/off control - room temperature (volt free switching) The Remeha Avanta can be connected to a 2-wire on/off thermostat, such as the Remeha Celcia 10. -
Page 37: Connecting A 230 V Time Clock In Combination With A Modulating Room Control
• A 230 V two channel time clock for CH and DHW control can be connected to the Remeha Avanta. Live 230 V supply for the time clock - connect to connectors 4 (L) and 5 (N) on X2 terminal strip. •... -
Page 38: Connecting A Modulating Control - Room Or Outside Compensation
An OpenTherm® room modulating control (qSense) used in conjunction with a simple external 230 V time clock will provide easy to set up and operate - timed room compensation heating. page 20 2.7.4 Connecting a modulating control - room or outside compensation The Remeha Avanta has an OpenTherm®... -
Page 39: Connecting An Outside Temperature Sensor
R000153-B The Remeha Avanta can therefore be controlled directly by any other controls with this OpenTherm® logo 2.7.5 Connecting an outside temperature sensor An outside temperature sensor can be connected to connectors 1 and 2 of the X9 terminal strip. The boiler will regulate the output using the set point of the internal heat curve. -
Page 40: Connecting The Dhw Sensor/Thermostat
fig. 22 Heat curve Remeha Avanta LTALW7H000030 page 21 2.7.6 Connecting the DHW sensor/thermostat If an external DHW calorifier is being used with the Avanta system boiler a DHW control sensor or volt-free thermostat can be connected to connectors 3 and 4 of the X9 terminal strip. -
Page 41: Connecting A Three-Way Valve
fig. 23 Wiring diagram DHW calorifier sensor or thermostat R000194-A 2.7.7 Connecting a three-way valve If required a 230 V DIVERTING three-way valve can be connected to terminal X5 of the control unit. When used in conjunction with an "Open Therm" compensator the DHW-production operates with priority. - Page 42 - when the water temperature is above 10°C: the boiler is switched off and the circulation pump runs for another 15 minutes. fig. 25 Wiring diagram for frost thermostat R000155-B If a 230 V switching time clock is connected to terminal strip X2, the frost thermostat wired as indicated (on connectors 7 and 8 of the X9 terminal strip) it will not bring the boiler on if the time clock is in the OFF position.
-
Page 43: Connecting An External Interlock
iSense control and cause an error message (OT ERROR) flashes in the display and the boiler will operate continuously to achieve the flow set point. 2.7.9 Connecting an external interlock The Remeha Avanta is supplied with an external interlock function. A volt free switching device (i.e. -
Page 44: Connecting A Pc/Pda
• Connect an external gas valve to connectors 1 and 3 on terminal X7. Contact closes when the gas valve is activated. For this purpose set parameter [2][4] from [0] to [3]. • Connect an external pump relay* to connectors 1 and 3 on terminal X7. Contact closes on heat demand. -
Page 45: Connecting An External Pump
fig. 28 X10 socket connector LTALW7H000035 2.8 Connecting an external pump Connect the system pump to terminal X4 (X4-1 and X4-2) of the control unit. The pump's earth connection must be connected to the control unit's earth connection with an AMP-connector (supplied with boiler). The cable must be fed through the boiler's casing by means of the supplied cable gland and run trough the cable clamp on the right-hand inside of the boiler. -
Page 46: Wiring Diagram
fig. 29 Connecting external pump R000161-A page 24 2.9 Wiring diagram fig. 30 Wiring diagram R000163-A page 25 2.10 Commissioning... -
Page 47: Control Panel
2.10.1 Control Panel The control panel of the Remeha Avanta has 4 function keys and a LED display. The function keys are used to read or change the settings and temperatures. display [reset] key [-] key [+] key [enter] key fig. - Page 48 • When commissioning, complete all relevant sections of the Benchmark Commissioning Checklist, located on the inside back of this document. • Work through all the stages of this section, and send a copy of the completed commissioning details to Remeha along with the completed registration card in the supplied warranty leaflet.
-
Page 49: Putting The Boiler Into Operation
T002019 page 26 2.10.3 Putting the boiler into operation This section details the procedure for putting the boiler into operation. There are 7 stages to the procedure: 1. Isolating the power supply and opening the front cover; 2. Checking the connections and making the boiler operational; 3. - Page 50 fig. 33 Isolating power 59970LTGBW7H036 2. Checking the connections and making the boiler operational Open the valves on all the radiators connected to the central heating system before filling the system with water. • Open the valves on all the radiators connected to the central heating system; •...
- Page 51 • Check the condensate siphon. This should be filled with clean water if necessary. Avoid water getting into the boiler. • Check the system pump (spin the shaft to check that the impellor can move freely); • Check that all boiler connections are watertight; fig.
- Page 52 59970LTGBW7H014 page 27 • Open the boiler gas valve and check the static pressure to the boiler at the measurement point (C) on the gas block. • The boiler has been factory tested for natural gas at 20 mbar. • The minimum gas inlet pressure is 17 mbar for natural gas •...
- Page 53 • Check that all electrical connections, including the earth connection, have been made correctly. • Check the electrical connections to the thermostat and other external controls. • Check that the flue-gas and air-supply connections are sealed. fig. 36 Check electrical connections and thermostat R000164-A page 28 3.
- Page 54 appear during this time, the boiler will then start to run if called for by the controls. • The boiler now starts to run. The operational status is shown in the display. Combustion checking/setting must be carried out by a competent person. It must not be carried out unless that person is equipped with a combustion analyser which conforms to the relevant British Standards.
- Page 55 fig. 38 Check the gas/air ratio control - set to full load - gas/air ratio adjustment A on gas block 59970LTGBW7H017 Setting values O for natural gas Boiler type Fan speed (rpm) Full load [H][3] * approx. 2400 5.2 ± 0.1 8.8 ± 0.1 approx.
- Page 56 Boiler type Fan speed (rpm) Full load [H][3] * approx. 2400 5.1 ± 0.1 10.3 ± 0.1 approx. 2800 5.1 ± 0.1 10.3 ± 0.1 approx. 3300 5.1 ± 0.1 10.3 ± 0.1 approx. 4300 5.1 ± 0.1 10.3 ± 0.1 approx.
- Page 57 approx. 1300 5.2 ± 0.1 8.8 ± 0.1 table 07 Setting values part load CO and O (front panel not fitted) Setting values O for LPG (propane) Boiler type Fan speed (rpm) Part load [L][3] * approx. 2000 5.1 ± 0.1 10.3 ± 0.1 approx.
- Page 58 page 30 Set boiler to part load: Press the [enter]-key until [L][3] appears in the display, part load has been set. • Once the unit has reached the part load fan speed, measure the O percentage and compare this to the value in table •...
- Page 59 The Remeha Avanta is delivered pre-tested and operating parameters set up with standard factory settings to suit the most common systems. These setting can be adjusted to suit specific site conditions but must not be changed without reference to Remeha or one of our approved contractors fig.
-
Page 60: Normal Start-Up Procedure
fig. 41 Instructing the user 59970LTGBW7H020 2.10.4 Normal start-up procedure • Switch on the boiler at the fused spur unit and ensure that the time control is in the on position and any other controls (i.e. room thermostat etc) calling for heat •... -
Page 61: Read Out Settings
• If the display is blank (should show red dots or letters), check: - 230 V main supply available to switch spur; - switch spur fuse; - cable and connections between the switched spur and the boiler control unit; - fuse on the boiler control unit (F2 = 2AT, 230V). •... - Page 62 • Press the [+]-key again until [t][2] appears and, for example, [4][5] (45°C), the current return temperature; • Press [+]-key again until [F][L] appears and e.g. [6][0] (6uA), the present ionisation current; • Press [+]-key again until [F] appears and e.g. [3][0] (3000 rpm), the present fan speed;...
- Page 63 fig. 42 Read out settings LT.AL.W7H.000.046...
-
Page 64: Adjust The Boiler According To The System
page 33 2.10.7 Adjust the boiler according to the system The operating parameters of the Remeha Avanta have been factory set to suit most systems. However it is possible to adjust some of the parameters to enable the Remeha Avanta to operate more efficiently to match specific system designs and site conditions. - Page 65 [P][6] Display off 0 = display stays off automatically 1 = display stays on 2 = display light switches off automatically after 3 minutes [P][1][7] Maximum fan speed Do not change CH (natural gas) Maximum fan speed Adjustments for Propane CH (propane) firing [P][1][8] Maximum fan speed...
- Page 66 Connection with Heat 0 = no connection with HRU [P][2][3] Recovery Unit (HRU) 1 = connection with HRU State remote alarm 0 = off (X7 terminal) (connectors 1 and 2 closed) 1 = alarm signal (connectors 1 and 2 closed) 2 = run indication [P][2][4] (connectors 1 and 3 closed)
- Page 67 [P][1] Adjustable between 20 - 85°C but the highest water temperature setting for this type of boilers is limited to 75°C. Changing the factory settings could result in the boiler not working properly. page 35 The parameters can be changed from the stand-by status as follows: •...
- Page 68 fig. 43 Change parameters in service level LT.AL.W7H.000.047...
-
Page 69: Changing The Maximum Output (Hi) For Ch Operation
The boiler will automatically return to the normal operating mode if no keys are pressed for 10 minutes. page 36 2.10.9 Changing the maximum output (Hi) for CH operation The maximum output for CH operation can be changed with parameter [P][1][7] (maximum fan speed) and is set standard to a speed of 2400, 3000, 3500, 4500 or 5200 rpm for the five System-types. - Page 70 fig. 44 Change boiler output LT.AL.W7H.000.048...
-
Page 71: Restore Factory Settings
45 Fan speed / boiler input ratio Avanta 12V, 15V and 18V T001103 fig. 46 Fan speed / boiler input ratio Avanta 24V and 30V T001104 page 37 2.10.10 Restore factory settings... - Page 72 The factory settings can be restored in the service level as follows: 1. After parameter [P][3][1] has shown, press the [+]-key; [d][F] and [X][X] appear alternately; 2. Press ←-key; [X][X] appears; 3. Read boiler identification plate for value of [d][F]; press [+] or [-] key to reach this value;...
-
Page 73: Putting The Boiler Out Of Operation
fig. 47 Restore factory settings LT.AL.W7H.000.052 2.11 Putting the boiler out of operation The boiler must be switched off and allowed to cool down before any maintenance or repairs are carried out. If the central heating system is not going to be used for a long time (during the holidays, forn instance, or frost-free periods) it is advisable to put the boiler out of operation. -
Page 74: Inspection
Only Remeha spare parts/materials should be used. All service and maintenance must be carried out by a qualified Engineer with the relevant training and certification (i.e. ACS - IEE registrations etc). 3.1 Inspection The annual inspection of the Remeha Avanta can be limited to the following checks: - check the flue pipes and air supply pipes for leaks, see par. -
Page 75: Checking The Condensate Siphon
fig. 49 Checking flue pipes 59970LTGBW7H023 page 39 3.1.2 Checking the condensate siphon • Check the condensate siphon. Remove any dirt residues and refill with clean water to the mark. -
Page 76: Checking The Ignition Electrode
fig. 50 Checking the condensate siphon 59970LTGBW7H0234 3.1.3 Checking the ignition electrode • Check the ionisation /ignition electrode for: - deposits (remove any white deposits with abrasive cloth); - the adjustment of the ignition electrode (between 3 and 4mm); - the quality of the gasket and condition of the porcelain (this should not be cracked) inspect and replace if necessary;... -
Page 77: Checking The Combustion
fig. 51 Checking the ignition electrode 59970LTGBW7H026 page 40 3.1.4 Checking the combustion • Measure the O percentage and the flue gas temperature at the flue gas sample point. Do this as follows: - heat the water temperature in the boiler to approx. 70°C; - unscrew the top of the flue gas point of measurement;... - Page 78 fig. 52 Checking the combustion 59970LTGBW7H025 Ensure that the analysing probe has a gas tight seal in the sampling point with the probe end in the centre of the flue duct. Checking values O for natural gas Boiler- Fan speed (rpm) type Full load [H][3] Part load [L][3] approx.
- Page 79 Boiler- Full load [H][3] Part load [L][3] type approx. 2400 approx. 2000 5.1 ± 0.2 10.3 ± 0.3 approx. 2800 approx. 2000 5.1 ± 0.2 10.3 ± 0.3 approx. 3300 approx. 2000 5.1 ± 0.2 10.3 ± 0.3 approx. 4300 approx.
-
Page 80: Maintenance
fig. 53 Benchmark checklist T002020 page 41 3.2 Maintenance To conduct maintenance: • During regular maintenance inspections the integrity of all combustion circuit seals, especially the burner door seal must be checked for potential leaks. If... - Page 81 any evidence of seal leakage is detected then Remeha strongly recommend the gasket making the seal is replaced. • Any gasket that is exposed during maintenance or inspection should always be replaced. • A service gasket set and new ignition/ionisation electrode is available as a spare if deemed necessary for a change following an inspection.
- Page 82 fig. 54 Open the boiler 59970LTGBW7H038 2. Maintenance of the ignition/ionisation electrode • Disconnect the earth wire from the electrode mounting plate. • Release the two screws on the electrode and remove the assembly. • Inspect, clean, re-gap or replace the electrode if required following inspection, 3.1.3.
- Page 83 fig. 55 Maintenance of the electrode 59970LTGBW7H027 page 42 3. Dismantling the front plate of the heat exchanger • Isolate gas supply. • Release the ignition transformer mounting plate and remove it completely. • Disconnect the electrical connection on the gas block. •...
- Page 84 • Carefully pull the front plate assembly c/w fan, gas block, venturi pipe and burner unit away from the heat exchanger by approx. 10 cm. • Remove the front plate assembly completely. fig. 56 Dismantling the front plate of the heat exchanger 59970LTGBW7H028 4.
- Page 85 fig. 57 Checking the burner 59970LTGBW7H029 page 43 5. Maintenance to the heat exchanger (CH) • Check the seal between the front plate and the heat exchanger and the insulation section. • Handle the fragile front-plate insulation and the back-plate insulation of the heat exchanger with great care and do not let them get wet.
- Page 86 fig. 58 Maintenance to the heat exchanger 59970LTGBW7H030 6. Re-Assembling the boiler and checking the combustion • Re-assemble all the components in reverse order. • Remember to connect the fan plug again before it is completely home on the front of the heat exchanger. •...
-
Page 87: Errors
fig. 59 Assembling the boiler 59970LTGBW7H031 page 44 4 ERRORS 4.1 General... -
Page 88: Error Codes
The Remeha Avanta has an advanced control unit. The heart of this control unit is a microprocessor, the abc®-control which both controls and protects the boiler. If an error is detected anywhere in the boiler, it will lock out and an error code will appear in the display. - Page 89 Too much air in the Vent the system. system. Deviation in the flow Check that the sensors are or return working; take the sensors temperature sensor. out* and measure the resistance with a multimeter at room temperature (20 - 25°C); the sensor is working properly if the resistance is between 12 and 15 kOhm.
- Page 90 • the ignition wire and electrode for 'dielectric breakdown'; • the inner-electrode distance, this should be 3 - 4 mm; that weather • the ignition electrode is properly earthed. Check that: • the gas tap is open; • the gas pre-pressure is sufficient; •...
- Page 91 Ignition Unit. Faulty ignition unit, replace ignition unit. Unwanted flame [E][6] formation. Control unit. Faulty control unit, replace control unit. Insufficient water. Check the water level and check for leaks. Check that the pump is working; turn the spindle with a screwdriver, No through flow.
-
Page 92: Control Stop Or Lock-Out
Check: • the sealing of the viewing glass; • Air box whether front plate of heat exchanger Air leakage from heat [E][1][1] temperature to is properly tightened exchanger to air box. • high. front plate sealing; • whether ignition electrode is properly fitted. -
Page 93: Error Code Memory
• Code [d][9] is a lock-out and appears if the maximum temperature rise is exceeded or if the ∆T between the supply and return temperature > 22°C or a rate of rise in the flow temperature > 2,7°C/sec. and also at a boiler-start with no through flow or insufficient water. -
Page 94: Error Read Outs
fig. 60 Sensor resistance graph raph Sensor resistance page 48 4.4.1 Error read outs • Press the [enter]-key and keep it pressed; • Press the [reset]-key until codes [C] and [0] appear alternately in the display; • Enter the special access code [8][8] with the [+] or [-]-key; •... - Page 95 • Press the [reset]-key to stop the cycle; the following appears in the display; [E][r] and e.g the numbers [1] and [8]; • Press the [+] or [-] key to look at the following error data.
-
Page 97: Deleting Errors
fig. 61 Error read outs LT.AL.W7H.000.064 4.4.2 Deleting errors The last message in the list, Er followed by cl will appear in the display; • Press the [enter]-key again, and the following will appear in the display: [0]; • Press the [+]-key to set the parameter to [1]; •... - Page 98 table 13 Return form example * These details can be found on the boiler type plate; the type plate is stuck to the bottom of the boiler. page 50...
- Page 99 fig. 62 Exploded view Remeha Avanta 59970EVGBW7H010...
-
Page 100: Ec Declaration
page 51 Break down parts kit Part No Description Position S100006 Heat exchanger 12v, 15v, 18v 2001 S100014 Heat exchanger 24v, 30v 2001 S62741 Burner 12v, 15v, 18v 2003 S100017 Burner 24v, 30v 2003 S62743 Electrode ignition/ionisation 2004 S59118 Glass inspection set 2005 S100015 Siphon assembly 2021... -
Page 101: Regulations
page 53 7 REGULATIONS 7.1 EC regulations The boiler meets the requirements of the EC regulations at the following directives: - 90/396EEC Gas appliances directive - 92/42/EEC Efficiency directive - 2006/95/EEC Electrical low voltage directive... -
Page 102: Remeha Factory Test
- 2004/108/EEC EMC directive - 97/23/EEC Pressure equipment directive (art. 3, sub. 3) Classification type for evacuation of the combustion products; according EN 483 7.2 Remeha factory test Before it leaves the factory, each Remeha Avanta boiler is optimally adjusted and tested for: - Electrical safety;... -
Page 103: The Boiler Components
Noise level at distance of 1m from the boiler dB(A) < 44=""> (at full load) Gas and flue details Classification due to discharging flue gases B23, B33, C13, C33, C43, C53, C63, C83 Gas type permitted II ( 2H3P natural gas and propane) Gas inlet pressure natural gas mbar 20 - 25... - Page 104 fig. 63 Components of the Remeha Avanta 59970LTGBW7H045 Flue / Air inlet connection Flue gas measuring point Heat exchanger Front plate heat exchanger Siphon Control panel Air inlet tube Gas valve multiblock / Ignition transformer...
-
Page 105: Working Principle
Ignition/ionization electrode Control unit 8.3 Working principle The Remeha Avanta casing serves as a sealed air box, with air drawn in by the fan. On the outlet side of the fan is a venturi, into which a measured quantity of gas is injected based on the volume of air available. -
Page 106: Regulating The Water Temperature
problems and alike. In the event of such influences, the boiler will not go to "lock-out" failure mode, but will in the first instance modulate back, and if necessary, depending on the nature of the circumstances, will temporarily switch off (shutdown or control stop), and then after a short while simply try again. -
Page 107: Efficiency Data And Gas Efficiency Labels
9 EFFICIENCY DATA AND GAS EFFICIENCY LABELS 9.1 Annual efficiency 108.7 % in relation to Hi at a load of 30% and a return temperature of 30°C. 9.2 Water-side efficiency 98 % in relation to Hi at full load and an average water temperature of 70°C (80/60°C). - Page 108 page 60...
- Page 109 page 61...
- Page 110 page 62 page 63 Remeha - PART OF BDR THERMEA Brooks House Coventry Road Warwick CV34 4LL After Sales Tel: 0844 879 7690 Technical Enquires: 0118 974 3070 Internet: www.remehaheating.co.uk © Copyright All technical and technological information contained in these technical instructions, as well as any drawings and technical descriptions supplied, remain our property and shall not be multiplied without our prior consent in writing.
Need help?
Do you have a question about the Avanta 12v and is the answer not in the manual?
Questions and answers