Advertisement
Quick Links
Advertisement

Subscribe to Our Youtube Channel
Related Manuals for Marabraz BR 33-170


Summary of Contents for Marabraz BR 33-170
- Page 1 MANUAL DE MONTAGEM ASSEMBLY INSTRUCTIONS INSTRUCCIONES DE MONTAJE COD BR: BR 33-170...
- Page 3 Sumário Summary Resumen Acessórios incluídos na caixa Hardware included in box Accesorios incluidos en la caja Leia atentamente este manual e siga os passos indicados para que o produto não perca a garantia e também para uma perfeita montagem. Read this manual and follow the steps in order to keep the guarantee and also for the perfect fit.
- Page 4 Antes de começar Before starting Antes de comenzar Antes de começar a montagem prepare o ambiente, deixando-o completamente limpo e com bom espaço para iniciar o trabalho. Prepare the room before starting the assembly, leaving it completely clean and the area in good condition to start the work.
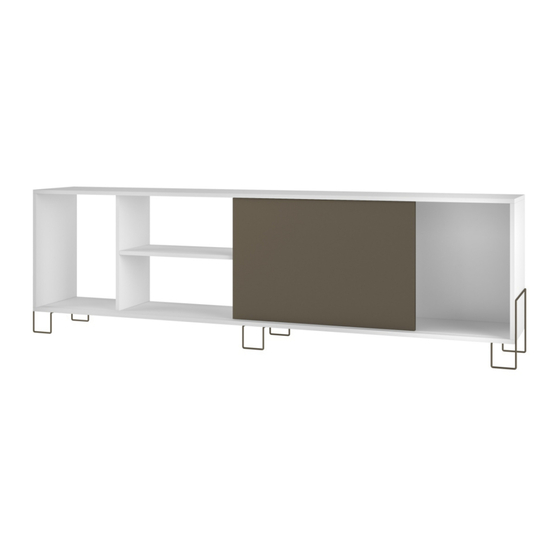
- Page 5 Dimensões e ferramentas Dimensions and tools Dimensiones y herramientas Dimensões: L: 1800 A: 560 P: 294 mm Dimensions: W: 70.87 H: 22.05 D: 11.57 inches Dimensiones: L: 1800 A: 560 P: 294 mm Limpeza Cleanig Limpieza Pano levemente umedecido com água, seguido de pano seco, não utilizar produtos químico ou abrasivos. Slightly dampened cloth and after a dry cloth, do not use chemicals or abrasives.
- Page 6 COD BR: BR 33-170 PEÇA DESCRIÇÃO QUANT. PART DESCRIPTION PIEZA DESCRIPCIóN CANTIDAD TAMPO TAPA SIDE LATERAL LATERAL PORTA DOOR PUERTA DIVISÓRIA DIVISION DIVISÓRIO BASE BASE BASE PRATELEIRA SHELF ESTANTE COSTA BACK REVÉS PÉS LATERAIS LATERAL FEET PIES LATERALES PÉ CENTRAL...
- Page 7 ACESSóRIOS INCLUÍDOS NA CAIXA 01 - HARDWARE INCLUDED IN BOX 01 - ACCESORIOS INCLUÍDOS EN LA CAJA 01 PERFIL PLÁSTICO x 1 EF 000033 x 20 EF 000106 x 4 EF 000216 X 12 PLASTIC PROFILE X 1 3,5X14 CC 8X30 PERFIL PLASTICO X 1 EF 000106 x 4...
- Page 8 = 5KG - 11LB = 18KG - 39LB = 4 KG - 8.8LB 55" PASSO 1 / STEP 1 / PASO 1 Insira a ferragem EF 000033 nas peças 02, 04 e 06. Insert hardware EF 000033 into pieces 02, 04 and 06. Añade el herraje EF000033 en las piezas 02, 04 y 06.
- Page 9 PASSO 2 / STEP 2 / PASO 2 Insira a ferragem EF 000094 nas pré-furações nas peças 01 e 04 Insert hardware EF 000094 at pre-drilled holes in pieces 01 and 04. Añade el herraje EF 000094 en los huecos ya marcados en las piezas 01 y 04.
- Page 10 PASSO 5 / STEP 5 / PASO 5 Insira a ferragem EF 000033 na peça 02. Fixe a ferragem EF 000571 utilizando EF 000106, observe as medidas indicadas. Insert hardware EF 000033 into piece 02. Fix hardware EF 000571 using EF 000106, note the measures indicated.
- Page 11 PASSO 8 / STEP 8/ PASO 8 Conecte a peça 03 encaixando o pino plástico nas peças 01 e 05. Fixe a peça 05 utilizando a ferragem EF 000132. Connect piece 03 fitting hardware the plastic pine at pieces 01 and 05. Fix piece 05 using hardware EF 000132.
- Page 12 PASSO 11 / STEP 11 / PASO 11 Utilize o tapa furos para cobrir os parafusos aparentes. Use the sticker to cover the apparent screws. Utilice los tapa huecos para cubrir los tornillo aparentes. Tapa furos Sticker Tapas plásticas PASSO 12 / STEP 12 / PASO 12 Utilize o giz para dar o acabamento final ao produto.
Need help?
Do you have a question about the BR 33-170 and is the answer not in the manual?
Questions and answers