Advertisement
Quick Links
Advertisement

Related Manuals for Impact Acoustics Chatpod 700


Summary of Contents for Impact Acoustics Chatpod 700
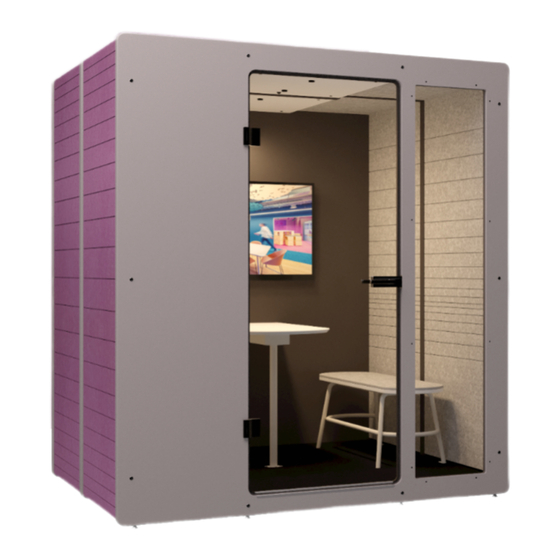
- Page 1 Assembly instructions Chatpod 700 90min...
- Page 2 Step 1 Press the drive-in nuts (AD) on the inside of the back panel (E and F) into the holes and tighten the screws (Y) with the 4mm hex key (AJ). Chatpod 700 IMPACT ACOUSTIC AG, Bodenhof 4, 6014 Luzern, Switzerland...
- Page 3 Insert the dowels (AE) in the four holes. Join the two frame halves (E and F). Place the three connectors (W) in the cut-outs and tighten them with the 4 mm hex key (AJ). Chatpod 700 IMPACT ACOUSTIC AG, Bodenhof 4, 6014 Luzern, Switzerland...
- Page 4 Step 3 Remove the silicone paper from the double-sided tape on the back of the two panels (O) and press the fillings into the recess of the back panel. Chatpod 700 IMPACT ACOUSTIC AG, Bodenhof 4, 6014 Luzern, Switzerland...
- Page 5 Step 4 Position the back panel to the final position and level it using the four leveling feet with a 13 mm wrench. Chatpod 700 IMPACT ACOUSTIC AG, Bodenhof 4, 6014 Luzern, Switzerland...
- Page 6 (AH) with the power plug into the H-connector (AG). Insert also the plugs of the left (C) and right side (D) into the connector and make sure that the plugs snap in. click click click Chatpod 700 IMPACT ACOUSTIC AG, Bodenhof 4, 6014 Luzern, Switzerland...
- Page 7 Place the base plate (L) on the four blocks (V) and make sure that they are aligned as shown. Join the two sides (C and D) with the base plate (L). This should go easily, otherwise the parts must be aligned better to each other. Chatpod 700 IMPACT ACOUSTIC AG, Bodenhof 4, 6014 Luzern, Switzerland...
- Page 8 Step 7 Guide the cable of the side through the recess of the cover (N). Join the cover with the two sides. This should go without too much resistance. 90º 90º Chatpod 700 IMPACT ACOUSTIC AG, Bodenhof 4, 6014 Luzern, Switzerland...
- Page 9 Step 8 Move the two sides, the bottom and the cover into the back panel. It may be necessary to lift the cover slightly. Make sure that the cable is exposed. Chatpod 700 IMPACT ACOUSTIC AG, Bodenhof 4, 6014 Luzern, Switzerland...
- Page 10 Screw one setscrew (AB) into each connecting rod (S) using the 4 mm hex key (AJ) and insert the rods into the holes provided. Now turn the screws again until the rods engage with the screws of the back panel. Chatpod 700 IMPACT ACOUSTIC AG, Bodenhof 4, 6014 Luzern, Switzerland...
- Page 11 Insert the dowels (AM) in the four holes. Join the two identical connecting frame halves (J). Place the three connectors (W) in the cut-outs and tighten them with the 4 mm hex key (AJ). Chatpod 700 IMPACT ACOUSTIC AG, Bodenhof 4, 6014 Luzern, Switzerland...
- Page 12 Join the connecting frame with the back element. It may be necessary to lift the cover slightly for this step. Make sure that the cable (AG) is led through one of the two holes of the connecting frame. Chatpod 700 IMPACT ACOUSTIC AG, Bodenhof 4, 6014 Luzern, Switzerland...
- Page 13 (AG) into the T-connector(AI). Insert also the plugs of the left (A) and right side (B) into the distributor and make sure that the plugs snap in. click click click Chatpod 700 IMPACT ACOUSTIC AG, Bodenhof 4, 6014 Luzern, Switzerland...
- Page 14 Place the base plate (K) on the four blocks (V) and make sure that they are aligned as shown. Join the two sides (A and B) with the base plate (K). This should go easily, otherwise the parts must be aligned better to each other. Chatpod 700 IMPACT ACOUSTIC AG, Bodenhof 4, 6014 Luzern, Switzerland...
- Page 15 Step 14 Guide the cable of the side through the recess of the cover (M). Join the cover with the two sides. This should go without too much resistance. 90º 90º Chatpod 700 IMPACT ACOUSTIC AG, Bodenhof 4, 6014 Luzern, Switzerland...
- Page 16 Step 15 Move the two sides, the bottom and the cover into the back panel. It may be necessary to lift the cover slightly. Chatpod 700 IMPACT ACOUSTIC AG, Bodenhof 4, 6014 Luzern, Switzerland...
- Page 17 Step 16 Fahre die Stangen (S) in die vorgesehenen Aussparungen ein. Drehe die Stangen im Uhrzeigersinn, bis sie mit dem Gewindestiften greifen, gegebenenfalls mit der Hilfe einer Schraube (Y). Chatpod 700 IMPACT ACOUSTIC AG, Bodenhof 4, 6014 Luzern, Switzerland...
- Page 18 Insert the dowels (AE) in the four holes. Join the two halves of the frame (G and H). Place the two connectors (W) in the cutouts and tighten them with the 4 mm hex key (AJ). Chatpod 700 IMPACT ACOUSTIC AG, Bodenhof 4, 6014 Luzern, Switzerland...
- Page 19 Step 18 Press the door threshold (T) over the frame and fix it with the four screws (AC). Tighten the screws only handtight. Chatpod 700 IMPACT ACOUSTIC AG, Bodenhof 4, 6014 Luzern, Switzerland...
- Page 20 Step 19 Join the door frame (G and H) with the back element. Insert the screws (Y) and tighten them with the 4 mm hex key (AJ). Chatpod 700 IMPACT ACOUSTIC AG, Bodenhof 4, 6014 Luzern, Switzerland...
- Page 21 Guide the cables which are coming from the sides into the cut-outs provided and insert them until they snaps in. motionsensor light light power in Note: Only the power cable has to be plugged in the other cables are already plugged in. click Chatpod 700 IMPACT ACOUSTIC AG, Bodenhof 4, 6014 Luzern, Switzerland...
- Page 22 Step 21 Put the upper parts of the top on the chatpod. Chatpod 700 IMPACT ACOUSTIC AG, Bodenhof 4, 6014 Luzern, Switzerland...
- Page 23 13 mm open-ended spanner (AN) and the 4 mm hex key (twice in the inner of the chatpod) until it is the case. Remove the honeycomb cardboard blocks (V) and recycle them. Plug in the cable (AH). Chatpod 700 IMPACT ACOUSTIC AG, Bodenhof 4, 6014 Luzern, Switzerland...
- Page 24 Step 23 Remove the silicone paper on the bottom of the carpet strip (AF) and stick the strip between the two pieces of carpet. Chatpod 700 IMPACT ACOUSTIC AG, Bodenhof 4, 6014 Luzern, Switzerland...
- Page 25 Attach the glass door (I) and secure it with the two pins. Make sure that the notch of the pin is on the bottom. Tighten the two small setscrews with the 2.5 mm hex key (AL). Chatpod 700 IMPACT ACOUSTIC AG, Bodenhof 4, 6014 Luzern, Switzerland...
- Page 26 Mount the door handle (U) in the following order: lock, metal ring, plastic ring, door handle. Press the two door handles together while tightening the set screw with the 3 mm hex key (AK). Chatpod 700 IMPACT ACOUSTIC AG, Bodenhof 4, 6014 Luzern, Switzerland...
- Page 27 Well done! Check that the chatpod is fully functional, especially the lighting, fans, sockets and that the door closses properly. Chatpod 700 IMPACT ACOUSTIC AG, Bodenhof 4, 6014 Luzern, Switzerland...