Table of Contents
Advertisement
Quick Links
2021/08/26 08:47
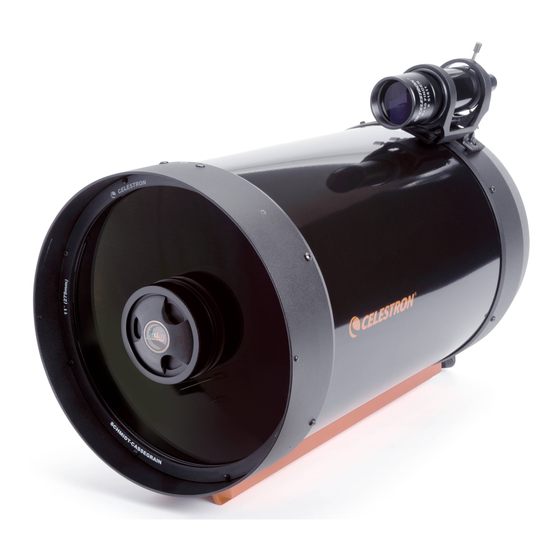
C11 & CGE PRO
The C11 is our second largest Schmidt Cassegrain telescope and suitable for mobile use. Every time
one likes to use it, one has to put it up again from scratch. The purpose of this article is to describe
the details of this process.
Scattered pieces
To protect the sensitive electronics from humidity and other harsh weather conditions they are stored
in the lab course room. The remaining mechanical parts stay in the dome, so that one does not need
to carry them around.
Stored in the dome:
1.
the tripod
2.
the tube (C11)
3.
counterweights + bar
Stored in lab course room:
1.
the CGE PROs electronic box
2.
the CGE PRO mount
3.
a box containing all 1.4" eyepieces and the corresponding filters
4.
sun filters
Setup
1.
The CGE PRO is a parallactic mount, which has to be adjusted to point to the northern celestial
pole. Therefore, the tripod (see
sufficient to point the tripod leg with the carrier for the hand terminal to the south.
2.
Now put the electronic box on the tripod (see
3.
Place the mechanics of the CGE PRO (see
three bolts (see
performed by two people.
4.
Screw the counterweight bar into the mechanics and place the counterweights on it (see
figure
6). When you fasten the screws on them, they are hold in place.
5.
Connect the electronic box to the engines of the mount. The cables (see
ports on the side of the electronic box
one connects electronic box with the right-ascension axis, while the longer one is for the
declination axis (see
6.
Now plug the energy supply (see
corresponding ports (see
7.
The attachment of the tube should also be performed by two people. One inserts the dovetail
into the clamp of the mount (see
OST Wiki - https://polaris.astro.physik.uni-potsdam.de/wiki/
figure
figure
5). Due to the heavy weight of the mechanics, this step should be
figure
9). The cables only fit in one position.
figure
figure
12).
figure 13
1/7
1) should be positioned accordingly. To do so, it is usually
figure
2) and fix it with three bolts (see
figure
4) on the electronic box and fix it again with
(figure
8). The cables have different lengths. The short
10) and the hand terminal (see
and
figure
14) and holds it in place. The other one
C11 & CGE PRO
figure
3).
figure
7) go in the
figure
11) into the
Advertisement
Table of Contents

Related Manuals for Celestron C11


Summary of Contents for Celestron C11
- Page 1 C11 & CGE PRO The C11 is our second largest Schmidt Cassegrain telescope and suitable for mobile use. Every time one likes to use it, one has to put it up again from scratch. The purpose of this article is to describe the details of this process.
- Page 2 Last update: 2021/06/08 en:ost:telescope:c11_bedienung https://polaris.astro.physik.uni-potsdam.de/wiki/doku.php?id=en:ost:telescope:c11_bedienung 14:26 tightens the screws (see figure 15). Remove the cover from the tube (figure 16) and add, if needed, the sun filter (see figure 17). Now you can attach an eyepiece, a camera, or a spectrograph to the tube. To use 2″ oculars or one of the other instruments you need to exchange the 1.4″...
- Page 3 2021/08/26 08:47 C11 & CGE PRO Fig. 7: Cables for the connection of the electronic box with the engines Fig. 8: Electronic box with Fig. 9: CGE PRO with the cable ports for the cables attached Fig. 12: Ports for the power...
- Page 4 14:26 Fig. 14: CGE PRO clamp on the mount Fig. 13: Dove tail on the tube Fig. 15: Attachment of the C11 at the CGE PRO Fig. 16: Tube with the cover Fig. 17: Tube with the sun Fig. 18: Telescope build up filter...
- Page 5 2021/08/26 08:47 C11 & CGE PRO Alignment Usually it is required to create a new alignment after each start of the mount. If we want to use the telescope more than one night in a row, we have the opportunity to put the mount into a hibernation mode (see below) that allows to disconnect the mount from the power supply and at the same time to conserve the alignment.
- Page 6 The telescope is ready for the next observation! Troubleshooting Known error sources and their solutions can be found here. Additional documentation More details on the CGE PRO and the C11 can be found in the corresponding manuals in the lab course room. https://polaris.astro.physik.uni-potsdam.de/wiki/ Printed on 2021/08/26 08:47...
- Page 7 2021/08/26 08:47 C11 & CGE PRO From: https://polaris.astro.physik.uni-potsdam.de/wiki/ - OST Wiki Permanent link: https://polaris.astro.physik.uni-potsdam.de/wiki/doku.php?id=en:ost:telescope:c11_bedienung Last update: 2021/06/08 14:26 OST Wiki - https://polaris.astro.physik.uni-potsdam.de/wiki/...
Need help?
Do you have a question about the C11 and is the answer not in the manual?
Questions and answers