Advertisement
Table of Contents
- 1 Y O U R T E L E S C O P E
- 2 Adjusting the Tripod Height
- 3 Attaching the Telescope to the Mount
- 4 The Eyepieces
- 5 Aligning the Finder
- 6 Calculating Magnification
- 7 Your First Look
- 8 Daytime Observing
- 9 Observing Deep-Sky Objects
- 10 Maintenance
- 11 Care and Cleaning of the Optics
- 12 Storing Your Telescope
- 13 Technical Specifications
- 14 Optional Accessories
- Download this manual
Advertisement
Table of Contents

Summary of Contents for Celestron C102AZ
- Page 1 Firstscope 70 AZ Firstscope 80 AZ Refracting Telescopes INSTRUCTION MANUAL Models #21080 and 21080-AL Models #21075 and 21075-AL Model #21011 C102 - AZ...
-
Page 2: Y O U R T E L E S C O P E
Firstscope AZ When setting up the telescope, find a large, clear area where the parts can be laid out. Remove the contents of the box and place them neatly on your work surface. Once your refractor has been unpacked and assembled, you will not need the boxes for everyday storage and transportation. -
Page 3: Adjusting The Tripod Height
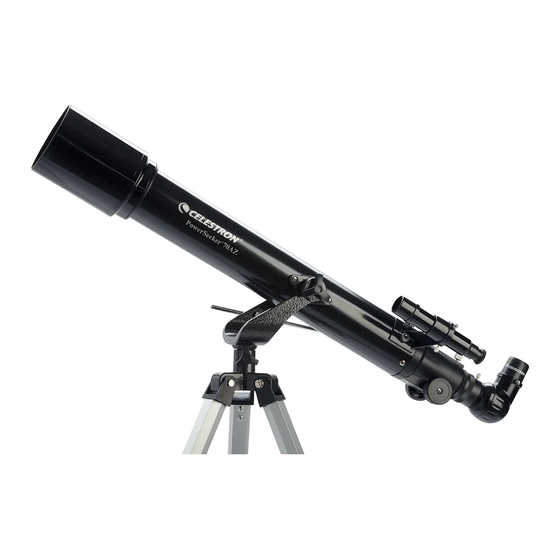
F I R S T S C O P E The Firstscope AZ fully assembled. iarize yourself with the various parts of your Firstscope AZ telescope. Adjusting the Tripod Height Figure 2-1 Use this illustration and others throughout this manual, to famil- 3. -
Page 4: Attaching The Telescope To The Mount
— one on each ring. This portion to the Mount of the ring slides over part of the mounting platform to hold the telescope in place. 1. Slightly loosen the screws that hold the mounting rings on the telescope in 2. - Page 5 3. Place the telescope tube on the mount and orient it so that the objective 4. Slide the rings together until the square extrusions fit over the ends of the 5. Tighten the bolt on the square extrusion on the ring closest to the objective 6.
- Page 6 The azimuth tension knob must be fully tightened before you can use the azimuth slow motion control knob. Once assembled, the telescope can be left set up. The entire unit is light enough to pick up and carry outside for a casual observing session. If, how-...
-
Page 7: The Eyepieces
T E L E S C O P E Once your telescope has been fully assembled, you are ready to attach the accessories. The Accessory Adapter Attaching the Accessories The accessory adapter is the short black tube with the set screw that allows the attachment of visual accessories (i.e., the star diagonal, erect image... -
Page 8: Aligning The Finder
For more information on how to determine power, see the section on “Calculating Magnification.” In addition, eyepieces are also referred to by barrel diameter. These Celestron refractors use eyepieces with a barrel diameter of 1-1/4". To focus your telescope, simply turn either of the focus knobs located directly Focusing opposite the finderscope. -
Page 9: Calculating Magnification
Because of this, it may take a few minutes to familiarize yourself with the directional change each screw has on the finderscope. You can change the power of your Celestron telescope just by changing the Calculating eyepiece (ocular). To determine the actual magnification with any given... -
Page 10: Observing Deep-Sky Objects
Use a Celestron mylar solar filter to view the Sun in complete safety. These filters reduce the intensity of the Sun’s light making it safe to view. With these filters you can see sunspots as they move across the solar disk and faculae, which are bright patches seen near the Sun’s edge. - Page 11 Moon is out. Photography Hints Your Celestron can be used for both terrestrial and astronomical photography. Celestron telescopes have fixed apertures and, as a result, fixed f/ratios. To properly expose your subjects photographically you need to set your shutter speed accordingly.
-
Page 12: Maintenance
Occasionally, you may experience dew build-up on the objective lens of your telescope during an observing session. This may be removed with a hair dryer or by pointing the telescope at the ground. Since your Celestron refractor has a built-in dew cap, the dewing process is slightly reduced. If moisture con- denses on the inside of the lens, remove the accessories from the telescope. -
Page 13: Technical Specifications
These specifications are approximate and subject to change without notice. Celestron offers a large assortment of accessories for this telescope: Optional Accessories The Celestron Accessory Catalog (#93685) has complete details on these and more accessories available for your telescope. C102-AZ... - Page 14 CELESTRON ONE YEAR WARRANTY Celestron International (CI) warrants this telescope to be free from defects in materials and workmanship for one year. CI will repair or replace such product or part hereof which, upon inspection by CI, is found to be defective in materials or workmanship.


Need help?
Do you have a question about the C102AZ and is the answer not in the manual?
Questions and answers