Table of Contents
Advertisement
INSTALLATION AND USER MANUAL
Thank
Thank
you for choosing our product and trusting our company.
you for choosing our product and trusting our company.
This manual is to provide you with necessary information for optimal use and
This manual is to provide you with necessary information for optimal use and
maintenance, please read it carefully and keep it for subsequent use.
maintenance, please read it carefully and keep it for subsequent use.
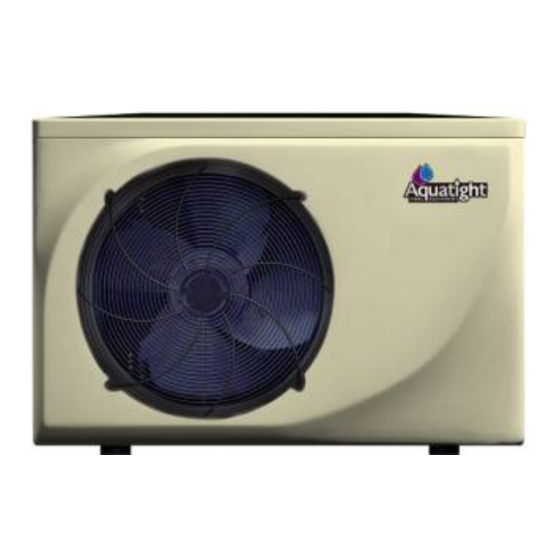
Swimming Pool Heat Pump
Aquatight Saturn Series
Swimming Pool Heat Pump
Advertisement
Table of Contents

Related Manuals for Aquatight Saturn Series


Summary of Contents for Aquatight Saturn Series
- Page 1 Swimming Pool Heat Pump Aquatight Saturn Series Swimming Pool Heat Pump INSTALLATION AND USER MANUAL Thank Thank you for choosing our product and trusting our company. you for choosing our product and trusting our company. This manual is to provide you with necessary information for optimal use and This manual is to provide you with necessary information for optimal use and maintenance, please read it carefully and keep it for subsequent use.
-
Page 2: Table Of Contents
Content . Introduction ................. 1 Safety precaution..................1 Important features of this product.............. 1 Parameters of product range ..............3 . Installation Guide................ 5 Transport it in proper manner ..............5 Determining Optimum installation position..........5 Water pipe connection................8 Electric connection.................. -
Page 3: Introduction
. Introduction Safety precaution Caution: Danger of electric shock Always switch off power supply before working on the heat pump and stop the hydraulic circuit. - The swimming pool heat pump must be installed by a qualified electrician. - Always install a differential protective device with a sensitivity of 30 mA on the distribution unit before the electrical box. - Page 4 High / Low Refrigerant Pressure Switches • The high-pressure switch senses the refrigerant pressure in the sealed refrigeration system and shuts the heat pump down in the event unsafe operating pressures are reached. The heat pump will automatically reset after the system pressure drops back to normal operating pressures.
-
Page 5: Parameters Of Product Range
Parameters of product range SX09 SX14 SX17 Model Performance Condition: Air 26°C, Water 26°C, Humidity 80% 14.0 17.0 Heating capacity Kw C.O.P. Performance Condition: Air 15°C, Water 26°C, Humidity 70% 10.0 11.2 Heating capacity Kw C.O.P. Max Pool Volune Rated Power 10.0 13.0 Rated current... - Page 6 Note: Machine can work well under air temp +10 ~43 ,. Performance cannot be guaranteed outside the operating ranges and must take account the exterior conditions of use identified to select suitable model (such as location, area of swimming pool, and numbers of swimmer.) Above parameters are subjected to adjustment periodically for technical improvement with further notice.
-
Page 7: Installation Guide
. Installation Guide Attention! This swimming pool heat pump must be installed by a skilled team. Transport it in proper manner 1. Transport it in original package. 2. When moving the machine, do not lift the water nozzle since the titanium heat exchanger inside the machine will be damaged. - Page 8 Pay attention to the following points: The heat pump must be installed OUTSIDE in a well ventilated place to avoid air recirculation or in a place with adequate room area both for installation and maintenance. Please refer to the following illustration: A minimum of 300mm of clearance from walls, shrubbery, equipment, etc.
- Page 9 !!Warning: The machine must not be hung onto the wall with soft pipe since the inlet/outlet union on the machine can’t hold weight. The machine must always be connected with hard pipe! The heat pump should be far from any source of combustibles and corrosive material to avoid any damage to this unit.
-
Page 10: Water Pipe Connection
Water pipe connection - The water flow through this machine needs to be driven by an appended water pump (Prepared by the user). The recommended pump specification-flux is shown on the product specification and Max. lift 10m; - Pipe length between heat pump and swimming pool should not be longer than 10m. Noted: The drawing is just for demonstration, and layout of the pipes for reference. - Page 11 Attention: The swimming pool heater must be earthed well. Recommendation for protecting devices and cable specification MODEL SX09 SX14 SX17 Rated Current A Breaker Rated Residual Action Current Fuse Power Cord (mm 3×2.5 3×2.5 3×4 Signal cable (mm 3×0.5 3×0.5 3×0.5 Above data is subject to modification without notice.
-
Page 12: Trial After First Installation
Trial after first installation Inspection before connecting power supply - Check the installation of the whole machine and the pipe connections according to the pipe connecting drawing. - Check the electric wiring according to the electric wiring diagram, and ground well. - Make sure no blockage on the air inlet and outlet, or the efficiency of the heater will be reduced or cause machine to stop operation. -
Page 13: Operation Guide
. Operation guide LED controller Picture for keys Power on/off COOL Shows the cool mode has been set HEAT Shows the heat mode has been set. MODE Key Heat or cool mode selection Down- Set required temperature. ALLOW UP-ALLOW Set required temperature. LED screen Display temperature and machine failure code. -
Page 14: Maintenance
Precautions Maintenance Caution: Danger of electric shock “Cut off” power supply of the heater before cleaning, examination and repairing In winter season when you don’t swim: Cut off power supply to prevent any machine damage Drain water clear of the machine. !!Important: Unscrew the water nozzle of inlet pipe to let the water flow out. -
Page 15: Common Faults
gasoline, thinners or any similar fuel. C Check bolts, cables and connections regularly. . Trouble shooting Common faults Phenomenon Possible reason A. The fan motor stops automatically for defrost. B. There will be sound from the solenoid valve when A.Noticeable White machine starts or ends to defrost. - Page 16 Heat pump does not run A. Power supply failure B. Check manual power supply switch to make sure it is on. C. Fuse burned. D. If machine auto- protector has started (check failure Recheck code display on controller). E. Check whether machine automatic on or off was set. Running but not heating or Check if there is blockage on air inlet and outlet of the unit.
-
Page 17: Failure Code
Failure code Failure Failure description Action code EE 1 High pressure protection Contact your dealer. EE 2 Low pressure protection Contact your dealer. 1. Check if there is no water through machine; make sure the EE 3 Low water pressure protection pump is on. -
Page 18: Warranty Conditions
Warranty Conditions The warranty must comply with the following terms: The unit can only be repaired by Aquatight Pool Equipment personnel or an authorized dealer. Maintenance must be carried out periodically, or as required. Only genuine Aquatight spare parts should be used. - Page 19 State Health Department. If, in the opinion of Aquatight Pool equipment, the equipment has been subjected to other than normal swimming pool use or has been improperly serviced or maintained.
-
Page 20: Contact Details
Contact Details: Aquatight Pool Equipment Webstie: www.autopool.com.au Email: info@autopool.com.au Western Australia 115 Belmont Avenue, Belmont Western Australia, 6104 Phone: 08 9362 4022 Fax: 08 9361 3913 New South Wales Phone: 1300 656 956 Fax: 1300 502 508 Victoria Phone: 1300 656 956...
Need help?
Do you have a question about the Saturn Series and is the answer not in the manual?
Questions and answers
How do I set the heater temperature. It is showing 18c and I want to set at 29c
To set the temperature on the Aquatight Saturn Series heater from 18°C to 29°C:
1. Use the MODE key to select either HEAT or COOL mode.
2. Press the UP-ALLOW button to increase the temperature setting to 29°C.
3. Confirm the new temperature is displayed on the LED screen.
Make sure the heater is powered on and connected properly before adjusting the temperature.
This answer is automatically generated