
Related Manuals for Life technologies invitrogen Neon


Summary of Contents for Life technologies invitrogen Neon
- Page 1 ™ Neon Transfection System For transfecting mammalian cells, including primary and stem cells, with high transfection efficiency Catalog no. MPK5000 Rev. Date: 1 April 2010 Manual Part no. 25-1055 MAN0001557 User Manual...
-
Page 3: Table Of Contents
Contents Product Contents............................v ™ Unpacking the Neon Transfection System ................... vi ™ Neon Transfection System ........................vii Introduction ........................1 About the Product ............................1 Description of Parts............................3 Methods ......................... 6 Getting Started ..............................6 General Guidelines.............................12 ™ Using the Neon Transfection System ....................14 Optimization Protocol for DNA and siRNA ..................22 Troubleshooting............................31... -
Page 5: Product Contents
Product Contents Examine the unit carefully for any damage incurred during transit. Any damage Upon Receiving claims must be filed with the carrier. The warranty does not cover in-transit the Device damage. To register the device, activate your warranty, and be notified of important updates, go to www/invitrogen.com/neon. -
Page 6: Unpacking The Neon Transfection System
™ Unpacking the Neon Transfection System ™ Follow the instructions below to unpack the Neon Transfection System. The Unpacking ™ weight of the Neon device is 13.2 pounds (6 kg). Instructions 1. Cut plastic tapes and remove the outer box. Save the outer box and other packaging material (in case you need to transport or ship the unit). -
Page 7: Neon ™ Transfection System
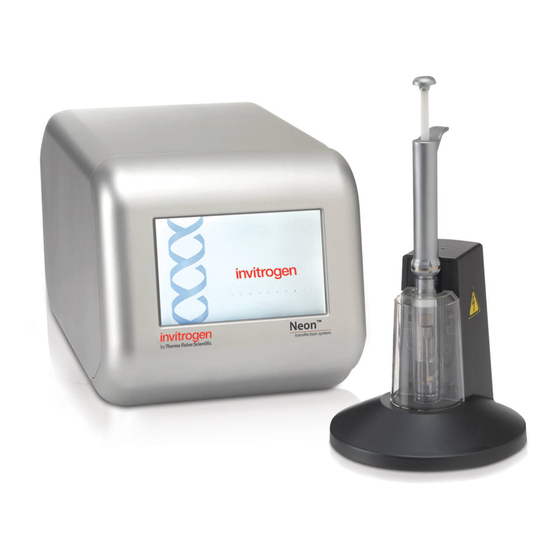
™ Neon Transfection System ™ The front view of the Neon device is shown below. Front View Touchscreen ™ The rear view showing various parts of the Neon device are shown below. Rear View The USB port (need to unscrew the panel to view the port) is used to connect a USB memory drive. - Page 8 ™ Neon Transfection System, Continued ™ ™ The Neon Pipette Station is supplied with a high voltage and sensor connector Neon Pipette ™ ™ which connects the pipette station to the Neon device. The Neon Pipette with a Station ™ ™...
-
Page 9: Introduction
Introduction About the Product ™ ™ The Neon Transfection System is a novel, benchtop electroporation device Neon that employs an electroporation technology by using the pipette tip as an Transfection electroporation chamber to efficiently transfect mammalian cells including System primary and immortalized hematopoietic cells, stem cells, and primary cells. ™... - Page 10 About the Product, Continued ™ Unlike standard cuvette based electroporation, the Neon Transfection System System Overview ™ uses a unique electroporation reaction chamber, the Neon Tip that delivers a ™ high electric field to the biological sample. The Neon Tip maximizes the gap size between the two electrodes while minimizing the surface area of each electrode.
-
Page 11: Description Of Parts
Description of Parts ™ ™ The Neon device is a simple, Neon Device user friendly benchtop electroporation device. When ™ used with a Neon Pipette ™ Station and Neon Kits, the ™ Neon device efficiently transfects mammalian cells including primary and stem cells. - Page 12 Description of Parts, Continued ™ ™ ™ The Neon Pipette Station is a unique component of the Neon Transfection Neon Pipette ™ system. It holds a Neon Pipette during electroporation procedures. The Station ™ Neon Pipette Station is equipped with many safety sensors and protection mechanisms that protects the user from any exposures to an electrical shock.
- Page 13 Description of Parts, Continued ™ ™ The Neon Tips are disposable tips composed of a tip and piston used with the Neon Tips ™ ™ Neon Pipette. The Neon Tips contain a gold-plated electrode to create a disposable electric chamber for the delivery of a high electric field to biological ™...
-
Page 14: Methods
Methods Getting Started ™ 1. Unpack the Neon device as instructed on page vi. Installing the ™ Neon Device with 2. Four power cords are shipped with the device to ensure that the cord you use Pipette Station is compatible with your local socket format. ™... - Page 15 Getting Started, Continued ™ 8. Attach the power cord to the AC inlet on the rear of the Neon device and Installing the ™ then to the electrical outlet. Use only properly grounded AC outlets and power Neon Device with cords.
- Page 16 Getting Started, Continued Input Window, To create a cell specific protocol, if you already have the electroporation parameters for your cell type: Continued 1. Press the power switch (located on the rear side of the unit, page vii) to turn ™...
- Page 17 Getting Started, Continued Enter cell-specific protocols into the database. The database can store up to Database Window 50 cell-specific protocols. 1. Press the power switch (located on the rear side of the unit, page vii) to ™ ™ turn ON the Neon device.
- Page 18 Getting Started, Continued Database Window, Continued 4. Once the Edit screen is displayed, enter the User name by pressing the key pad buttons. The cursor automatically moves to the next field Protocol and is highlighted red. Continue to enter the information for Voltage, Width, and Pulse. If you wish to password protect the protocol, enter the Password (up to 7 characters) and Repeat Password information using the key pad.
- Page 19 Getting Started, Continued Perform optimization of electroporation parameters using the preprogrammed Optimization 24-well optimization protocol. These protocols are locked and cannot be Window edited. 1. Press the power switch (located on the rear side of the unit, page vii) to ™...
-
Page 20: General Guidelines
General Guidelines ™ To use the Neon device for electroporation of mammalian cells, you need to Recommended ™ purchase the Neon Kits from Invitrogen. Ordering information is on page 38. Kits Do not use any other kits with the unit. To obtain the best results, follow these recommendations: ... - Page 21 General Guidelines, Continued The quality and concentration of DNA used for electroporation plays an DNA Quality and important role for the transfection efficiency. We strongly recommend using Amount ™ high quality plasmid purification kits such as PureLink HiPure Plasmid DNA Purification Kits (page 38) to prepare DNA.
-
Page 22: Using The Neon Transfection System
™ Using the Neon Transfection System ™ Instructions are provided in this section to use the Neon device with the Introduction ™ ™ Neon Pipette Station and Neon Kits for electroporation of mammalian cells. ™ General instructions to prepare cells for use with the Neon Transfection System are described below. - Page 23 ™ Using the Neon Transfection System, Continued ™ ™ 1. Ensure the Neon Pipette Station is connected to the Neon device (page 6). Setting up the ™ Neon Pipette ™ 2. Fill the Neon Tube with 3 mL of Electrolytic Buffer (use Buffer E for 10 μL Station ™...
- Page 24 ™ Using the Neon Transfection System, Continued 1. Cultivate the required number of cells (see below). Preparing Adherent Cells 2. One–two days prior to electroporation, transfer the cells into flask with fresh growth medium such that the cells are 70–90% confluent on the day of the experiment.
- Page 25 ™ Using the Neon Transfection System, Continued 1. Cultivate the required number of cells (see below). Preparing Suspension Cells 2. One to two days prior to electroporation, transfer the cells into flask with fresh growth medium such that the cells are 70–90% confluent on the day of the experiment.
- Page 26 ™ Using the Neon Transfection System, Continued 1. Make sure you have appropriate number of cells prepared as described on Electroporation pages 16–17, have the plasmid DNA or siRNA at the suggested concentrations Protocol (page 13), and prepare a plate containing culture medium without antibiotics to transfer the electroporated cells.
- Page 27 ™ Using the Neon Transfection System, Continued ™ ™ 8. Insert the top-head of the Neon Pipette into the Neon Tip until the clamp Electroporation fully picks up the mounting stem of the piston (see below) Protocol, Continued Top-head 9. Gently release the push-button, continuing to apply a downward pressure on the pipette, ensuring that the tip is sealed onto the pipette without any gaps.
- Page 28 ™ Using the Neon Transfection System, Continued ™ ™ 11. Insert the Neon Pipette with the sample vertically into the Neon Tube Electroporation ™ placed in the Neon Pipette Station until you hear a click sound. Ensure that Protocol, Continued the pipette projection is inserted into the groove of the pipette station.
- Page 29 ™ Using the Neon Transfection System, Continued Electroporation 17. Repeat Steps 7–16 for the remaining samples. Protocol, Continued ™ ™ Be sure to change the Neon Tips after using it twice and Neon Tubes ™ ™ after 10 usages. Use a new Neon Tip and Neon Tube for each new plasmid DNA sample.
-
Page 30: Optimization Protocol For Dna And Sirna
Optimization Protocol for DNA and siRNA Electroporation is mainly dependent on the combination of three electric Introduction parameters such as the electric field, pulse width, and pulse number. Based on your initial results, you may need to optimize the electroporation parameters for your cell type especially the hard-to-transfect cells. - Page 31 Optimization Protocol for DNA and siRNA, Continued Choosing Based on your cell type, choose the appropriate optimization protocol as shown below. Optimizations are generally required for cell types which are not in the Appropriate ™ ™ Neon database but may also be needed for cell types that exist in the Neon Optimization database as cell culture conditions may vary between laboratories.
- Page 32 Optimization Protocol for DNA and siRNA, Continued 24-well 1. Make sure you have cells prepared as described on pages 16–17, have the DNA or siRNA, and prepare a 24-well plate containing 0.5 mL culture medium with Optimization serum and without antibiotics to transfer the electroporated cells. Prepare Protocol for enough cells and plasmid DNA/siRNA for at least 30 transfections.
- Page 33 Optimization Protocol for DNA and siRNA, Continued ™ 5. After electroporation, immediately remove the Neon Pipette and transfer 24-well ™ samples from the 10 μL Neon Tip into prewarmed 0.5 mL culture Optimization medium. Protocol for Adherent and ™ For 100 μL Neon Tip, dilute samples 10-fold in 900 μL medium and Suspension Cell transfer 100 μL of the sample to 0.4 mL prewarmed culture medium.
- Page 34 Optimization Protocol for DNA and siRNA, Continued 1. Make sure you have cells prepared as described on pages 16–17, have the 18-well DNA or siRNA, and prepare 18-wells of a 24-well plate containing 0.5 mL Optimization culture medium with serum and without antibiotics to transfer the Protocol for electroporated cells.
- Page 35 Optimization Protocol for DNA and siRNA, Continued Select the best transfection conditions obtained from the previous experiment Optimization and fine-tune the optimization by narrowing the Pulse Voltage. Protocol—Day Two For example, if you obtained optimal conditions between 1,500 V, 20 ms and 1,400 V, 30 ms, (underlined in the table on the next page) perform optimization using these narrower parameters as below.
- Page 36 Optimization Protocol for DNA and siRNA, Continued Optimization Protocol—Day Two, Continued Sample Well no. Pulse Pulse Pulse Results Voltage Width Transfection Efficiency Cell Viability 1450 1475 1500 1525 1550 1575 1375 1400 1425 1450 1475 1500 Control containing DNA but no electroporation pulse. ™...
- Page 37 Optimization Protocol for DNA and siRNA, Continued For further optimization, repeat experiments by varying other conditions such Optional: as multiple pulsations. This is optional and depends on the cell type. Optimization Protocol—Day For siRNA, you can vary the amount of siRNA from 10–200 nM. Three 1.
- Page 38 Optimization Protocol for DNA and siRNA, Continued Optional: Optimization Protocol—Day Three, Continued Sample Well no. Pulse Pulse Pulse Results Voltage Width Transfection Efficiency Cell Viability 1450 1475 1500 1525 1550 1575 1375 1400 1425 1450 1475 1500 Control containing DNA but no electroporation pulse. ™...
-
Page 39: Troubleshooting
Troubleshooting Problem Cause Solution No power (the AC power cord is not Check AC power cord connections at both ends. Use the correct display remains connected cords. blank when the power is turned Connection error Pipette or tube is ™... - Page 40 Troubleshooting, Continued Problem Cause Solution ™ Arcing (sparks) Air bubbles in the Avoid any air bubbles in the Neon Tip while aspirating the ™ Neon sample. High voltage or pulse Reduce the voltage or pulse length settings. length settings Accidentally used Do not precipitate DNA with ethanol to concentrate DNA as salt-precipitated it can cause arcing due to salt contamination.
-
Page 41: Neon ™ Device Error Messages
™ Neon Device Error Messages This section describes the error messages displayed. Most of the error messages Introduction are self explanatory and after fixing the error, you should be able to continue with the protocol. Contact Technical Support (page 39) if you need to send the device for servicing. -
Page 42: Appendix
Appendix Repackaging the Instrument If you need to send the device to Invitrogen for warranty issues, or you wish to Repackaging and transport the instrument to another location, repackage the unit as follows. Storage Instructions Note: Prior to sending the device, ensure the device is properly decontaminated if the device is exposed to any viable biological agents, radioactive materials, or hazardous chemicals (toxic, carcinogenic, mutagenic, toxic for reproduction, sensitizing, and/or have not been fully tested). -
Page 43: Product Specifications
Product Specifications ™ Input Power: 100–240 VAC, 3.0-6.0 Amps, 50–60 Hz, Neon 300 W Transfection System Output: 0.5-2.5 kV Specifications Pulse Width: 1-100 ms Maximum Duty Cycle: Charging Time: Maximum 8 seconds Altitude: Up to 2,000 meters Operating Temperature: 5ºC to 40°C Maximum Relative Humidity: Up to 80% Degree of Protection:... -
Page 44: Safety Information
Failure to comply with the instructions in this manual may create a potential safety hazard, and will void the manufacturer’s warranty and void the EN61010- 1 safety standard certification. Life Technologies is not responsible for any injury or damage caused by use of this instrument when operated for purposes which it is not intended. - Page 45 Safety Information, Continued ™ The symbols used on the Neon Transfection System and in the manual are Informational explained below: Symbols The Caution symbol denotes a risk of safety hazard. Refer to the accompanying documentation. ON (power) OFF (power) Protective earth (ground) Used on the instrument to indicate an area where a potential shock hazard may exist.
-
Page 46: Accessory Products
Accessory Products ™ Additional The following products are for use with the Neon Transfection System and are available separately from Invitrogen. Products For more information, visit www.invitrogen.com or contact Technical Support (page 39). Product Quantity Catalog no. ™ Neon Kit, 10 μL 1 kit (50 reactions) MPK1025 1 kit (192 reactions) -
Page 47: Technical Support
Technical Support Visit the Invitrogen web site at www.invitrogen.com for: Web Resources Technical resources, including manuals, vector maps and sequences, application notes, SDSs, FAQs, formulations, citations, handbooks, etc. Complete technical support contact information Access to the Invitrogen Online Catalog ... -
Page 48: Purchaser Notification
If the purchaser is not willing to accept the limitations of this limited use statement, Life Technologies is willing to accept return of the product with a full refund. For information on purchasing a license to this product for purposes other than research, contact Licensing Department, Life Technologies Corporation, 5791 Van Allen Way, Carlsbad, California 92008. - Page 49 Purchaser Notification, Continued ™ Neon Invitrogen (a part of Life Technologies Corporation) warrants to the original ™ purchaser (“Purchaser”) that the Neon Transfection System device will be free Transfection from defects in materials and workmanship for a period of one (1) year from the System Warranty date of delivery.
- Page 50 Notes...
- Page 52 Corporate Headquarters 5791 Van Allen Way Carlsbad, CA 92008 T: 1 760 603 7200 F: 1 760 602 6500 E: tech_support@invitrogen.com For country-specific contact information, visit our web site at www.invitrogen.com...
Need help?
Do you have a question about the invitrogen Neon and is the answer not in the manual?
Questions and answers