Table of Contents
Advertisement
Quick Links
Advertisement
Table of Contents

Related Manuals for IMPLOX Laerdal Nursing Kelly VitalSim


Summary of Contents for IMPLOX Laerdal Nursing Kelly VitalSim
-
Page 2: Table Of Contents
Table of Contents Laerdal Recommends Items Included Skills Taught Teeth Carotid Pulse Tracheostomy Plug & Care NG Tube Placement Intubation Chest Lungs Stomach Reservoir Belly Plates Injection Pads Waist, Knee and Ankle Joints Arms Legs IV Arm Replacing Skin & Vein System Blood Pressure Arm Auscultation of Heart, Breath and Bowel Sounds 300-00001... - Page 3 Genitalia Colon Reservoir Urinary Catheterization and Enema Simulation Troubleshooting VitalSim Care and Maintenance Warranty Replacement Parts 300-00001 Laerdal...
-
Page 4: Laerdal Recommends
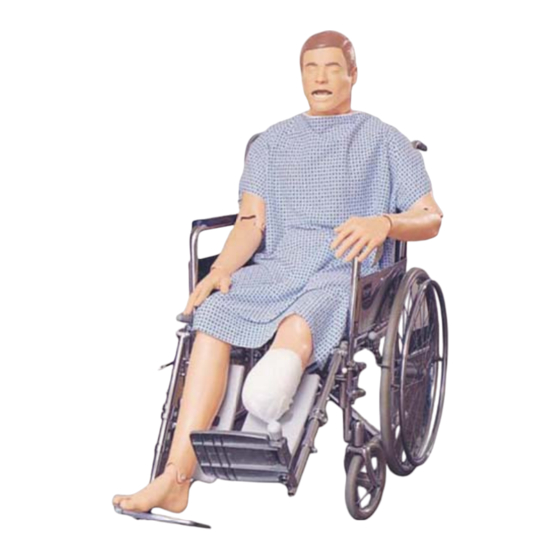
Nursing Kelly VitalSim™ is a full-body, lifelike vinyl manikin designed to teach all skills from basic patient handling to advanced nursing, including the measurement of noninvasive blood pressure and the auscultation and recognition of normal and abnormal heart, lung and bowel sounds. The manufacturing quality of this simulator should provide many sessions of training when reasonable care and maintenance are practiced. -
Page 5: Items Included
Items Included: (1) Full-Body Manikin with Heart, Breath & Bowel Sounds (1) VitalSim™ (w/ 300-00001) (1) Articulating Blood Pressure Training Arm with BP Trainer (1) Articulating Multi-Venous IV Training Arm (1) Set of Wound Assessment and Care Modules (1) Hospital Gown (1) Male Genitalia (1) Female Genitalia (3) Urinary Valves... -
Page 6: Skills Taught
Skills Taught: x Basic patient handling x Denture care x Oral hygiene x Oral and nasal Intubation x Eye and ear irrigation (simulated) x NG Tube insertion, care medication administration and removal x Lavage/Gavage x Tracheostomy care and suctioning x Blood pressure skills x IV care and management x Subcutaneous and intramuscular injection x Oxygen delivery procedures... -
Page 7: Teeth
Laerdal Recommends: Teeth – To remove: Insert and remove bottom teeth first Grasp firmly and lift. when performing denture care. To reinsert both sets: a. Begin on one side and work around, aligning ridges with corresponding grooves in jaws. (Dusting with baby powder is helpful.) (Photo 1) b. -
Page 8: Ng Tube Placement
Laerdal Recommends: NG Tube Placement – This manikin features an esophagus For best results, lubricate the and stomach reservoir for practice tube with either manikin of NG tube insertion and skills such lubricant or liquid detergent as Lavage and Gavage. prior to NG or OG tube insertion. -
Page 9: Belly Plates
Belly Plate with Multi-Sounds – To remove: Laerdal Recommends: 1. Apply pressure to center of plate. 2. Work your fingers under edge of Dusting with talcum powder is plate while lifting. helpful in replacing belly plates. 3. Disconnect bowel sound speaker connector to release plate. -
Page 10: Waist, Knee And Ankle Joints
Waist, Knee and Ankle Laerdal Recommends: Joints – These joints are connected When assembled, talcum powder with a bolt and lock nut. should be used in joints to assist To remove, unscrew lock nut articulation. and pull bolt from joint. Segments will now easily disconnect. -
Page 11: Legs
Legs – Attachment Legs are attached with a 6” long hardware is located bolt, a spring, a large washer, a in envelope inside small washer and a wing nut. carton. To attach: 1. Remove belly plate from manikin to locate hole in hip. 2. -
Page 12: Replacing Skin & Vein System
Laerdal Recommends: When excessive leaking occurs at puncture sites, either a new vein system or skin should be installed to reduce loss of fluid. We recommend working at a sink when replacing the skin and vein system. Replacing Skin and Veins: Remove skin: If replacing skin and veins, cut off skin. - Page 13 5. Place new veins along grooves, (Figures 4 & 5) spot gluing as needed. (We recommend a fast-drying glue.) Fig. 4 Fig. 5 6. Generously lather arm mandrel with liquid soap. Laerdal Recommends Heat arms skins before replacing on mandrel. This can be done with a blow-dryer 7.
-
Page 14: Blood Pressure Arm
8. Work skin over fingers, as with a glove. (Photo 4) Photo 4 9. Work arm skin up, over mandrel. (Photos 5 & 6) Photo 5 Photo 6 Blood Pressure Arm – 1. Place Blood Pressure Cuff on arm. 2. Attach tubing on cuff to clear tube, located underneath Photo 7 Nursing Kelly’s arm. -
Page 15: Auscultation Of Heart, Breath And Bowel Sounds
Auscultation of Heart, Breath and Bowel Sounds – 1. Connect Nursing Kelly to VitalSim Unit, via cable located on back of manikin. (Photo 8) 2. See VitalSim DFU for complete Heart, Breath and Bowel Sound Auscultation. Photo 8 300-00001 Laerdal... - Page 16 Genitalia: Both male and female genitalia have been provided for urinary catheterization and enema training procedures. Tube-like valves, with a screw cap on one end, connect urethra and anus to corresponding reservoirs. This cap must be connected to genitalia openings. Soft vinyl end of connector is attached to urinary and anal reservoirs with a white clamp.
- Page 17 To assemble: (Photos 9, 10 & 11) 1. Screw both valves onto genitalia. When attaching valves, be sure alignment of genitalia, urinary reservoir (belly plate) and colon reservoir are as illustrated in Figure 7. 2. Lift up on edge of belly plate. Fig.
- Page 18 Colon Reservoir – Colon reservoir inserts into pelvic cavity with narrow end downward and connector pointing outward. This connector attaches reservoir to anal valve on genitalia. (Photo 12) Reservoir should be removed from manikin, inverted, drained and completely air-dried before storing. Photo 12 Urinary Catheterization and Enema Simulation –...
- Page 19 Troubleshooting – What can I do if my manikin develops a pelvic spread? Cinch pelvis with a belt and heat with a hair dryer to soften, cinching as you heat. Insert pin, leaving belt in place until cool. What do I do if my connectors leak? Make sure C-clamps are squeezed tightly into place and connectors are screwed on tightly.
- Page 20 Care and Maintenance 1. Clean with mild soap and water; do not submerse manikin or parts in cleaning fluids or water. Apply a light coat of talcum powder to the face and chest skin to achieve skin- like feeling. 2. Use only on clean surface. Avoid felt tipped markers, ink pens, acetone, iodine or other staining products and avoid placing the manikin on newsprint or inked lines of any kind.
- Page 21 – service, repair, readjustment or modification is carried out by Laerdal Medical or persons authorized by Laerdal Medical. – the electrical installation of the room where the product is used complies with pertinent equipment requirements. – the product is used in the proper manner in strict compliance with its Directions for Use.
- Page 22 REPLACEMENT PARTS: Product Number: Description: 312029 Kit, Skin/Vein Adult Multi-Venous IV Arm 380200 Arm Assembly, Blood Pressure 380460 Genitalia, Blank-Adult Male 380471 Plug, Belly plate-Adult 380475 Pin, Pelvis 380600 Leg Assembly, Left Adult 380650 Leg Assembly, Right Adult 380700 Arm, Male Multi-Venous IV Training 380800 Arm Assembly, Left...
- Page 23 300-00250 Pad Assembly, Ventral Gluteal Injection Adult Male 300-00350 Pad Assembly, Gluteal Injection Adult Male 300-00450 Valve/Clamp Set, Anal Hosp Urin/Anal CVK 300-00550 Valve/Clamp Set, Urinary Hosp Adult 300-00650 Lubricant, Manikin-4 oz Bottle W/Sprayer 300-00750 Blood, Simulated-4 oz 300-00850 Plug, Tracheostomy 300-00950 Denture Set, Upper/Lower Adult...
Need help?
Do you have a question about the Laerdal Nursing Kelly VitalSim and is the answer not in the manual?
Questions and answers