Advertisement
Table of Contents
- 1 Important Safety Instructions
- 2 Package Contents
- 3 Product Specifications
- 4 Installation Procedures
- 5 Mounting Locations
- 6 Installation
- 7 Step 1. Installing the Mounting Bracket
- 8 Step 2. Installing the Mounting Plate
- 9 Care and Cleaning
- 10 Troubleshooting
- 11 Conditions of Warranty
- Download this manual
TM
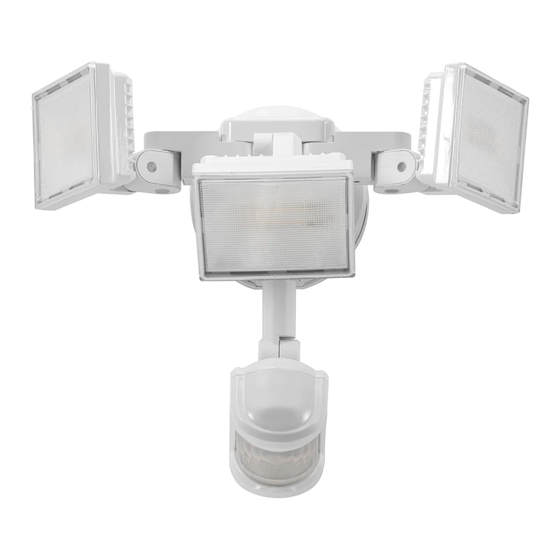
MOTION ACTIVATED
LED SECURITY FLOODLIGHT
ITM. / ART. 1405190
Model: LM030022
CARE & USE INSTRUCTIONS
@
KodaBuiltOfficial
IMPORTANT, RETAIN FOR
FUTURE REFERENCE: READ CAREFULLY
For assistance with assembly, installation, parts and customer service, call us at 1-866-294-9244 (English),
Monday - Friday, 8am - 5pm Pacific Time, email us at info@kodabuilt.com
2975 Red Hill Ave., Ste. 100, Costa Mesa, CA 92626, USA
www.KodaBuilt.com
Advertisement
Table of Contents

Related Manuals for KODA LM030022


Summary of Contents for KODA LM030022
- Page 1 MOTION ACTIVATED LED SECURITY FLOODLIGHT ITM. / ART. 1405190 Model: LM030022 CARE & USE INSTRUCTIONS KodaBuiltOfficial IMPORTANT, RETAIN FOR FUTURE REFERENCE: READ CAREFULLY For assistance with assembly, installation, parts and customer service, call us at 1-866-294-9244 (English), Monday - Friday, 8am - 5pm Pacific Time, email us at info@kodabuilt.com 2975 Red Hill Ave., Ste.
-
Page 2: Important Safety Instructions
IMPORTANT SAFETY INSTRUCTIONS: • To reduce the risk of death, injury to persons or property damage from fire, electric shock, falling parts, cuts/abrasions and other hazards read all warnings and instructions included with and on the fixture box and all fixture labels. • Before installing, servicing or performing routine maintenance upon this equipment, follow these general precautions. • It is recommended that a qualified licensed electrician perform all wiring connections. The electrical system and the method of electrically connecting this fixture to it must be in accordance with the National Electrical Code and local building codes. • Do not mount the unit against flammable surfaces. • The motion detector will not operate properly if it is installed: -Near the outlet of a central heating boiler -Near an air conditioning unit -Pointing directly at moving vehicles... - Page 3 CAUTION: RISK OF PRODUCT DAMAGE • Never connect components under load. • Do not mount or support these fixtures in a manner that can cut the outer jacket or damage wire insulation. • Avoid covering LED fixtures with insulation, foam, or other material that will prevent convection or conduction cooling. • Never connect an LED product directly to dimmer packs, occupancy sensors, timing devices or other related control device, unless individual product specifications deem otherwise. • Do not exceed fixture’s maximum ambient temperatures. • LED products are Polarity Sensitive. Ensure proper polarity before installation. Electrostatic Discharge (ESD) can cause damage to LED fixtures. Personal grounding equipment must be worn during all installation or servicing of the unit.
-
Page 4: Package Contents
PACKAGE CONTENTS: Please lay out all parts and read the instructions prior to installation. 1 x Motion Activated LED Security Floodlight 1 x Mounting Bolt 1 x Decorative Knob 1 x Mounting Plate 1 x Mounting Bracket 2 x #6 Outlet Box 2 x #8 Outlet Box Screw Screw Tools Needed (not included) Hammer Safety Glasses Phillips-Head Screwdriver Level Silicone Sealant... -
Page 5: Product Specifications
PRODUCT SPECIFICATIONS: 1. Operating Voltage: 120 Vac, 60 Hz 2. Wattage: 44 W 3. Light Output: 3000 lumens 4. Color Temperature: 5000 K 5. LED Life Cycles: up to 50,000 hours 11.8 IN / 30 CM 5.6 IN / 14.4 CM 6. Operating Temperature: -20°C to 40°C / -4°F to 104°F INSTALLATION PROCEDURES: Before beginning assembly of the product, make sure all parts are present. Compare parts with package contents list. If any part is missing or damaged, do not attempt to assemble the product. Estimated assembly time: 30 minutes. Sensor detects motion that moves across the detection zone Note: It is recommended that a qualified licensed electrician perform all wiring connections. The electrical system and the method of electrically connecting this fixture to it must be in accordance with the National Electrical Code and local building codes. • Install the motion sensor between 6.2 ft / 1.9 m and 9.8 ft / 3 m above the ground. Motion sensor is less sensitive above 9.8 ft / 3 m. • Mount sensor away from heat producing sources to prevent false triggering. Be very careful not to include objects such as windows, white walls and water in the detection zone. -
Page 6: Installation
Note: Do not mount this Security Floodlight on the ground. Important notes: 1. E nvironmental temperature affects the sensor range. It is recommended not to mount the fixture near a heat source like an air conditioner, vent or furnace exhaust, or in a direction facing a light reflecting object. 2. T he sensor will be more sensitive to motion across its detection path than motion coming directly towards it. 3. F or best performance, gently clean the lens with a soft cloth every two months to assure maximum sensitivity. INSTALLATION WARNING: Risk of electric shock. Disconnect power at fuse or circuit breaker before installing or servicing. STEP 1. INSTALLING THE MOUNTING BRACKET Line up the holes on the Mounting Bracket with the holes on your outlet box. Using the two Mounting Screws or fit the outlet box. Ensure the ‘FRONT’ marking is at the front after installation. STEP 2. INSTALLING THE MOUNTING PLATE CAUTION: Do not cut any wires with factory installed wire connectors or remove the wire connectors. • Take the outlet box wires through the hole in the Mounting Plate . • Place the Mounting Plate against the outlet box. • When mounting to a wall, the “UP” arrow must point upward. •... - Page 7 STEP 3. MARKING THE ELECTRICAL CONNECTIONS • Insert the outlet box wires into the side of the terminal block. • Insert the white wire from the outlet box into the terminal marked “N (White)”. • Insert the black wire from the outlet box into the terminal marked “ L (Black)”. • Insert the green ground wire from the outlet box into the terminal marked “GND”. STEP 4. MOUNTING THE SECURITY FLOODLIGHT Large mounting bolt (pre-installed) • Align the bottom edge of the Security Floodlight with the bottom edge of the Mounting Plate . Tilt the Security Floodlight toward the Mounting Plate , making sure the Security Floodlight is centered on the Mounting Plate . • Tighten the Large Mounting Bolt securely through the center of the Mounting Plate . Do not overtighten.
- Page 8 OPERATION 1. ADJUSTING THE LED LAMP-HEADS • Adjust the lamp up and down with range of around 45 degrees. You may adjust the lamp left and right with range of around 25 degrees to get the desired lamp direction. 90º 30º 30º 90º 85º 85º 90º 90º 80º 40º 40º • The lamp-heads can be adjusted to horizontal style or “T” style. Note: LED LAMPS ARE NON-REPLACEABLE. Do not attempt to access / maintain the LEDs; they are non-replaceable and any contact may damage the LEDs and will void the warranty. 2. ADJUSTING THE DETECTOR • After installing your Security Floodlight, you are ready to set /aim the motion detector. Detection Range: around 70 ft / 21 m x 240 degrees ( Max ) 70 ft / 21 m detection range, it upon on ambient temperature 25 degree. • Adjust the sensor head horizontal for long coverage. 70ft / 21m 10º 59ft / 18m 20º...
- Page 9 3. ROTATING THE SENSOR CONTROLS DOWNWARD Rotate the motion sensor so the controls face toward the ground. SENS SENS Sensor detection range (SENS) Switch Adjust the SENS setting to adjust range of Passive Infrared(PIR) Motion Sensor • Slide the “SENS” switch toward the (low) position for short detection range. • Slide the “SENS” switch toward the (middle) position for middle detection range. • Slide the “SENS” switch toward the (high) position for long detection range. The higher the “SENS” setting (sensitivity), the greater the possibility of false triggering. To reduce false triggering, suggest to slide the “SENS” SENS switch toward the (low) setting if you don’t need long detection distance while SENS using this light. Dusk Level / Ambient Light Sensor (LUX) Setting This setting is used to control the ambient light level for the Security Floodlight to turn on.
- Page 10 Time Setting This setting is used to control the time span of how the long Security Floodlight remains on when motion is detected. • Set the “TIME” switch to the 1,3 or 7 minute position. • The Security Floodlight will stay on as long as motion is detected and will go off after the time span you set when no motion is detected. SENS Brightness Setting This setting is set the brightness of light. • When sliding the “Bright” switch toward the position, the light will get a high lumen output. • When sliding the “Bright” switch toward the position, the light will get a low lumen output. SENS...
-
Page 11: Care And Cleaning
4. MANUAL OVERRIDE FUNCTION To enable the manual override function, rotate the motion sensor so the controls face towards the ground. • When power is on, the PIR sensor enters a “warm-up” period for about 40 seconds, then automatically switches into AUTO MODE. • During AUTO MODE, by switching the main switch OFF for about 1 second then ON, the PIR sensor will automatically change into MANUAL MODE from AUTO MODE. In MANUAL MODE, the lights will remain ON, and will NOT be controlled by time duration or ambient light (LUX) levels. The MANUAL MODE will change to AUTO MODE in 6 hours automatically. • During MANUAL MODE, by switching the main switch OFF over 30 seconds then back ON again, the PIR sensor will reset to the “warm-up” period. Turn the switch Turn the switch OFF for 1 second back ON 5. BLUE LED SENSOR INDICATOR The Blue LED Light will flash to show that the PIR sensor is functioning properly. -
Page 12: Troubleshooting
TROUBLESHOOTING: PROBLEM POSSIBLE CAUSE SOLUTION The light wall switch is turned off. Turn the light wall switch on. The fuse is blown or the circuit Replace the fuse or ensure the breaker is turned off. circuit breaker is in the on position. The light will not Check wiring to ensure all wires come on. Faulty wire connection. are correctly wired and are wired securely. The detector is aimed in the wrong Re-aim the detector to cover the direction. desired area. -
Page 13: Conditions Of Warranty
NOTE: Warranty only applies for North American customers of purchases made in North America. CONDITIONS OF WARRANTY If during the 1-year warranty period your new product is found to be defective, Koda will repair such defect, or replace the product, without charge for parts or labor subject to the following conditions: • All repairs must be performed by Koda. • All warranty claims must be accompanied by a copy of the sales receipt or bill of sale. • The equipment must not have been altered or damaged through negligence, accident, improper operation, or failure to follow the product instructions for installation, use, or care. - Page 14 SPECIFICALLY SET FORTH HEREIN, NO WARRANTY OR REPRESENTATION, EXPRESS OR IMPLIED, IS MADE AS TO THE MOTION ACTIVATED LED SECURITY FLOODLIGHT. KODA AND/OR ITS AFFILIATES EXPRESSLY DISCLAIMS, WITHOUT LIMITATION, ANY STATUTORY WARRANTIES AND ALL IMPLIED WARRANTIES, INCLUDING ANY IMPLIED WARRANTY OF MERCHANTABILITY OR FITNESS FOR A PARTICULAR PURPOSE.
- Page 15 - Connect the equipment into an outlet on a circuit different from that to which the receiver is connected. - Consult the dealer or an experienced radio/TV technician for help. CAN ICES-005(B) / NMB-005(B) The Facebook logo is a trademark of Facebook, Inc. The Instagram logo is a trademark of Instagram, Inc. YouTube and the YouTube logo are registered trademarks of Google Inc. MADE IN CHINA...
- Page 16 Have a comment or question? Email us at info@kodabuilt.com or visit us online at www.KodaBuilt.com A Horizon Brands Company 2975 Red Hill Ave., Ste. 100, Costa Mesa, CA 92626, USA | Tel: 1-866-294-9244 © 2020 Koda. All rights reserved. ML-030022_V1...
Need help?
Do you have a question about the LM030022 and is the answer not in the manual?
Questions and answers