Table of Contents
Advertisement
Quick Links
Advertisement
Table of Contents

Related Manuals for ARTISUL A1201


Summary of Contents for ARTISUL A1201
- Page 1 User Manual Artisul Pen Tablet | Model: A1201 Windows and Macintosh...
-
Page 2: Precautions
Precautions 1. Please read this manual carefully before using, and keep it well for future reference. 2. Before cleaning this product please unplug the power cord and wipe with a soft damp cloth, do not use any kind of detergents. 3. -
Page 3: Table Of Contents
Contents Precautions ................................2 1. Product Overview ..............................4 1.1 Tablet Introduction ..............................4 1.2 Product and Accessories .............................4 1.3 Tablet Connection ..............................1.4 Driver Installation ..............................1.5 Connecting to Android Phone &Tablet ....................... 1.6 Pen Nib Replacement............................. 2. Basic Operation ..............................9 2.1 Digital pen .................................. -
Page 4: Product Overview
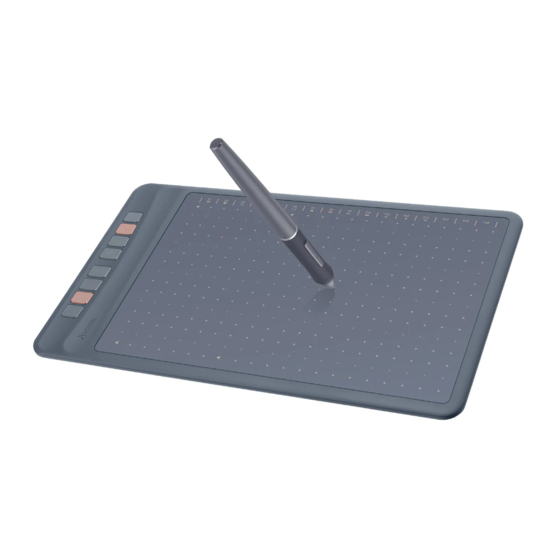
1. Product Overview 1.1 Tablet Introduction Thank you for purchasing the Artisul pen tablet A1201. A1201 is a professional battery-free pen tablet applying the latest technology, which is able to provide you with pen-on-paper experience and render various brushstroke effects and colors vividly. A1201 is to greatly facilitate your writing and drawing, and improve your work efficiency. - Page 5 1.2.2 Multimedia bar Open Task View Save Previous Song Muted Open a New Open Task Manager Pause / Play Volume Down Window Display and Hide Lock Your PC Next Song Volume Up The Desktop Open File Explorer Show/ Hide the Spotlight Muted Save Previous Song...
-
Page 6: Tablet Connection
Windows 7 or later, macOS 10.12 or later, Andriod 6.0 or later 1.4.2 Driver download and installation Please download the driver from our official website : https://www.artisul.com/downloads/ After the driver is installed successfully, you can find the icon in the system tray area; when... -
Page 7: Connecting To Android Phone &Tablet
1.5 Connecting to Android Phone & Tablet 1. Please use Android phone/tablet in portrait mode. 2. Please make sure your phone/tablet OS is Android OS 6.0 or later, and supports OTG function. 3. For some models, you need to go phone or tablet "Settings" then enable "OTG" function. Notes : 1. -
Page 8: Pen Nib Replacement
1.6 Pen Nib Replacement The nib will wear off after using for a long time, then you need to replace a new nib. -
Page 9: Basic Operation
2. Basic Operation 2.1 Digital pen 2.1.1 Gesture Hold the digital pen just like holding a regular pen or pencil. Adjust your grip position so that you can easily press the pen buttons with your thumb. Please be careful not to accidentally press the buttons when using the pen for drawing or positioning. - Page 10 2.1.2 Cursor position Move the pen tip slightly above the active area without touching the tablet, and the cursor will move to the new position accordingly. Press the pen tip on the tablet to make a selection. Tap the tablet once with the pen tip, or press it to the tablet with certain pressure to select the item.
- Page 11 2.1.3 Tap Tap the pen nip once on the tablet to highlight or select an item on the computer, and then double-tap to open it. 2.1.4 Move Choose an item, and then slide the pen tip on the tablet to move its position on the computer.
-
Page 12: Pen Tablet
2.1.5 Pen button The two buttons of the pen can be programmed to different functions respectively. There is no need to touch the pen tip to the tablet to use the programmable buttons. The two buttons can function well as long as the pen tip is within 10 mm of the active area of the tablet. 2.2 Pen tablet 2.2.1 Press key There are eight press keys on the pen tablet and you can program them to different functions... -
Page 13: Mac Whitelist Settings
3.Mac Whitelist Settings 1. Open the downloaded driver and move it into the "Applications"; 2. Open "Applications", click the driver that has been placed in "Applications", and then click "Open" in the pop-up window ; 3. After the above steps, the installed driver will be displayed. Use the digital pen to tap on the pen tablet, and then the "Accessibility Access"... -
Page 14: Function Setting
4.Function Setting 4.1 Device Connection Prompt 1. No Device Detected: The computer does not recognize the tablet. 2. Device connected: The computer has recognized the tablet. - Page 15 4.2 Working Area Setting 4.2.1 Using Multiple Monitors Select the monitor to define the relationship between pen movement on the tablet and cursor movement on the monitor screen. By default the entire active area of tablet maps to the entire monitor. If more than one monitor is in use and you are in extended mode, you need to choose the related monitor on the driver interface which you are going to map to.
-
Page 16: Working Area Setting
4.2.2 Working Area Setting Define the tablet area that will be mapped to the screen area. 1. Full Area: the entire active area of the tablet. This is the default setting. 2. Custom Area: Drag the corners of the foreground graphic to select the screen area. -
Page 17: Shortcuts Keys Function Setting
4.2.3 Rotate Working Area By changing the direction of the tablet to adapt to the left and right hand operation. We provide four directions of choice. 4.3 Shortcuts Keys Function Setting Default Setting: Place the cursor on the shortcut key or click the shortcut keys to find the default values. -
Page 19: Pen Buttons Function Setting
4.4 Pen Buttons Function Setting Customized Setting: Select the function to be achieved on the pop-up dialog box, and it will be saved automatically. -
Page 20: Pressure Sensitivity Setting
4.5 Pressure Sensitivity Setting The pressure sensitivity will be changed by dragging the points of the pressure curve. Drag the points to the upper left for higher sensitivity. Drag the points to the lower right for lower sensitivity. -
Page 21: Pen Pressure Testing
4.6 Pen Pressure Testing You can gradually apply pressure to the stylus on the screen to test the pressure level. -
Page 22: Enable The Windows Ink Feature
4.7 Enable the Windows Ink Feature Microsoft Windows provides extensive support for pen input. Pen features are supported in such as Microsoft Office 、 Windows Journal 、 Adobe Photoshop CC 、 SketchBook 6 and so on. -
Page 23: Mouse Mode
4.8 Mouse Mode As shown below, check the checkbox in front of the mouse mode to open the mouse mode. Under mouse mode, when you move the pen, the cursor moves following the relative coordinate principle, similar to moving the cursor with the mouse. This means you can click icons or select options at the edge of the screen without moving the pen to the edge of the working area. -
Page 25: Data Export And Import
4.10 Data Export and Import The driver supports exporting and importing your custom configuration data of the product, which is convenient for you to use different software and avoid the trouble of repeated settings. -
Page 26: Specifications
5.Specifications Model A1201 Touch Technology Battery-free EMR 258.4 x161.5mm Working Area The diagonal is 12 inches(12inch) Dimension 349.2x207.7x8mm Net Weight 569.5g Touch Resolution 5080LPI ≥ 266PPS Report Rate Accuracy ±0.3mm Pen Sensing Height 10mm Interface Type-c Express Key 8 Programmable Press Keys+16 Multimedia Keys OS Support Windows 7 or later, mac OS 10.12 or later, Andriod 6.0 or later... -
Page 27: Trouble Shooting
10mm Make sure the USB port is functional, if not, please The computer can’t recognize the change to another USB port. tablet For more FAQs, please feel free to check : http://support.artisul.com/en/support/home... -
Page 28: Contact Us For After-Sell Service
7.Contact Us for After-sales Service If you have any questions, please feel free to contact us at: www.artisul.com service@artisul.com...
Need help?
Do you have a question about the A1201 and is the answer not in the manual?
Questions and answers