Table of Contents
Advertisement
Quick Links
Advertisement
Table of Contents

Subscribe to Our Youtube Channel
Related Manuals for ARTISUL SP1603


Summary of Contents for ARTISUL SP1603
- Page 1 User Manual Artisul LCD Sketch-Pad | Model: SP1603 Windows and Macintosh...
-
Page 2: Notice
Notice 1. Please read this manual carefully before you use the pen display, and keep it well for future reference. 2. Before cleaning the pen display please unplug the power cable and wipe the screen with a soft damp cloth. No detergents are suggested. 3. -
Page 3: Table Of Contents
Contents Notice ....................................2 1. Product Overview ..............................4 1.1 Product Introduction ...............................4 1.2 Product and Accessories .............................4 1.3 Connection ................................. 1.4 Driver Installation ..............................1.5 Pen Nib Replacement ............................1.6 OSD Settings................................2. How to Use Digital Pen ............................9 2.1 Digital Pen .................................. -
Page 4: Product Overview
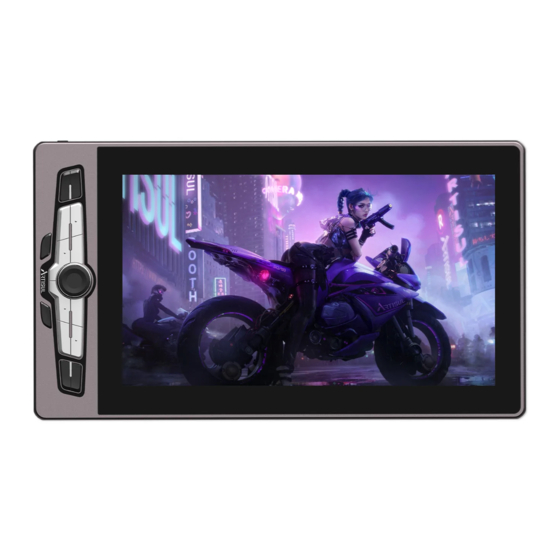
To better understand and use this product, please read this user manual carefully. It shows how to use Artisul® SP1603 when you connect it to a computer running Windows operating system. It is also applicable to computers running Mac operating system unless a special note is given out. - Page 5 1.2.2 Accessories X 38 Digital Pen Pen Holder Pen Nibs Cleaning Cloth HDMI Cable 2-in-1 Cable Pen Case Warranty Card Power Adapter Quick Start Guide Warranty Card 1.2.3 Power Adapter Pick right plugs which are used in your country or region and fit the power adapter with it (The included plug differs from country to country) UK Standard EU Standard...
-
Page 6: Connection
USB-A end to the computer, and the red USB-A end to the power adapter (You can also use a Type-c cable to connect the power supply and the computer instead). 3. Once correctly connected, SP1603 will start up automatically. HDMI... - Page 7 Note: The pen display may restart because the output voltage of the full-featured Type-c port in the computer is low. In this case please connect your display to the power supply via a 2-in-1 cable first, then connect the display to your computer via a full featured USB-C to USB-C cable (You only need to plug the red USB-A connector to the power adapter and let the black one alone, otherwise the pen display can not be detected).
-
Page 8: Driver Installation
Windows 7 or later, macOS 10.12 or later 1.4.2 Install Driver Please download the driver from our website : https://www.artisul.com/downloads/ to the computer. When the installation is finished successfully, you can find the driver icon in system tray. Connect the device to your computer and the icon turns into , showing that the driver has detected the device and now you can use it. -
Page 9: Osd Settings
1.6 OSD Settings Press and hold Power Button for two seconds to turn off K4: Auto K3: Menu Press and hold press key Status Indicator: K1 and K2 to enter Video signal received: No light or exit OSD mode No signal: red light OSD mode: slow flashing white light K13: Down K14: Up... -
Page 10: How To Use Digital Pen
2. How to Use Digital Pen 2.1 Digital pen 2.1.1 How to hold the pen Hold the digital pen as you hold a real pen. Adjust your grip so that you can toggle the pen buttons easily with your thumb or index finger. Be careful not to accidentally press the button while drawing with the pen. - Page 11 2.1.2 Cursor Movement Move the pen slightly above the working area of the screen without touching the surface of pen display, and the cursor on the screen will move to the new position accordingly. Tap the screen with the pen nib to select a program. 2.1.3 Click Select a program with the digital pen and double-click on the item to open it.
- Page 12 2.1.4 Move Pick up an item on the screen, then slide the pen nib across the display to move 2.1.5 How to Use the Pen Buttons There are two customizable buttons on the digital pen. The buttons on the pen will work as long as the vertical distance between the pen nib and the screen is within 10mm.
-
Page 13: Mac Whitelist Setting
3.Mac Whitelist Settings 1. Put the downloaded driver into “Applications”. 2. Click “Applications” and then open the driver. 3. Use the digital pen to tap on the screen of the pen display and the “Accessibility Access” pop-up window appears. click “Open System Preferences”. Go to “Security & Privacy” and click “Privacy”. -
Page 14: Driver Settings
4. Driver Settings 4.1 Device Connection Notification 1. No Device Detected: The device can not be identified by the computer. 2. Device Connected: The device is identified by the computer. -
Page 15: Working Area
4.2 Working Area 4.2.1 Multiple Monitors Connected to a Computer When the pen display is in use with a computer/all-in-one PC/other monitors, you can set the area that the cursors can move on the screens in the driver. By default, the entire active area of the pen display maps to the whole monitor. If more than one monitor is in use and they are in extended mode, users need to choose one that will be mapped to on the driver interface and the other ones as the external displays. - Page 16 4.2.2 Set Working Area Select the working area of your pen display which can be mapped to the monitor. 1. Full Area: The entire active area of the pen display will be mapped to the monitor. It is the default setting. 2.
-
Page 17: Press Key
4.2.3 Rotate Working Area Both left-handed and right-handed users can freely use the pen display and place it either way because the working area can be rotated by 0°, 90°, 180°or 270°. 4.3 Press Key Default functions: Place the cursor over one of the buttons on the driver or click a button to check its default value. -
Page 19: Pen Button
4.4 Pen Button Click the buttons to set custom functions. You can enter a name for the keystroke and choose the function you want. -
Page 20: Pressure Sensitivity
4.5 Pressure Sensitivity Adjust the pressure sensitivity level by dragging the slider in the Pressure Sensitivity box shown below: Move the slider up to get a high level of pressure sensitivity, and move it down to get a low level of pressure sensitivity. -
Page 21: Pressure Sensitivity Test
4.6 Pressure Sensitivity Test Draw lines in the Pressure Test box with the pen, and the bar on the right will simultaneously show the pressure changes on the pen nib. Test several times until you find the appropriate pressure sensitivity level. -
Page 22: Calibration
4.7 Calibration Screen Calibration: Click the red crosses on the screen one by one to complete calibration. Factory Reset: Click “Factory Reset” to reset the pen display. Cancel Calibration: Click “Cancel Calibration” or press “ESC” key to cancel the calibration. -
Page 23: Enable Windows Ink
4.8 Enable Windows Ink This function is for software that supports Windows Ink, such as Microsoft Office, Windows Journal, Adobe Photoshop CC, SketchBook 6 and so on. -
Page 24: Mouse Mode
4.9 Mouse Mode Select “Mouse Mode” to enable mouse mode (see the picture below). In Mouse Mode, as relative positioning is applied to the digital pen, you can use the pen as using a mouse to click the icon or open files close to the edge of screen without placing the digital pen at where the icon and files are. -
Page 26: Import And Export Data
4.11 Import and Export Data The functions you set in the driver will be saved and you can import or export these data in Backup. -
Page 27: Specifications
5. Specifications Model SP1603 Panel Size 15.6inch Resolution 1920 x 1080(16:9) LCD Type Active Area 344.16 × 193.59mm Contrast Ratio 1000 : 1 Screen 220cd/m2 Brightness Response Time 25ms 89°/89°(H)/89°/89°(V) (Typ.)(CR > 10) View Angle 90% Adobe RGB Gamut 88% NTSC... - Page 28 Input Voltage 100-240VAC, 50/60Hz DC 5V 2A Output Voltage Output Interface HDMI1.4, USB3.1Type-C (DP1.2) General Press Key 14 Customizable press keys + 1 Dial Dimension 442 × 274 × 12.5mm Net Weight 1.32KG OS Support Windows 7 or later, macOS 10.12 or later...
-
Page 29: Trouble Shooting
6. Trouble Shooting 6.1 Display Problem Malfunctions Suggested Solutions • Make sure the pen display is powered up. Power indicator does not work • Please check the power socket. 1. Please make sure the pen display is powered up. 2. Make sure that the video cable is connected correctly. 3. -
Page 30: Functional Failure
Pen buttons does not work of your display and the distance between the nib and the screen is within 10mm when you press the pen buttons. Cursor and pen nib are not Please do the calibration. aligned For more information, please refer to: http://support.artisul.com/en/support/home... -
Page 31: Contact Us
7. Contact Us If you have any questions, please feel free to contact us on the website: www. artisul.com, or send an email to service@artisul.com.
Need help?
Do you have a question about the SP1603 and is the answer not in the manual?
Questions and answers