
Subscribe to Our Youtube Channel
Related Manuals for VITACON VitaScan LT


Summary of Contents for VITACON VitaScan LT
- Page 1 VitaScan LT USB Ultrasound Bladder Scanner User and Service Manual Version 4.5.4.14 | Date: 7th of January 2020...
- Page 2 7th-Jan-20 The Information contained in this user and service manual is proprietary to Vitacon. It is only used for convenience of our customers. It may be changed in whole or in part without written notice. Any service work performed by persons who are not authorized by Vitacon may void your warranty.
- Page 3 VitaScan LT provided that it is used for the purpose for which it was designed. Vitacon will, Ultrasound Bladder Scanner.
-
Page 4: Table Of Contents
Application Features ......................19 Run VitaScan LT application....................20 Scanning on Vitacon Phantom .................... 29 How to run VitaScan LT application remote from INI file ............. 30 Application – Troubleshooting ..................... 32 Warranty and Disclaimer Information .................. 33 Service..........................34 Manufacturer: ........................ -
Page 5: Introduction
Important Information Notice To All Operators: output levels can be found in the section titled, “Technical Specifications” in this The VitaScan LT should be used only by individuals who have been trained and manual. authorized by a physician or the institution It is recommended that users read the providing patient care. -
Page 6: Indications For Use
Note: This box contains specifically designed foam inserts to ensure safe shipment of the VitaScan LT. Save these for future shipment of the unit for service or calibration. www.vitacon.com PAGE... -
Page 7: Content Of The Packaging
Warning: Do not have VitaScan LT connected to any device while stored in the original soft case container. Storage Requirements: Storage temperature from -30°C to 50°C Relative humidity of 20% to 90% @ 30°C, non-condensing... -
Page 8: Product Upgrades And Updates
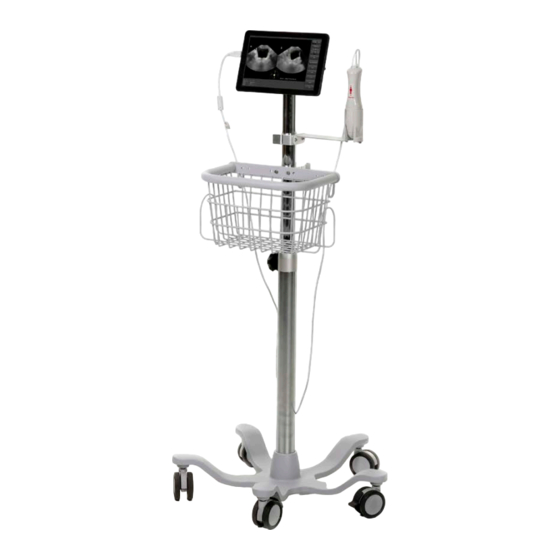
USB Memory stick With Software & Documentation About the System Software The VitaScan LT system contains software that controls its operation. Vitacon will provide you with a USB Memory stick containing the software. Typically new software provides new capabilities. About the Ultrasound System The VitaScan LT System includes: USB Probe, and tablet computer Lamina T-1022. -
Page 9: Electrical Safety
VitaScan LT, body. The degree of discharge can inspect the housing and USB cable. be significant enough to cause Do not use the VitaScan LT if these damage to a transducer or an are damaged. ultrasound system. The following... -
Page 10: Equipment Safety
Do not use the VitaScan LT on patients with open skin or wounds in the suprapubic region. Use care when scanning suprapubic and pelvic surgery patients. Scar tissue, surgical incisions, sutures, and staples can affect ultrasound transmission and reflection. -
Page 11: Labeling Symbols
VitaScan LT User and Service Manual Warning There is the possible hazard of explosion if the VitaScan LT is used in the presence of flammable anesthetics. Labeling Symbols Warning, consult CE mark – Notified body no.2274 accompanying documents Read the documentation Test Agency Certification Mark –... -
Page 12: Applicable Standards/Approvals
VitaScan LT User and Service Manual Applicable Standards/Approvals 93/42/EEC Council Directive concerning medical devices EN ISO 13485:2012+ AC:2012 Medical devices- Quality management systems- Requirements for regulatory purposes EN ISO 14971:2012 Medical devices – Application of risk management to medical devices EN ISO 14155:2011 Clinical investigation of medical devices for human subjects —... -
Page 13: Applying The Ultrasound Gel
VitaScan LT User and Service Manual Applying the Ultrasound Gel Palpate the patient’s symphysis pubis (pubic bone) and apply the Gel immediately superior to the patient’s symphysis pubis, as shown in images below. Or apply the Gel around the dome of the Scanhead. Smooth the gel out and remove any air bubbles, which may block ultrasound transmission. -
Page 14: Regular Inspections And Maintenance
Regular Inspections and Maintenance VitaScan LT is a Medical Electric Equipment and therefore needs special precautions regarding EMC. VitaScan LT needs to be installed and put into service according to the EMC information provided in the accompanying documents. Weekly Inspections: Once a week, you should inspect the Scanhead and cable for physical faults or cracks. -
Page 15: Care, Cleaning And Disinfecting
Care, Cleaning and Disinfecting Clean the VitaScan LT with a soft cloth soaked in a mild liquid detergent solution. Rinse with clean water and carefully dry with a clean soft cloth. Dampen a soft cloth with 70% ethanol. -
Page 16: Vitascan Lt Application Software Installation
• Medical Isolation Device – e.g. Tripp Lite IS150HG (N/A) or Noratel IMEDe 150 (Int’l) Note: Installing VitaScan LT Application Software on Windows 10 Operating System requires the operator is logged in as “Administrator”. Installation of the VitaScan LT application Open the folder to view the “VitaScan_LT_Installer”... - Page 17 VitaScan LT User and Service Manual The “Next” button gets enabled when user chooses to accept the license agreement • terms and conditions. • Press Next, (It is recommended to install in the default director) www.vitacon.com PAGE...
- Page 18 VitaScan LT User and Service Manual • Press Start. • Press Next. Finish the installation by pressing Exit. • • After a successful installation a VitaScan LT icon will appear on your desktop. www.vitacon.com PAGE...
-
Page 19: Usb Driver Installation
VitaScan LT User and Service Manual USB driver Installation • VitaScan LT installation requires installation of the USB driver for the VitaScan LT. • Press ‘OK’. • Press ‘Start’ to start the installation process. Connect the probe in the USB-port and press ‘OK’. - Page 20 VitaScan LT User and Service Manual Disconnect the probe from the USB-port and press ‘OK’. • • Press ‘Install’ to proceed the installation process. Press ‘OK’, to finish the installation process. • www.vitacon.com PAGE...
- Page 21 VitaScan LT User and Service Manual • Press ‘Exit’, to end the installation process. Note: If the PC has more than one USB port, please connect the probe to each different USB port while you are logged in as an “Administrator”. The USB driver will be automatically installed and the probe well recognized on whatever port it could be connected.
-
Page 22: User Guide
• • Rich Graphical User Interface and easy navigation VitaScan LT is configured to work for “No. Of Sectors To Scan” = 6, 12 or 24. • Note: Installing VitaScan LT Application Software on Windows 10 Operating System requires the operator is logged in as “Administrator”. -
Page 23: Run Vitascan Lt Application
Make sure the VitaScan v.2 probe is inserted to the computer USB port. • • Press the VitaScan LT Icon on your Desktop to start the application. All users should view a 2 minute user guide video “How to perform a successful scan” •... - Page 24 Study Time:” Current Time” • Study Modality: “XC” • Study Description: “VitaScan LT – Ultrasound Bladder Scanner” • By default, on power up, the gender will be “Female” and scan depth is set to 16 cm. • Select Male or Female without/with Hysterectomy.
- Page 25 VitaScan LT User and Service Manual When you have located the bladder, as in the picture above, press “Scan” to start • scanning. NOTE: Do not move the VitaScan probe until scanning is 100% done. The results will appear as shown below. The left picture shows the horizontal scan, and •...
- Page 26 VitaScan LT User and Service Manual • Software allows you to save pre-void result and post-void result. This allows the software to calculate the voided volume. This mode is default. To turn off, unselect Residual Calculation in Setup. www.vitacon.com PAGE...
- Page 27 VitaScan LT User and Service Manual • When you are pleased with the pre-void result, press “Accept as Pre-Void”, press “Discard” to do a new scan. The patient will have to empty the bladder. The user will have to do a new scan and •...
- Page 28 VitaScan LT User and Service Manual The green circle or bladder contour will be displayed. Drag and drop the small green • circles on the bladder wall. On left side you see thumbnails of the images you can alter. Clicking on the various thumbnails you can switch between the different slices.
- Page 29 VitaScan LT User and Service Manual The Measurement can be saved by pressing “Save”. This will generate an exact • image of what you see, including patient information and the volume result. The default name for a saved file is a timestamp which will have the form “20190108 094853”. This means the Measurement was done on the Date: 2019/Jan/08 Time: 09:48:53.
- Page 30 VitaScan LT User and Service Manual The result can also be printed by pressing “Print”. It will give you the option to select a • printer and chose if you want to print the picture in a landscape or normal orientation.
- Page 31 Dicom file will contain the following Dicom attributes: PatientID: “as in setup”, Patient Birth Date: “as in setup”, Patient Sex: “as selected”, Study Date: “Current Date”, Study Time:” Current Time”, Study Modality: “XC”, Study Description: “VitaScan LT – Ultrasound Bladder Scanner”. And an image of results, transversal image and sagittal plain is displayed.
-
Page 32: Scanning On Vitacon Phantom
This ensures the user will not get a pubic bone interference and recuses the risk to overestimation. Scanning on Vitacon Phantom Before scanning on a Vitacon Phantom enable the “Phantom” box under “Setup”. The • Phantom box is disabled as a default setting. I.e. the Phantom box will be turned off when “Setup”... -
Page 33: How To Run Vitascan Lt Application Remote From Ini File
Data Logging: Enables automatic data logging of measurements. Data is stored with a • timestamp in the folder C:\ Documents\Vitacon\VitaScanLT. This option may be used for investigation of issues with image data. How to run VitaScan LT application remote from INI file Requires version 4.5.4.6 or higher. - Page 34 SETTINGS: LANGUAGE=English // Set language SERIALNR_PC= // Input serial number of PC/Tablet SERIALNR_PROBE= // Input serial number of VitaScan LT USB probe HOSPITAL_ID= // Hospital name or ID# MANUAL_MEASUREMENT=0 // Set to 0 = OFF or 1 = 0N RESIDUAL_CALCULATION=0...
-
Page 35: Application - Troubleshooting
• Scanbutton is deactivated. on your computer p Press Clear/Restart button, or No space between ‘-I’ and path to the reset the VitaScan LT by removing INI-filename USB connection for a few seconds SAVE and insert again. p Turn off “Power Saving Mode”. Set... -
Page 36: Warranty And Disclaimer Information
VITACON will, for a period of sixty (60) months from date of purchase, repair or replace any defective Product with new or reconditioned parts or... -
Page 37: Service
IVBM VUFE. design description. IVBM VUFE is the Overview electronic module in the VitaScan LT bladder volume scanner. VitaScan LT is a The drawing below shows an overview of 3-dimensional ultrasonic scanning device used to measure the bladder volume and the complete VitaScan LT bladder scanner quantity of urine remaining in the bladder;... - Page 38 The following are “live” image of the bladder, making it the main parts of the design: possible to move the VitaScan LT to • Microcontroller the correct position before making a •...
- Page 39 VitaScan LT User and Service Manual PSU: Analog Receiver and Transmitter: The transmitter is a bipolar “square- The PSU (power supply unit) in the wave” pulse transmitter. The voltage IVBM-VUFE module get its input level is settable to tree levels by voltage from the USB-connection.
-
Page 40: Manufacturer
Repair should be performed only by Vitacon authorized service organization. Manufacturer: UAB Vitacon LT Naujoji g. 12-525 Alytus 63250 Lithuania Copyright 2020 by Vitacon. All rights reserved. 2274 www.vitacon.com...
Need help?
Do you have a question about the VitaScan LT and is the answer not in the manual?
Questions and answers