
Related Manuals for Philips FW-P75


Summary of Contents for Philips FW-P75
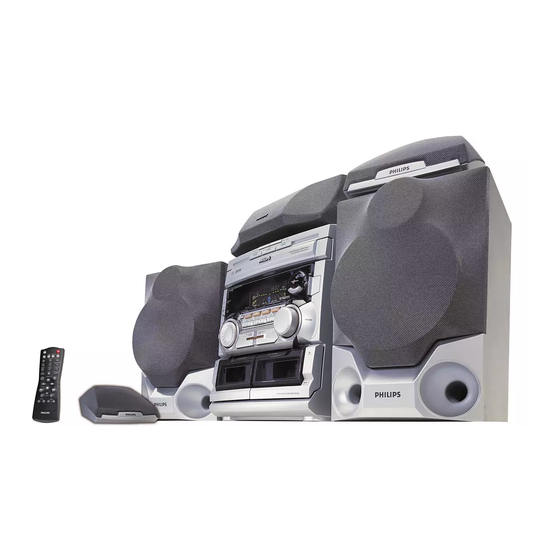
- Page 1 All manuals and user guides at all-guides.com Mini Hi-Fi System with 3 CD changer 3139 116 19311 pg 01-26/P75/22-Eng 3/6/00, 12:39 PM...
- Page 2 This apparatus is fitted with an approved 13 Amp plug. To change a fuse in this type of plug proceed as follows: Si dichiara che l’apparecchio FW-P75 Philips 1 Remove fuse cover and fuse. risponde alle prescrizioni dell’art. 2 comma 1 del 2 Fix new fuse which should be a BS1362 5 Amp, A.S.T.A.
- Page 3 All manuals and user guides at all-guides.com INDEX English ........5 Français .........27 Español ........51 Deutsch ........75 Nederlands ......99 Italiano .........123 Svenska .......147 Dansk ........169 Suomi ........193 Português ......213 CLASS 1 ∂ÏÏËÓÈο ......237 LASER PRODUCT 3139 116 19761 pg 01-26/P75/22-Eng 3/6/00, 12:39 PM...
- Page 4 All manuals and user guides at all-guides.com 3139 116 19761 pg 01-26/P75/22-Eng 3/6/00, 12:39 PM...
-
Page 5: Table Of Contents
All manuals and user guides at all-guides.com CONTENTS GENERAL INFORMATION SAFETY INFORMATION • Place the system on a solid base (e.g. a General Information Acknowledgement General Information ....5 cabinet). • The type plate (which contains the • Place the system in a location with Safety Information .... -
Page 6: Preparation
All manuals and user guides at all-guides.com PREPARATION Rear Connections A AM Loop Antenna Connection Connect the supplied loop antenna to the AM ANTENNA terminal. Place the AM loop STANDBY ON antenna far away from the system and CUT OFF FREQUENCY HIGH POWER SUBWOOFER 60Hz 150Hz... - Page 7 All manuals and user guides at all-guides.com PREPARATION CAUTION: F Line Out Connection H Subwoofer Out Connection Inserting batteries into the (wireless – For optimal sound performance, it is Remote Control Connect the optional active subwoofer to ready) recommended to use the supplied the SUBWOOFER OUT terminal.
-
Page 8: Dolby Pro Logic
All manuals and user guides at all-guides.com DOLBY PRO LOGIC • Rear (surround) speakers: Connect Center Speaker 3 Press Dolby Pro Logic BALANCE either the wired rear surround speakers For the best sound, place the center BALANCE L This state of the art Dolby Pro Logic mini or a pair of wireless rear speakers (not speaker at the same height as the left and to adjust the... - Page 9 All manuals and user guides at all-guides.com DOLBY PRO LOGIC When you have completed the Dolby Pro Important! Dolby Surround Dolby 3 Stereo Logic setup, you are ready to enjoy Home 1 For the best Dolby Pro Logic sound, This setting is for a full Dolby Surround Pro Use this setting when full surround is not Cinema sound.
-
Page 10: Controls
All manuals and user guides at all-guides.com CONTROLS DISC CHANGE OPEN•CLOSE DISC 1 DISC 2 DISC 3 C H A N G E R ‹ MINI HIFI SYSTEM PROGRAM STEREO TUNER TAPE 1/2 BACK REPEAT TIMER NEWS T.A. FRONT 60Hz 8KHz 250Hz 500Hz... - Page 11 All manuals and user guides at all-guides.com CONTROLS 9 DISPLAY SCREEN % DPL DISPLAY PANEL PLAY É / PAUSE Å Controls on the system and – to view the current setting of the – to view the selected Dolby Pro Logic for CD ....
- Page 12 All manuals and user guides at all-guides.com CONTROLS ≥ BALANCE L/R Notes for remote control: – to balance the sound level of the Front – First select the source you wish to Left and Right speakers. control by pressing one of the •...
-
Page 13: Operating The System
All manuals and user guides at all-guides.com OPERATING THE SYSTEM To start the demonstration mode Switching the system ON • Press and hold Ç (on the system only) • Press CD, TUNER, TAPE or AUX. MINI HIFI SYSTEM for 5 seconds when the system is in PROGRAM STEREO REPEAT... - Page 14 All manuals and user guides at all-guides.com OPERATING THE SYSTEM With the JOG control, you can change the Automatic DSC-DBB selection Selecting the Equalizer Sound Control level of any DSC setting except CLASSIC. The best DBB setting is generated Display VOLUME ADJUSTMENT automatically for each DSC selection.
- Page 15 All manuals and user guides at all-guides.com Discs for playback CD Direct Play DISC CHANGE OPEN•CLOSE DISC 1 DISC 2 DISC 3 This system can play all digital audio CD, • You can play a CD directly by pressing finalized digital audio CD-Recordable and the DISC 1, DISC 2 or DISC 3 button.
- Page 16 All manuals and user guides at all-guides.com Selecting a desired track during – If the system is reading the disc, Disc Change Programming Tracks playback programming is not possible, You can change the outer two discs while Programming tracks of a loaded CD is •...
- Page 17 All manuals and user guides at all-guides.com Notes: Shuffle Repeat (only on remote control) (only on remote control) – If you press any of the CD DIRECT PLAY In shuffle mode, the system plays all the You can play the current track, a disc or all buttons, the system will play the available discs and their tracks in random available discs repeatedly.
-
Page 18: Tuner
All manuals and user guides at all-guides.com TUNER ™ The system will search for every • If you wish to store the radio station to another preset number, press 4 or 3 to available station in the FM waveband MINI HIFI SYSTEM first, then search the MW and LW select the desired preset number. -
Page 19: Tape
All manuals and user guides at all-guides.com TAPE Loading a tape Auto Reverse Playback (only on 1 Press OPEN. tape deck 2) MINI HIFI SYSTEM PROGRAM SHUFFLE STEREO REPEAT TIMER BACK FRONT NEWS T.A. 2 The tape deck door opens. •... -
Page 20: Aux/Cdr
All manuals and user guides at all-guides.com TAPE AUX/CDR 3a(for playback on tape deck 2 only) During playback • Press í or ë to select tape side (see • Press and hold à or á until the MINI HIFI SYSTEM Tape Side) . -
Page 21: Recording
All manuals and user guides at all-guides.com RECORDING SWITCH OFF DOLBY PRO LOGIC Recording from other sources WHEN RECORDING (only on tape deck 2) MINI HIFI SYSTEM PROGRAM STEREO REPEAT TIMER BACK 1 Press TAPE ( TAPE 1•2 ) to select tape FRONT NEWS T.A. -
Page 22: Clock
All manuals and user guides at all-guides.com RECORDING CLOCK 4 Press DUB (HSD) once for normal CD Synchro Start Recording speed dubbing or twice (within 2 1 Load a blank tape into tape deck 2 and a MINI HIFI SYSTEM seconds) for high speed dubbing. -
Page 23: Timer
All manuals and user guides at all-guides.com TIMER SLEEP TIMER 5 Press CLOCK/TIMER again to store the ™ The starts flashing. – If the source selected is TAPE, and if the TIMER Sleep Timer (only on remote control) setting. ™ The selected source is lit while other preset time is reached during high This feature allows you to select a length ™... -
Page 24: Specifications
All manuals and user guides at all-guides.com SPECIFICATIONS TUNER SURROUND SPEAKERS Specifications FM wave range ......... 87.5 – 108 MHz System ............closed satellite AMPLIFIER Impedance ..............3 Ω MW wave range ........531 – 1602 kHz Output power LW wave range ..........153 – 279 kHz Speaker Driver .......... -
Page 25: Maintenance
• The CD is dirty, badly scratched or good playback quality, clean the CD lens warped. with Philips CD Lens Cleaner or any ™ Clean or replace the CD. commercially available cleaner. Follow • The CD lens is dirty or dusty. - Page 26 All manuals and user guides at all-guides.com TROUBLESHOOTING Remote control has no effect on the There is a howling sound at the Tape Deck Operation General system. external source. Recording or playback cannot be System does not react when any •...
Need help?
Do you have a question about the FW-P75 and is the answer not in the manual?
Questions and answers