Table of Contents
Advertisement
Quick Links
Shenzhen Dericam Technology Co.,LTD
Quick Installation Guide
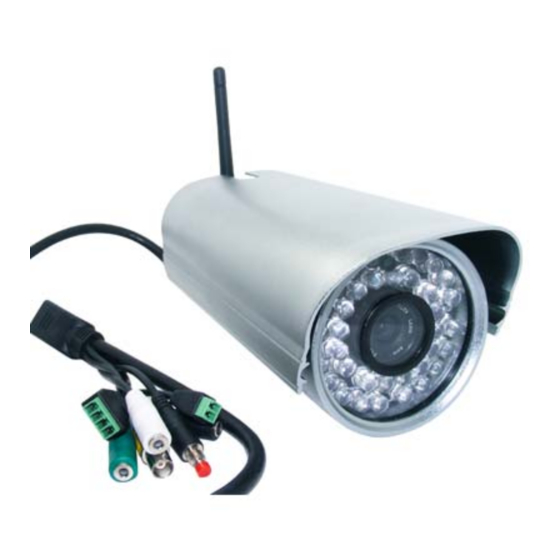
2.0 Megapixel WiFi Waterproof IR IP Camera
Wired Version: H218
Package Contents
IR IP Camera 2.0 Megapixel
Power Adapter 12V-3A
Network Cable
WiFi Antenna (Wireless Version H218W)
CD-ROM with Setup Software and User Guide
Quick Installation Guide
H218W/H218
Model:
Copyright @ Shenzhen Dericam Technology Co.,LTD
1
Quick Installation Guide
Wireless Version: H218W
Advertisement
Table of Contents

Subscribe to Our Youtube Channel
Summary of Contents for Dericam H218W
- Page 1 Model: Wired Version: H218 Wireless Version: H218W Package Contents IR IP Camera 2.0 Megapixel Power Adapter 12V-3A Network Cable WiFi Antenna (Wireless Version H218W) CD-ROM with Setup Software and User Guide Quick Installation Guide Copyright @ Shenzhen Dericam Technology Co.,LTD...
-
Page 2: Start Installation
Connect the included two parts of the power supply first, and then connect the end of DC connector to the camera’s power socket, and plug the other end of power supply to an electrical outlet. Copyright @ Shenzhen Dericam Technology Co.,LTD... -
Page 3: Software Installation
Click button “install” Close the window when finished Install NVSCenterV6.19 , goes to the icon , left double click the mouse to install, Click “next” to finish the installation of the setup software NVS Center Copyright @ Shenzhen Dericam Technology Co.,LTD... -
Page 4: Language Configuration
Close the window when finished 3) Login the Camera ① Step 1, Open Search tools to search the camera within LAN Goes to the menu “Start”, and click, then goes to “Programs” “NVSCenterV6.19” “SearchNVS”. Copyright @ Shenzhen Dericam Technology Co.,LTD... - Page 5 Parameter window as below. And check the IP range of your computer. For example, if the computer’s Local IP is 192.168.0.95, so you need to change the default IP of the camera from 192.168.55.160 192.168.0.160 or any IP start from 192.168.0.xxx.And change the default Gateway from 192.168.55.1 192.168.0.1. Copyright @ Shenzhen Dericam Technology Co.,LTD...
- Page 6 (The default user name & password of the camera are both admin.) Thirdly, After the camera being rebooted, then search the camera, the new IP 192.168.0.160 will be listed on the window as below. Copyright @ Shenzhen Dericam Technology Co.,LTD...
- Page 7 Open IE browser (IE6, IE7, IE8 all ok), entering the modified LAN IP of the camera on the address bar. “Enter” admin And press , it leads to the login window of the camera, enter password to access the camera. Congratulations , you have accessed to the live video of the camera successfully Copyright @ Shenzhen Dericam Technology Co.,LTD...
- Page 8 For example: the encryption method of the router is WEP, and Authentication Type is Hexadecimal, SSID is IPCAM, Password is ABCDEF1234, So then fill the “Save” parameters as below. And click . The camera will restarted to make the settings effect. Copyright @ Shenzhen Dericam Technology Co.,LTD...
- Page 9 Date Port No. HTTP Port No. settings. One is the other one is . The default Date Port 5000 no. of the camera is and the default HTTP Port No. is . Show as below. Copyright @ Shenzhen Dericam Technology Co.,LTD...
- Page 10 HTTP Port No. by the tool Date port no.: 5000 Note All the default data no. is 5000, please just leave it alone, do not make any change of the data port no. Copyright @ Shenzhen Dericam Technology Co.,LTD...
-
Page 11: First Of All
LAN IP address & HTTP Port No. of the camera within the router. Take TP-link brand router as an example showed as below Add new column of Port Forwarding or Virtual Server Copyright @ Shenzhen Dericam Technology Co.,LTD... - Page 12 After the port forwarding is finished, you can use the WAN IP address + HTTP Port to access the camera via internet. Take 183.37.19.183 for example, the accessing link of the camera via internet would be http://183.37.19.183:80 Copyright @ Shenzhen Dericam Technology Co.,LTD...
- Page 13 ‘get a free domain service’, and click Sign up free. hostname user name password Create a which are used to DDNS settings within the camera. (Please apply the account step by step according to instructions on www. dyndns.com) Copyright @ Shenzhen Dericam Technology Co.,LTD...
-
Page 14: Other Settings
Select Dyndns.org as a server showed as below, and fill dericam as DDNS regName, fill password dericam2010 as DDNS password, fill dericam.dyndns.org as DDNS domain and server URL, Then click save to make effect. The camera will restart and to take the DDNS settings effective.


Need help?
Do you have a question about the H218W and is the answer not in the manual?
Questions and answers