Table of Contents
Advertisement
Quick Links
Advertisement
Table of Contents

Related Manuals for Aspira ASPIRCOMFORT CLASS 620H


Summary of Contents for Aspira ASPIRCOMFORT CLASS 620H
-
Page 2: Fundamental Safety Rules
E N G L I S H ASPIRCOMFORT CLASS 620H GENERAL 1.1 INTRODUCTION This manual was prepared with the aim of making the installation and management of your system as simple as possible. By reading and applying the suggestions of this manual, you can achieve the best performance of the purchased product. - Page 3 E N G L I S H ASPIRCOMFORT CLASS 620H • It is forbidden to insert objects and substances through the air intake and supply grids. • It is forbidden to open the access doors to the inside of the device, without firstly placing the system’s main switch on ‘off’.
- Page 4 E N G L I S H ASPIRCOMFORT CLASS 620H 1.4 WARNINGS The unit must be installed by qualified and authorised personnel according to the rules in force in the various countries. If installation is not carried out, this could lead to a situation of danger.
- Page 5 E N G L I S H ASPIRCOMFORT CLASS 620H 1.5 CONFORMITY The CE marking (applied on each machine) certifies compliance with the following Community standards: • Low Voltage Directive 2014/35/EC • Electromagnetic Compatibility Directive 2014/30/EC • Ecodesign 2009/125/EC • RoHS2 2011/65/EU •...
-
Page 6: Construction Features
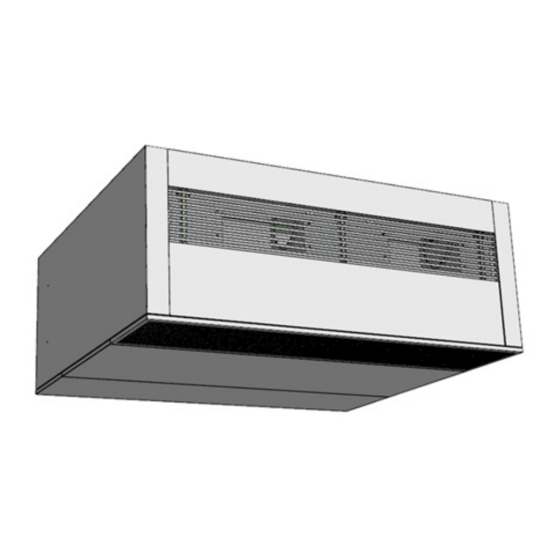
E N G L I S H ASPIRCOMFORT CLASS 620H 1.8 CONSTRUCTION FEATURES ASPIRCOMFORT CLASS 620H is a fan unit complete with heat recovery unit dedicated to air renewal without wasting energy. The unit is particularly suitable for single rooms where ducted systems are not possible;... -
Page 7: Description Of Operation
E N G L I S H ASPIRCOMFORT CLASS 620H 1.9 DESCRIPTION OF OPERATION The unit is a decentralised fan system with heat recovery, with the following characteristics and special features: • it promotes healthy ventilation in offices, schools, businesses, allowing correct air renewal of the rooms and extracting excess humidity and unpleasant odours;... -
Page 8: Requirements For Start-Up
E N G L I S H ASPIRCOMFORT CLASS 620H 1.11 REQUIREMENTS FOR START-UP Before start-up make sure there are no foreign bodies inside the unit. Check the fastenings of the closing panels and inspection doors. Check the electrical power supply and the earthing of the unit. -
Page 9: Installation Conditions
E N G L I S H ASPIRCOMFORT CLASS 620H INSTALLATION 2.1 INSTALLATION CONDITIONS The unit must be installed based on national and local regulations governing the use of electrical devices and based on the following indications: • install the unit inside residential buildings with room temperature between 0°C and 45°C;... -
Page 10: Unit Positioning
E N G L I S H ASPIRCOMFORT CLASS 620H 2.2 UNIT POSITIONING The unit can be installed close to the wall with the pipes directly to the outside, or away from the wall with a minimum of ducting to get the pipes to the outside;... - Page 11 E N G L I S H ASPIRCOMFORT CLASS 620H SLEEVES For non-ducted installation, the unit does not have ducting but is installed directly adjacent to the wall with direct holes to the outside; In this case it is possible to leave the fittings if the centring of the holes outwards is very precise, or to remove them...
-
Page 12: Machine Front
E N G L I S H ASPIRCOMFORT CLASS 620H TEMPLATE FOR CEILING HOLES A template is provided for easy drilling of the holes for mounting the unit: • Position the installation template on the ceiling • Mark or drill directly according to the dowel, threaded rod used;... - Page 13 E N G L I S H ASPIRCOMFORT CLASS 620H TEMPLATE FOR WALL HOLES A template is provided for easy drilling of the unit's wall holes • Position the wall installation template; • Mark and drill two holes in the wall for outdoor air and indoor air outlet;...
- Page 14 E N G L I S H ASPIRCOMFORT CLASS 620H PREPARATION FOR CEILING UNIT POSITIONING To mount the unit on the ceiling, it is necessary to: • Remove the front discharge grille by pressing upwards on the 3 locking points of the grille to remove it;...
-
Page 15: Ceiling Installation
E N G L I S H ASPIRCOMFORT CLASS 620H CEILING INSTALLATION After preparing the fastenings with threaded rods or dowels, proceed as follows: • Raise the unit and secure it to the bars using the nut and washer on the 4 brackets on the sides;... -
Page 16: Condensate Discharge Connection
E N G L I S H ASPIRCOMFORT CLASS 620H CONDENSATE DISCHARGE CONNECTION Because of the heat recovery system (the exhaust air is cooled by the air supplied into the heat exchanger), the humidity contained in the internal air condenses inside the unit. - Page 17 E N G L I S H ASPIRCOMFORT CLASS 620H - ATTENTION To horizontal sections for condensate discharge with direct installation to the outside; If water stagnates and outside temperatures are below 0°, there is a danger of the discharge freezing and...
-
Page 18: Aeraulic Connections
E N G L I S H ASPIRCOMFORT CLASS 620H AERAULIC CONNECTIONS 3.1 AERAULIC ORIENTATIONS The unit is equipped with 2 circular male connections Ø 250mm for outdoor air and expulsion to the outside; To correctly connect the air ducts, refer to the following diagram and stickers on the unit. -
Page 19: Electrical Connections
E N G L I S H ASPIRCOMFORT CLASS 620H ELECTRICAL CONNECTIONS 4.1 GENERAL - Before starting any operation to perform the electrical connection make sure that the unit is not electrically powered. - Perform the necessary electrical connections referring exclusively to the wiring diagram attached to this manual. - Page 20 E N G L I S H ASPIRCOMFORT CLASS 620H 4.2 POSITIONING AND PROCEDURES OF THE CONNECTIONS On the machine, the electrical connections are located on the left-hand side; A 3x1.5mm power supply cable and a cable for the unit's remote panel with a 4-pin connector and a length of 10m are supplied;...
- Page 21 E N G L I S H ASPIRCOMFORT CLASS 620H The electronic board is located on the lower central part of the unit where any auxiliary connections can be made; Pe electrical auxiliary connections • Remove the bottom panel screws and remove the centre bottom panel itself after removing the two outer bottom panels;...
-
Page 22: Unit Wiring Diagrams
E N G L I S H ASPIRCOMFORT CLASS 620H 4.3 UNIT WIRING DIAGRAMS Room air probe Exhaust probe Outdoor air probe POWER SUPPLY 230/1/50 POST VALVE / COIL CONNECTIONS SET UP BY THE CUSTOMER GRID n.a. n.a. CHILLER n.a. - Page 23 E N G L I S H ASPIRCOMFORT CLASS 620H 4.4 CH193VMC REMOTE PANEL CONNECTION The board uses a capacitive touch remote control to manage all of the functions of the unit and is set up for wall or outdoor 502 box installation;...
-
Page 24: Maintenance
E N G L I S H ASPIRCOMFORT CLASS 620H MAINTENANCE To always guarantee correct and optimal unit operation, it is necessary to periodically perform all of the maintenance activities. 5.1 EPM1 FILTER CLEANING OR REPLACEMENT To replace the filters, or periodically clean them, do the following: •... -
Page 25: Heat Exchanger Cleaning
E N G L I S H ASPIRCOMFORT CLASS 620H 5.2 HEAT EXCHANGER CLEANING It is advisable to check the status of the heat exchanger annually and clean it if necessary. This must only be done by qualified personnel (installer). - Page 26 E N G L I S H ASPIRCOMFORT CLASS 620H 5.3 GENERAL UNIT CLEANING It is advisable to occasionally check and possibly clean the fans of the condensation discharge and the inside walls of the unit. These activities must only be carried out by qualified personnel (installer).
- Page 27 E N G L I S H ASPIRCOMFORT CLASS 620H ALARMS In case of any problems or failures, take note of any error code appearing on the electronic control unit or remote control screen, take note of the model and the serial number of the unit you possess (data provided on the identification plate attached on the side of the unit) and contact the installer.
-
Page 28: Alarm Signalling
E N G L I S H ASPIRCOMFORT CLASS 620H 6.2 ALARM SIGNALLING A list of all alarms managed by the application follows. The presence of an alarm has two display modes: • an error code on the CH193VMC; •... -
Page 29: Display Alarms
E N G L I S H ASPIRCOMFORT CLASS 620H 6.3 DISPLAY ALARMS 15:25 15-09-20 23.0 The MEV has a self-diagnostic function that can detect up to 16 different types of faults. The details of the faults are [ AUTO ] shown in the tables below, where the presence of the figure "1"... - Page 30 E N G L I S H ASPIRCOMFORT CLASS 620H ......................................................................................................................................................................................................................................................................................................................................................................................................................................................................................................................................................................................................................................................................................................................................................................................................................................
- Page 32 FANTINI COSMI S.p.A. Via Dell’Osio, 6 - 20049 Caleppio di Settala, Milan, Italy Tel. +39 02 956821 | Fax +39 02 95307006 E-mail: info@aspira.it | supportotecnico@aspira.it www.fantinicosmi.it...
Need help?
Do you have a question about the ASPIRCOMFORT CLASS 620H and is the answer not in the manual?
Questions and answers