Miele CVA 7440 Operating And Installation Instructions
Built-in coffee machine
Hide thumbs
Also See for CVA 7440:
- Installation and operating instructions manual (92 pages) ,
- Operating and installation instructions (92 pages) ,
- Installation manual (5 pages)
Table of Contents
Advertisement
Advertisement
Table of Contents

Related Manuals for Miele CVA 7440


Summary of Contents for Miele CVA 7440
- Page 1 Operating and Installation Instructions Built-in Coffee Machine Always read the operating instructions before setting up, installing, and commissioning the appliance. This prevents both personal injury and damage to the appliance. en-CA M.-Nr. 11 822 950...
-
Page 2: Table Of Contents
Controls and indicators ..................18 Using the appliance................... 20 Symbols in the display ..................22 Initial commissioning ..................23 Miele@home ......................23 Before using for the first time ................24 Switching on for the first time ................24 Filling the bean containers ................26 Filling the water container ................ - Page 3 Barista Mode ....................46 Latte Mode ..................... 46 Party Mode ..................... 46 Water hardness ....................46 System lock ....................47 Miele@home ......................48 Remote control....................48 RemoteUpdate ....................48 Software version....................49 Showroom program (demo mode) ..............49 Factory default settings ..................49 Cleaning and care .....................
- Page 4 Contents Cleaning by hand or in the dishwasher ............... 51 Unsuitable cleaning agents ................. 52 Cleaning the drip tray and grounds container............. 53 Cleaning the drip tray cover ................55 Cleaning the water container ................55 Cleaning the central spout .................. 55 Cleaning the cup rim sensor ................
-
Page 5: Warnings And Safety Instructions
Miele cannot be held liable for injury or damage caused by non- compliance with these instructions. Keep these operating instructions in a safe place and pass them... - Page 6 Warnings and safety instructions Appropriate use This coffee machine is intended for home use. The coffee machine is not suitable for outdoor use. This coffee machine must not be used at altitudes above 2,000 m. The machine is intended only for domestic use and for the preparation of drinks such as espresso, cappuccino, latte macchiato, tea, etc.
- Page 7 Warnings and safety instructions Safety with children Danger of burning and scalding on the dispensing spouts. Children’s skin is far more sensitive to high temperatures than that of adults. Ensure children do not touch hot surfaces of the coffee machine or place parts of their body under the dispensing spouts.
- Page 8 Warnings and safety instructions Technical safety Installation work or repairs should only be carried out by a Miele authorized technician. Unauthorized or incorrect installation work or repairs can pose considerable danger to users. Damage to the coffee machine can compromise your safety.
- Page 9 Warnings and safety instructions Ensure that the power supply cable will not be pinched or damaged by any sharp edges. To reduce the risk of injury, do not drape cord over the counter top or table top where it can be pulled on by children or tripped over unintentionally.
- Page 10 To do this, pull only the plug, not the power supply cable. While the coffee machine is under warranty, repairs should only be undertaken by a service technician authorized by Miele Service. Otherwise the warranty will be invalidated. ...
- Page 11 Warnings and safety instructions Risk of injury to the eyes! Never look directly at the lighting or use optical instruments (e.g., magnifying glass) to look at it. Please note the following regarding water: - The water quality must conform to the requirements for drinking water in the country in which the coffee machine is being used.
- Page 12 Warnings and safety instructions Do not hang on to the open appliance door or place any objects on it as this will damage the hinges of the coffee machine. Do not use the coffee machine to clean any other objects.
-
Page 13: Preparing Your Appliance For An Extended Vacation
Accessories and spare parts Miele can only guarantee the safety of the appliance when original Miele parts are used. Faulty components must only be replaced with genuine Miele replacement parts. - Page 14 Descale the coffee machine regularly depending on the water hardness. Descale the appliance more frequently if you use hard water. Miele cannot be held liable for damage resulting from not descaling the machine, using the wrong descaling agent, or an unsuitable descaling solution concentration.
- Page 15 Warnings and safety instructions For coffee machines with stainless steel surfaces: Do not use sticky notes, adhesive tape, or other types of adhesive on the stainless steel surfaces. These will damage the stainless steel surfaces, causing them to lose their dirt-repellent protective coating. ...
-
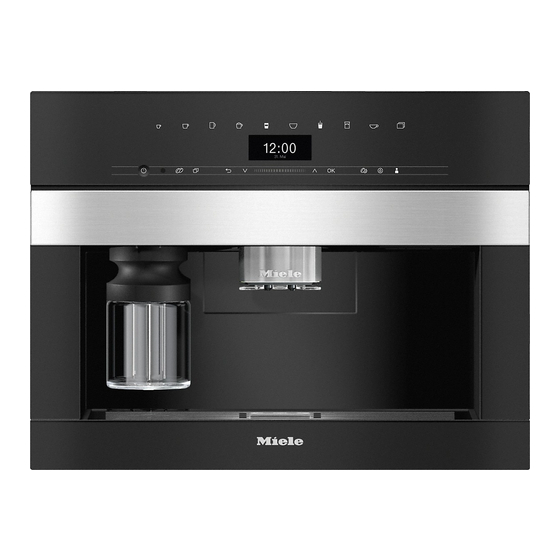
Page 16: Guide To The Appliance
Guide to the appliance Exterior view a On / Off button b Control panel c Door handle d Height-adjustable central spout with lighting e Drip tray cover f Milk container... - Page 17 Guide to the appliance Interior view a Bean container b Milk valve c Height-adjustable central spout with lighting d Grinder setting e Bean container f Fan outlet g Water container h Drip tray with lid i Brew unit j Grounds container k Maintenance container l Drip tray...
-
Page 18: Controls And Indicators
For creating and managing profiles aromatic coffee by using twice as Maintenance sensor button much ground coffee but the same Maintenance programs, e.g., amount of water Descale m Optical interface Parameters sensor button For displaying or changing drink (for Miele Service only) settings... - Page 19 Controls and indicators Drink button symbols Espresso Coffee Long coffee Cappuccino Latte macchiato Caffè latte Hot milk Milk froth Tea water...
-
Page 20: Using The Appliance
Volume”). To select a menu, tap the relevant sensor button, e.g., the sensor Drinks menu button. When the following appears in the 12:00 Miele display, you are in the drinks menu: Select drink Settings 12:00 Miele Ristretto Cappuccino Italiano... - Page 21 Using the appliance Useful tip: It is best to select short, memorable names. Name B C D E - To enter a character, highlight the one you want and confirm your choice with OK. - To delete a character, touch the sensor button.
-
Page 22: Symbols In The Display
(This symbol is also found on the water container: fill up to this mark with water.) If Miele@home has been activated for the coffee machine, these symbols represent the quality of the Wi-Fi connection. They indicate the strength of the Wi-Fi connection in ... -
Page 23: Initial Commissioning
- a Wi-Fi network Therefore, the availability of featured functions cannot always be guaranteed. - the Miele app - a Miele user account You can create Miele@home availability a user account via the Miele app. The ability to use the Miele app... -
Page 24: Before Using For The First Time
If the coffee machine has been location. connected to a Wi-Fi network and signed into the Miele app, the time will The choice of location determines how be synchronized based on the location the time of day is displayed, e.g., in setting in the Miele app. - Page 25 Initial commissioning Enter your local water hardness (in °dH) and confirm with OK. Selecting the Performance Mode You can select the appropriate mode to suit your personal preferences (see “Settings – Performance Mode”). - Eco Mode: This is an energy-saving mode.
-
Page 26: Filling The Bean Containers
Filling the bean containers Coffee or espresso can be made from whole roasted coffee beans which are freshly ground for each cup. This requires the bean containers to be filled with coffee beans. Risk of damage to the grinder due to incorrect operation. -
Page 27: Filling The Water Container
Filling the water container Risk to health due to contaminated water. Bacteria can develop in water which has been sitting in the water container for too long and is a risk to your health. Change the water in the water container every day. -
Page 28: Switching On And Off
Switching on and off Clean all parts thoroughly, including Switching the coffee machine the brew unit and interior of the machine. Touch the On / Off button . Switch the coffee machine off. The coffee machine heats up and rinses the pipework. Hot water will run out of the central spout. -
Page 29: Spout Adjustment
Spout adjustment The central spout cannot be manually adjusted. Before making the drink, the central spout moves down and the cup rim sensor stops it at the optimum height for the cups or glasses being used. When the coffee machine is switched off, the central spout will be in the middle position. -
Page 30: Preparing Drinks
Preparing drinks - Cappuccino consists of approx. Danger of burning and scalding 2 thirds milk froth and 1 third on the dispensing spouts. espresso. The liquids and steam dispensed are - Latte macchiato consists of 1 third very hot and can cause scalding. each of hot milk, milk froth, and Keep away from the area underneath espresso. -
Page 31: Milk Preparation
Preparing drinks The milk container Milk preparation Milk is not cooled in the milk Milk or milk alternatives (e.g., soy container. For high-quality milk froth, milk) containing added sugar can always use cold milk (< 50°F (10°C)). clog up the milk pipe and the rest of the milk pipework. -
Page 32: Making A Coffee Drink
Preparing drinks Making a coffee drink Place a cup under the central spout. Push the milk container back into the Tap the sensor button for the drink coffee machine until it clicks into you want. place. The drink will be dispensed from the Useful tip: It is easier to remove the central spout into the cup. -
Page 33: Making 2 Portions ( Sensor Button)
Preparing drinks Making a DoubleShot of coffee Coffee jug Press the sensor button You can make several cups of coffee immediately before or after you start one after the other automatically with making a drink. Coffee Pot function (maximum of 1 litre). -
Page 34: Tea
The respective dispensing temperatures depending on the region. Green tea are the ones that Miele recommends for can be infused multiple times. making the types of tea concerned. Dispensed temperature: approx. 175°F (80°C), brewing time: You can adjust the dispensing approx. 2,5 minutes... -
Page 35: Teatimer
Preparing drinks Select the setting you want and Follow the instructions for making confirm with OK. tea on the tea packaging. Making tea The amount of tea required varies from Tap the sensor button to access the one type of tea to another. Always menu containing the various types of follow the recommendations of the tea. -
Page 36: Tea Pot
Preparing drinks Remove the tea filter or tea bag when Dispensing warm or hot water the desired brewing time has You can choose between the following elapsed. options: Tea pot - hot water at approx. 90°C Tea Pot function allows you to make - warm water at approx. 65°C a large quantity of tea (maximum The drinks menu is displayed. - Page 37 Expert Mode Expert Mode function allows you to change the portion size while the drink is being made. The setting will not be Dispensing saved and will only apply to the current drink. Switching Expert Mode on and Move the indicator (small triangle) across the navigation area according The drinks menu is displayed.
-
Page 38: Grinder Setting
Grinder setting The grinder setting determines the contact time between the ground coffee and the water, known as the extraction time. When the ideal grinder setting is selected, the machine dispenses a perfect cup of coffee with a fine, hazelnut-brown crema. The grinder setting you select will be used for all coffee drinks. -
Page 39: Parameters
Parameters For coffee drinks that use milk, you can Displaying and changing not only set the amount of espresso or parameters coffee but also the amount of milk or You can change the portion size for all milk froth to be dispensed with these drinks. -
Page 40: Quantity Of Coffee
Parameters Useful tip: For the drinks pictured on Pre-brewing the ground coffee the control panel, you can change the When the pre-brewing function is portion size by pressing and holding the turned on, the ground coffee is first button down while the drink is being moistened with a little hot water. -
Page 41: Profiles
Profiles In addition to the Miele drinks menu You can now change the drinks (Miele profile), you can create individual individually. profiles to cater for different tastes and Making drinks stored in a preferences. profile Within the profile, you can adjust the ... -
Page 42: Changing The Name
Profiles Changing the name This option can only be selected if a profile has been allocated in addition to the Miele standard profile. Select Change name and confirm with OK. Change the name as required: - To delete a character, touch the sensor button. -
Page 43: Mobilestart
MobileStart With MobileStart you can, for example, If you are making a drink with start making a drink via the Miele app. MobileStart, you will be notified of drink dispensing with acoustic and You will only be able to use optical signals. -
Page 44: Settings
If the coffee machine has been connected to a Wi-Fi network and Change the setting as required and signed into the Miele app, the time will confirm with OK. be synchronized based on the location Some settings which can be found in setting in the Miele app. -
Page 45: Off At
Settings Once the coffee machine has come on Volume automatically three times at the set You can set the volume of the audible time without any drinks being signal and keypad tones (segment bar). dispensed, it will stop switching on automatically. -
Page 46: Eco Mode
Settings Eco Mode - Cleaning status messages or cleaning prompts are suppressed Eco mode is an energy-saving mode. and delayed until the machine is next The system does not heat up until switched on. someone starts making a drink. - The timers Turn off at Turn off after... -
Page 47: System Lock
Settings Water hardness Calcium Setting Water hardness Calcium Setting content content °dH mmol/l °dH mmol/l mg/l Ca mg/l Ca ppm (mg Ca ppm (mg Ca 37–45 6.6–8.0 258–321 37–45 46–60 8.2–10.7 322–429 46–60 61–70 10.9– 430–500 61–70 12.5 Useful tip: If your water hardness is > 21°dH (3.8 mmol/l), we recommend using bottled drinking water instead (< 150 mg/l Ca... -
Page 48: Miele@Home
The following points may appear under You can change the coffee machine Miele@home: settings, for example, in the Miele app - Set up: This option only appears if when remote control is switched on. To the coffee machine has never been... -
Page 49: Software Version
- Some software updates can only be - Miele@home carried out by Miele Service. Software version The “Software version” menu option is intended for Miele Service. You do not need this information for domestic use. Showroom program (demo mode) Do not activate this function for... -
Page 50: Cleaning And Care
Cleaning and care Risk to health due to inadequate cleaning. Heat and moisture inside the coffee machine can cause coffee residues to become mouldy and / or milk residues to go off and pose a risk to health. Carefully clean the coffee machine regularly. Overview of cleaning intervals Recommended frequency What do I have to clean / maintain? -
Page 51: Cleaning By Hand Or In The Dishwasher
Cleaning and care Cleaning by hand or in the Risk of damage as a result of dishwasher excessively high dishwasher temperatures. The brew unit is not dishwasher- Components may be ruined (e.g., safe. may become warped) if washed in a Only clean the brew unit by hand dishwasher at temperatures higher with warm water. -
Page 52: Unsuitable Cleaning Agents
Cleaning and care To avoid damaging the surfaces, do not Danger of burning and scalding use: on hot components or by hot liquids. - cleaning agents containing soda, Components can become very hot ammonia, acids, or chlorides during operation. Touching hot components can cause burning. -
Page 53: Cleaning The Drip Tray And Grounds Container
Cleaning and care Cleaning the drip tray and grounds container Danger of burning and scalding on hot components or by hot liquids. Components can become very hot during operation. Touching hot components can cause burning. The liquids and steam dispensed are very hot and can cause scalding. - Page 54 Cleaning and care Clean the drip tray, lid, and grounds Reassembling the drip tray container in the dishwasher or wash them by hand using warm water and a little dish detergent. Dry all parts. Clean the drip tray recess inside of the coffee machine.
-
Page 55: Cleaning The Drip Tray Cover
Cleaning and care Cleaning the drip tray cover Clean and dry the surface that the Remove the drip tray cover: to do water container sits on. this, push down on the rear edge of the cover so that the front lifts up and ... - Page 56 Cleaning and care Detach the milk pipework from the Grip the dispensing unit by the sides dispensing unit as follows: pull the and pull it down to remove it. tab to the left. Take the dispensing unit apart, Do not remove the milk pipework separating it into 3 components: the connecting piece.
-
Page 57: Cleaning The Cup Rim Sensor
Cleaning and care Refit the stainless steel cover. Close the appliance door. Fit cover to main dispenser appears in the display. Confirm the message with OK. Cleaning the cup rim sensor The cup rim sensor is located at the bottom of the central spout. -
Page 58: Cleaning The Milk Container With Lid
Cleaning and care Cleaning the milk container with lid The milk container should be taken apart and cleaned every day after use. Both the lid and the glass container can be cleaned in the dishwasher, or by hand using warm water and a little dish detergent. -
Page 59: Removing And Cleaning The Milk Valve (Once A Month)
Cleaning and care difficult to remove. Therefore, it is On the top right-hand side of the important to carry out regular cleaning cover, you will find a pin for swivelling after preparing milk. the cover out. Open the appliance door. ... - Page 60 Cleaning and care Press the retainers on the left and Pull the stainless steel bolt upwards right-hand sides of the milk valve and out. holder and pull the holder forward to Clean the individual components of remove it. the milk valve in the dishwasher.
- Page 61 Cleaning and care Connect together the angular Useful tip: If necessary, turn the milk moulded hose and longer milk pipework towards the back at the pipework. Start by attaching the connecting piece on the right-hand moulded hose to the top of the side.
-
Page 62: Cleaning The Bean Containers
Cleaning and care Cleaning the bean containers Risk of damage from incorrect use and cleaning. Immersing the bean containers in liquids can result in malfunctions. If they are taken apart, bits may break off or the mechanism may no longer work properly once they are reassembled. -
Page 63: Cleaning The Interior, Inside Of The Appliance Door, And Drip Tray
After interior: cleaning, wipe the surfaces dry using - water container a soft cloth. - drip tray Useful tip: You can also use a Miele Microfibre Cloth to clean the front. - maintenance container - brew unit - bean containers... -
Page 64: Maintenance Programs
You can order the cleaning agent for You can also start the Rinse appliance milk pipework from the Miele online function manually. shop, from Miele Service, or from your Miele dealer. Add 2 sticks of the cleaning agent for milk pipework to the water container. -
Page 65: Degreasing The Brew Unit And Cleaning The Interior
It is recommended to use Miele Cleaning Tablets to clean the brew unit. These have been specially developed for degreasing the brew unit in Miele Coffee Machines and prevent subsequent damage. The cleaning tablets are available to... - Page 66 Cleaning and care Cleaning the brew unit and interior The moving parts of the brew unit are lubricated. Cleaning agents will damage the brew unit. Only clean the brew unit by hand with warm water. Do not use any cleaning agents. To ensure good tasting coffee and to prevent a build-up of bacteria in the machine, remove and clean the brew...
- Page 67 Cleaning and care Dropping a cleaning tablet into the brew unit Wipe any coffee grounds from the filters. One filter is located in the funnel and the other to the left of the Drop a cleaning tablet into the top of funnel.
-
Page 68: Descaling The Appliance
Confirm the message with OK. The descaling tablets are available to order from the Miele online shop, from When the number of remaining portions Miele Service, or from your Miele reaches 0, the coffee machine will lock. - Page 69 Cleaning and care Add 2 descaling tablets to the water container. Fill the water container to the mark with lukewarm water. Follow the instructions for the mixing ratio carefully. Fill the water container with the specified amount of water. Otherwise, descaling will be incomplete.
-
Page 70: Frequently Asked Questions
Fault messages must be confirmed with OK, otherwise the message may reappear in the display even though the problem has been remedied. To address the fault, follow the instructions on the display. If the fault message appears in the display again, contact Miele Service. Problem Possible cause and solution F1, F2, There is an internal fault. - Page 71 Frequently Asked Questions Problem Possible cause and solution F73 or The brew unit cannot be positioned correctly in the Check the brew unit start position or is soiled. It is not possible to press the ground coffee. Check whether you can remove the brew unit. ...
- Page 72 Frequently Asked Questions Problem Possible cause and solution A maintenance program The water container has not been filled and inserted is prematurely aborted correctly. and the following Check that you have filled to the correct mark. appears in the display: The symbols marked on the water container indicate Push the water container in the amount of water required for the...
-
Page 73: Unusual Performance Of The Coffee Machine
The circuit breaker has tripped because the coffee machine, voltage, or another appliance is defective. Unplug the coffee machine from the socket. Contact a qualified electrician or Miele Service. The lighting remains off The lighting has been switched off. - Page 74 Frequently Asked Questions Problem Possible cause and solution The brew unit cannot be The brew unit is not positioned correctly. removed. If necessary, turn the handle on the brew unit back to the start position. Close the appliance door. ...
- Page 75 Frequently Asked Questions Problem Possible cause and solution The coffee machine The system lock is activated. does not switch itself Deactivate the system lock. on even though the Turn The current day of the week has not been selected. on at setting has been ...
-
Page 76: Unsatisfactory Results
Frequently Asked Questions Unsatisfactory results Problem Possible cause and solution The coffee is not hot The cup has not been pre-heated. enough. The smaller the cup and the thicker its sides, the more important it is to pre-heat it. Pre-heat the cup with hot water, for example. The brewing temperature is set too low. - Page 77 Frequently Asked Questions Problem Possible cause and solution The coffee tastes weak. Too little coffee is being brewed because insufficient The coffee grounds in coffee beans are getting into the grinder. the grounds container Have you used a dark roast? are sludgy and grainy.
-
Page 78: Service And Warranty
In the event of a fault which you cannot For further information, please refer to remedy yourself, please contact your your warranty booklet. Miele dealer or Miele Service. Contact information for Miele Service can be found at the end of this document. -
Page 79: Accessories
For descaling the water lines - CJ Jug 1.0 l Insulated flask for coffee or tea (pot function) - Miele Black Edition One for all perfect for making espresso, café crema, and specialty coffee with milk - Miele Black Edition Espresso Whole coffee beans –... -
Page 80: Caring For The Environment
Consult with local authorities, dealers or Miele in order to dispose of and recycle electrical and electronic appliances. Miele assumes no responsibility for deleting any personal data left on the appliance being disposed. -
Page 81: Installation
*INSTALLATION* Installation Electrical connection Before connecting the coffee machine, make sure that the connection data on the data plate (voltage and frequency) matches that of the domestic electrical supply. This data must match to prevent the coffee machine from being damaged. If in any doubt, consult a qualified electrician. -
Page 82: Installation Dimensions
A minimum installation height of 850 mm must be observed. All dimensions are indicated in mm. Combination with other Miele Built-in Appliances is possible. If the coffee machine is to be built in above another appliance, there must be a full-width, closed shelf between them. - Page 83 *INSTALLATION* Installation Installation and connections All dimensions are indicated in mm. Cut-out (at least 20" / 508 mm wide) in the niche floor of the tall cabinet for power cord and ventilation Electrical connection No electrical or fresh water connection in this area...
-
Page 84: Building In The Coffee Machine
*INSTALLATION* Installation open the door wide enough to remove Building in the coffee machine the left-hand bean container (minimum Danger of injury due to incorrect door opening angle of 120°). operation. To install the machine, you will need a A machine that has not been built in TX 20 screwdriver. -
Page 85: Door Opening Limiters
*INSTALLATION* Installation Connecting the electricity supply Observe the information under “Electrical connection”. Connect the coffee machine to the electricity supply. Pushing in and aligning the coffee machine Take care not to trap or damage the electrical connection when pushing the machine into the niche. - Page 86 *INSTALLATION* Installation The door opening limiters can be removed, allowing you to increase the opening angle to approx. 170°. This makes it easier to remove the bean containers, for example. Removing the door opening limiters Make sure that sufficient space is available for the larger door opening angle and that the door is not going to hit an adjacent wall.
- Page 87 FCC Declaration of Conformity Electricity consumption in standby: < 0,6 W Electricity consumption in networked < 0,9 W standby: Frequency range 2.412 GHz – 2.462 GHz Maximum transmitting power < 100 mW WiFi module EK037 Contains FCC ID: 2ACUWEK037 Contains IC: 5669C-EK037 This device complies with Part 15 of the FCC Rules and with Industry Canada licence-exempt RSS standard(s).
- Page 91 Please have the model and serial number of your appliance available when contacting Customer Service. Canada Importer Miele Limited Headquarters and Miele Centre 161 Four Valley Drive Vaughan, ON L4K 4V8 www.miele.ca Customer Care Centre Phone: 800 565-6435 customercare@miele.ca Germany Manufacturer Miele &...
- Page 92 CVA 7440 en-CA M.-Nr. 11 822 950 / 01...
Need help?
Do you have a question about the CVA 7440 and is the answer not in the manual?
Questions and answers