Table of Contents
Advertisement
Advertisement
Table of Contents

Subscribe to Our Youtube Channel
Related Manuals for Corghi CompactLine EM 9250


Summary of Contents for Corghi CompactLine EM 9250
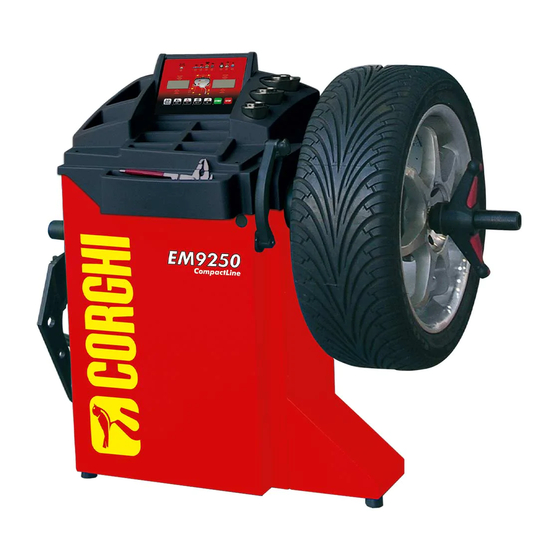
- Page 1 EM 9250 CompactLine Cod. 4-119438 del 09/2015 Operator’s manual...
-
Page 2: Table Of Contents
ORIGINAL INSTRUCTIONS CONTENTS INTRODUCTION ....................73 TRANSPORT, STORAGE AND HANDLING ............ 74 INSTALLATION ....................75 ELECTRICAL HOOK-UP................... 79 COMPRESSED AIR HOOK-UP ................ 80 SAFETY REGULATIONS................... 81 MAIN FEATURES ....................82 TECHNICAL DATA .................... 83 STANDARD EQUIPMENT ................86 OPTIONAL ACCESSORIES ................86 GENERAL CONDITIONS OF USE .............. - Page 3 15.2. SET UP – SELECTING THE MODE FOR ACQUIRING WHEEL DIMENSIONS IN BALANCING PROGRAMMES ALU1 AND ALU2 ..114 15.3. SET UP - UNBALANCE UNIT OF MEASURE........115 15.4. SET UP - UNBALANCE ROUNDING-OFF ........... 116 15.5. SET UP - WARNING OPT ..............117 15.6.
-
Page 4: Introduction
INTRODUCTION The purpose of this manual is to provide the owner and operator with effective and safe instructions for the use and maintenance of the wheel balancer. Follow all of the instructions carefully and your machine will assist you in your work and give long-lasting and efficient service, in keeping with manufacturer traditions. -
Page 5: Transport, Storage And Handling
TRANSPORT, STORAGE AND HANDLING Handling and manoeuvring before installation The basic wheel balancer packaging consists of 1 wooden crate containing: - the wheel balancer (Fig.7) - equipment; - the wheel guard and corresponding mounting tube (C, Fig.4a - D, Fig. 4a). Before installation, the wheel balancer must be shipped in its original packaging, making sure that the machine is maintained in the position indicated on the outer packaging. -
Page 6: Installation
- by inserting the forks of a lift truck under the machine so that the centre of the forks correspond approximately to the centre line of the body (Fig. 3). CAUTION Always unplug the power supply cable from the socket before moving the machine. CAUTION Never apply force to the wheel spin shaft when moving the machine. - Page 7 IMPORTANT: for the correct and safe operation of the machine, the lighting level in the place of use should be at least 300 lux. The floor must be strong enough to support a load equal to the weight of the equipment plus the maximum load allowed.
- Page 8 Fixing the machine to the ground (Fig. 6) The machine is to be fixed to the ground if: - It does not have the accessory triangular foot. - If it does have the accessory triangular foot but is going to be used with wheels heavier than 50Kg.
- Page 9 Fitting the external mechanical sensor and relative support (if available) Refer to the instructions provided with the kit, code 8-21100239 EXTERNAL MEASURING SENSOR + SUPPORT + INNER CABLE. Assembly of the ultrasonic sensor and its “optional accessory supplied on request” support for automatic width measurement (Only for machines equipped with the RPA programme and wheel guard) - Insert the ultrasonic sensor cable inside the slots in the metal pipe (see fig.7) fixing...
-
Page 10: Electrical Hook-Up
Main working parts (Fig. 8) (A) automatic diameter and distance measuring arm (B1) automatic width measuring arm (if present) (B2) automatic width measuring ultrasonic sensor (optional) (C) head (D) display panel (E) flange holder (F) weight tray (G) wheel support shaft (H) cone holder wheel guard (L) wheel-holder shaft locking brake... -
Page 11: Compressed Air Hook-Up
- The user must: • fit a plug that respects the current regulations onto the power supply cable; • connect the machine to its own electrical connection fitted with a suitable 30-mA current sensitive circuit breaker; • fit power supply protection fuses sized in compliance with specifications in the main wiring diagram of this manual;... -
Page 12: Safety Regulations
SAFETY REGULATIONS CAUTION Non-compliance with the instructions and danger warnings can cause serious injuries to the operator or other persons. Do not operate the machine until you have read and understood all the danger/warn- ing notices in this manual. In order to operate the machine correctly, it is necessary to be a qualified and authorised operator, able to be trained and to know the safety regulations. -
Page 13: Main Features
Key to caution and instruction labels Never use the wheel spin shaft as a lifting point for the machine. Unplug the power supply plug before performing any maintenance/ repair operations on the machine. Do not lift up the guard when the wheel is turning. Please use centring accessories with hole diameter 40 mm. -
Page 14: Technical Data
- Resolution: 1g (1/10oz). - Wide selection of programmes making the machine easy to use. - Unbalance value display in grams or ounces. - Unbalance display rounding-off setting. - Balancing modes available: • Standard dynamic on both rim sides seven different routines for alloy rims •... - Page 15 Machine dimensions (Fig. 9-9a) • depth with guard closed without the automatic sensor for measuring width ....1036 mm • depth with guard closed with the automatic sensor for measuring width ....1307 mm • depth with guard open ......................1086 mm • width with guard, without automatic width measurement sensor .........1293 mm •...
- Page 16 1154 1389 1291 Working range • settable rim width .......................from 1.5" to 20" • rim diameter measurable with the sensor (version with automatic sensor) ....from 11” to 28” • settable rim diameter from ......................1" to 35" • max. wheel/machine distance ......................360 mm •...
-
Page 17: Standard Equipment
STANDARD ACCESSORIES The following parts are supplied together with the machine. Weight pliers Threaded hub Calliper for wheel width measurement Hexagon wrench, size 10 Calibration weight Power cable Small cone Medium cone Large cone Small wheel fixing cap protection Spacer cap Small wheel fixing cap Quick fastener ring for locking wheel OPTIONAL ACCESSORIES... -
Page 18: Display Panel
WARNING Do not clean or wash the wheels mounted on the machine with compressed air or jets of water. CAUTION When working, never use equipment not manufactured by the manufacturer. CAUTION Get to know your machine: The best way to prevent accidents and obtain top perfor- mance from the machine is to ensure that all operators know how the machine works. -
Page 19: Display Panel - Status Icon
DISPLAY PANEL - STATUS ICON STATUS ICON DESCRIPTION Unbalance rounding-off to 5 grams or 0.25 ounc- Unbalance rounding-off If off, the rounding-off is to 1 gram or 0.10 ounce. Car environment active, the balancing pro- Car environ- grammes are dedicated to wheels for cars and ment lightweight transport vehicles. -
Page 20: Display Panel - Control Keypad
DISPLAY PANEL - CONTROL KEYPAD DESCRIPTION - Press this key to manually enter the wheel dimen- Wheel dimen- sions in the case of an automatic measurement sions system malfunction or for versions with a manual internal sensor. Multifunction key 1. In balancing mode, press this key to temporar- ily display the value rounded to the gram or End / Esc 1/10 of ounce. -
Page 21: Switching On The Machine
1. SWITCHING ON THE MACHINE Connect the power supply cable (A, Fig.10) sup- plied with the machine from the external electrical panel located on the rear side of the wheel balancer body to the mains. Switch on the machine using the switch on the rear side of the body (B, Fig.10). - Page 22 Balancing Inner weight application External weight applica- Vehicle type programme type and mode tion type and mode clip weight to apply clip weight to apply manually at the 12 o'clock manually at the 12 o'clock position position Adhesive weight to apply adhesive weight to apply manually at the 12* o'clock manually at the 12* o'clock...
-
Page 23: Entering Wheel Dimensions (Alu1P And Alu2P Programmes Excluded)
3. ENTERING WHEEL DIMENSIONS (ALU1P AND ALU2P PROGRAMMES EXCLUDED) Wheel data entry for wheel balancers without an ultrasonic sen- sor or outer mechanical sensor The machine allows for the diameter and distance values to be entered automati- cally; the width value can be entered using the keypad. - Page 24 When the measurement is stored, the value of the distance acquired by the machine will remain visible on the left display: - if only one measurement is taken, the machine interprets the presence of a rim with balancing us- ing a clip weight on both sides (Dynamic Balancing Programme);...
- Page 25 Keep the keys pressed to rapidly increase or decrease the previously set values. After completing the wheel data update, press the button to exit and display the unbalance values recalculated according to the new dimensions, or to perform a wheel spin. - if two subsequent measurements are taken inside the rim on two balancing planes, the machine interprets the presence of a rim with balancing using a clip weight on the inner plane and an adhesive weight on the external one (ALU 2P).
- Page 26 - In this phase, it is possible to perform a new acquisition of the rim planes. - Lowering the guard confirms the selection that was made (manual width entry or wheel type selection) and a spin is performed and the wheel width is automatically measured. Note: - automatic width acquisition is re-enabled only with a new acquisition of the automatic internal measuring arm;...
- Page 27 - Keep the arms in contact with the rim until the machine has acquired the values. The geometric data are displayed in sequence: distance value; diameter value; width value. When a geometric value is displayed, the corresponding LED illuminates on the display panel.
- Page 28 - press the key to confirm the previ- ous value and set the machine for diameter entry (-d-) - read the rated rim diameter value on the tyre - modify the displayed diameter value by pressing the keys until the read number is set ...
-
Page 29: Entering Wheel Dimensions In Balancing Programmes Alu1P Or Alu2P
4. ENTERING WHEEL DIMENSIONS IN THE ALU1P OR ALU2P BALANCING PROGRAMMES With this programme the real wheel data have to be set in relation to the real balancing planes rather than the nominal values (as in standard ALU programmes). The balanc- ing planes where the adhesive weights are to be applied may be selected by the user according to the specific shape of the rim. - Page 30 Centre of the notch in the weight holder Centre of the notch in the holder without the weight holder IN THE VERSION WITH MANUAL SENSOR, PROCEED AS FOLLOWS: - Press the key to prepare the machine for entering distance d1 relative to the internal side (the distance LED lights up on the panel).
- Page 31 - Modify the value displayed on the right display by pressing the keys to get the previously measured nominal diameter. - Press to display the unbalance values (recalculated according to the new dimensions) or perform a wheel spin. ALU 1P ALU 2P EM 9250 Operator’s manual...
-
Page 32: Entering Dimensions In The Motorcycle Programmes
5. ENTERING DIMENSIONS IN THE MOTORCYCLE PROGRAMMES The operations described below are valid if the motorcycle setting (byke) has been activated in the "vehicle type" set up. - Fit the appropriate extension on the inner measur- ing arm, specifically extension A on machines with no weight holder or extension B on machines with weight holder (Fig.16). - Page 33 CAUTION Never raise the guard before the wheel has come to a stop. CAUTION If the wheel keeps spinning permanently due to a fault on the machine, switch off the machine using the main switch or disconnect the plug from the power supply board (emergency stop) and wait until the wheel stops before raising the guard.
- Page 34 CAUTION Check that the system which fits the weight to the rim is in optimum condition. A weight which is not fitted properly or correctly may come off as the wheel rotates, thus creating a potential danger. Pressing the button while the wheel is moving interrupts the wheel spin before time and the A STP message is displayed.
-
Page 35: Applying Balancing Weights
• Manually applied adhesive weights with laser device enabled (if provided) - Select the first side to be balanced. - Turn the wheel until the central element of the corresponding position indicator lights up together with the laser line. - Apply the indicated balancing weight in the position on the rim corresponding to 6 o'clock. - Page 36 The rim surface must be perfectly clean to make the weight stick efficiently to the rim. If necessary, clean the surface using suitable cleansing products. • Manually applied adhesive weights 1 Select the first side to be balanced 2 Turn the wheel until the central element of the corresponding position indicator lights 3 Apply the adhesive weight manually in the position in which the relative plane was measured, using the centre of gravity of the weight itself as reference.
- Page 37 3 Apply the adhesive weight manually in the position in which the relative plane was measured, using the centre of gravity of the weight itself as reference. In this phase, one display shows the unbalance value of the side to be balanced and the other shows the message "H.6"...
- Page 38 weight Pe must be within an angle of 120°, as shown in Fig. 20. Figure 20. Conditions necessary for using the Hidden weights programme To use this programme, proceed as follows: 1 Turn the wheel until the central element of the corresponding position indicator lights It is recommended to keep the wheel in position using the pedal brake.
- Page 39 To select the exact position of the weight P2 relative to the Pe unbalance, use 6 o'clock as the reference if the “LAS” configuration is active and 12 o'clock if the “H12” or “CLP” configuration is active. The angle between P1 and P2 must be less than 120° and must include the outer weight Pe.
- Page 40 - Use the keys to select the spoke width small medium large OFF deactivates the programme; - Confirm with the key. - Apply two new counterweights in the positions indicated. In the motorcycle balancing programmes, the weight division operation can be per- formed on both balancing sides.
- Page 41 OPERATING PHASES OP.1 H.12 - bring the valve to the "12 o'clock" position and press to confirm - make a mark on the tyre 180° from the valve - remove the wheel from the wheel balancer - go to the tyre changer and move the mark made in correspondence with the valve OP.2 180 - press the key to confirm.
- Page 42 Press the key to exit or the key to stay in the programme. - The following message could be displayed at the end of the first spin: In this case it is advisable to exit the programme by pressing the key: the values of the weights necessary for balancing the wheel are displayed.
- Page 43 - press the key to confirm and exit. Activation of the second operator is indicated by the illumination of the LED on the display panel. Repeat the procedure described above to return to the first operator. 14. WHEEL SPIN COUNTER This programme is used to display the total number of spins performed by the machine since its first start-up (tot SPi), the number of spins performed since the last unbalance calibration (CAL SPi) and the number of partial spins performed since the machine was...
- Page 44 - Unbalance unit of measurement - Unbalance rounding-off - Warning OPT - Rim diameter display unit of measurement - Rim width display unit of measurement - Acoustic signal - Setting - Adhesive weight application position (CLIP - LASER h6-h12) - LED light (if provided) - Laser indicator (if provided) Proceed as follows to access the configuration menu: •...
- Page 45 Warning Proceed as follows to balance a motorcycle wheel: - fit the motorcycle wheel adapter A (AUMO) on the wheel balancer as shown in Fig. 21; - insert the two screws that are supplied in the holes on the wheel contact flange; - tighten the screws on the adapter making sure that it rests on the flange correctly;...
- Page 46 - use the keys to search for SEt UP - press the key to confirm - use the keys to search for ALU P (or ALU St if previously set) - press the key to change the setting: or ALU P: to activate the ALUP balancing programmes. These programmes are used for maximum precision balancing on light aluminium rims that require the application of both weights on the same side (inner) in relation to the rim disk.
- Page 47 - use the keys to search for Unb Gr (or Unb Oun if the ounce display mode is active) - press the key to change the setting: Unb Gr to activate the unbalance display in grams or Unb Oun to activate the unbalance display in ounces - press the key to confirm and exit.
- Page 48 15.5. SET UP - WARNING OPT The machine indicates the need to perform an unbalance optimisation procedure (OPT) with the flashing LED on the display panel. Proceed as follows to disable this function: - press the - use the keys to search for SEt UP - press the key to confirm - use the keys to search for OPt on (OPt oFF if disabled)
- Page 49 -d- MM to activate the display in millimetres or -d- in to activate the display in inches - press the key to confirm and exit. 15.7. SET UP - RIM WIDTH DISPLAY UNIT OF MEASUREMENT The machine may be set to display the rim width unit of measurement in inches or mil- limetres.
- Page 50 - press the key to confirm - use the keys to search for biP on (biP oFF if the beeper is disabled) - press the key to change the setting: biP on to activate the beeper or biP oFF to deactivate the beeper - press the key to confirm and exit.
- Page 51 TYPE OF WEIGHT CONFIGURATION WEIGHT APPLICATION POSITION TO BE APPLIED SELECTED 6 o'clock using the LASER line when the adhesive weight is inside the rim Adhesive (if applicable) 12 o'clock when the adhesive weight is outside the rim using the weight-holder terminal in the ALU1P/ALU2P balancing programmes or manually, using the centre of the notch in Adhesive...
- Page 52 or LEd 2 in this configuration, the light will turn on, in addition to the situations indi- cated above (in the Led1 mode) also during the entire measurement cycle, when acquiring dimensions in all balancing programmes and in the Hidden Weight programme when selecting the two planes behind the spokes.
- Page 53 Press the button to search for the second side position with the guard raised. Proceed as follows to deactivate the automatic position search programme: - press the - use the keys to search for SEt UP - press the key to confirm - use the keys to search for rPA on (rPA oFF if previously set) - press the...
- Page 54 2. The machine will display the following message: • CAL on the left-hand display; • GO on the right-hand display. 3. Perform a first spin. 4. At the end of the spin, fix the calibration weight supplied with the machine on the shaft assembly bell as indicated in figure 23.
- Page 55 • press the • use the keys to search for GAU CAL • press the key to perform cali- bration, proceeding as follows: 1. The machine will display the following message: • CAL on the left display • E flashing on the right display 2.
- Page 56 checking that the ultrasonic sensor's emitter/receiver is in line with the calibration template (see figure 27), and repeat the procedure; - the internal sensor was not in the rest position. Position it to the rest position and repeat the procedure. By selecting the key it is possible to exit the programme without executing the calibration.
- Page 57 19. MESSAGES ON THE DISPLAYS The machine can recognise a certain number of malfunction conditions and signals them to the user by visualising the relevant messages on the displays. – A – Notice Messages Wheel not suitable for performing the sensitivity calibration, use a wheel of average dimensions (typically 5.5”X14”) or larger, but NOT exceeding a weight of 40kg.
- Page 58 Correct sensitivity calibration procedure; Correct fastening and position of the calibration weight; Mechanical and geometric condition of the calibration weight; geometry of the wheel used. a) External mechanical sensor calibration error condition. Perform the external mechanical sensor calibration procedure. b) if the error continues after calibrating the external sensor or the external sen- sor is not present, or there is a distance-diameter measuring sensor fault, call the technical support centre.
- Page 59 • press the key. E 27 Excessive braking time. If the problem persists, contact the technical support centre. E 28 Encoder counting error. If the error occurs frequently, call in the technical support centre. E 30 Wheel spin device failure. Switch off the machine and call in the technical support centre.
- Page 60 - This message indicates that the machine is set for acquiring the P2 posi- in -2- tion behind the second spoke. - This message is displayed for approx. 3 seconds if the selected angle is no -2- greater than 120 degrees, indicating that the procedure must be repeated correctly.
- Page 61 CHECK FOR CORRECT FUNCTIONING OF BALANCING ACCESSORIES Checking balancing accessories allows the operator to make sure that wear has not altered the mechanical specifications of flanges, cones, etc. beyond the specified limits. A perfectly balanced wheel, which has been disassembled and reassembled in a different posi- tion, should not show an unbalance value greater than 10 grams.
- Page 62 to enter the wheel geometric data with the keypad, disabling control of the automatic sensor. Return the sensors to the correct position. ➥ Pressing the START key and the button (only the START key if the guard is installed) the wheel does not spin (the machine does not start) For machines with guard, check that it is not raised (the message "A Cr"...
- Page 63 MAINTENANCE CAUTION The company is not to be held responsible for any claims deriving from the use of non-original spare parts or accessories. CAUTION Unplug the machine from the socket and make sure that all moving parts have been locked before making any adjustments or maintenance work.
- Page 64 but must be separately collected for their proper treatment. The crossed-out bin symbol, placed on the product and on this page, reminds the user that the product must be disposed of properly at the end of its life. In this way it is possible to prevent that a non specific treatment of the substances contained in these products, or their improper use, or improper use of their parts may be hazardous to the environment or to human health.
- Page 65 GLOSSARY Below is a brief description of some technical terms used in this manual. SELF-CALIBRATION This procedure calculates suitable correction coefficients starting from known operat- ing conditions. It improves the machine accuracy by correcting to a certain extent the calculation errors that may result from the alteration of the machine's features over the course of time.
- Page 66 SPIN Procedure starting from the action that causes the wheel to rotate and the subsequent rotation of the wheel. THREADED HUB Threaded part of the shaft on which the ring nut is engaged to lock the wheel. It is sup- plied disassembled from the machine.
- Page 67 ELECTRICAL SYSTEM GENERAL DIAGRAM Feeder and control board Search card Internal pick-up External pick-up Fuse Fuse Motor Main switch Outer distance potentiometer Safety guard micro-switch / start key Power supply socket Diameter measuring sensor Distance measuring sensor LASER indicator External distance sonar sensor AP22 LED light EM 9250 Operator’s manual...
- Page 68 EM 9250 Operator’s manual...
- Page 69 ll rights reserved. No part of this publication may be translated, stored in an electronic retrieval system, repro- duced, or partially or totally adapted by any means (including microfilm and photostats) without prior permission. The information contained herein may be subject to modifica- tions without prior notice.
- Page 70 Notes EM 9250 Operator’s manual...
- Page 71 CORGHI S.p.A. - Strada Statale 468 n.9 42015 CORREGGIO - R.E. - ITALY Tel. ++39 0522 639.111 - Fax ++39 0522 639.150 www.corghi.com - info@corghi.com...
Need help?
Do you have a question about the CompactLine EM 9250 and is the answer not in the manual?
Questions and answers