Table of Contents
Advertisement
Available languages
Available languages
Quick Links
Advertisement
Table of Contents

Related Manuals for Technoline WS 6812


Summary of Contents for Technoline WS 6812
- Page 1 WS 6812 LED Wecker mit Innen- und Außentemperatur DE 1...
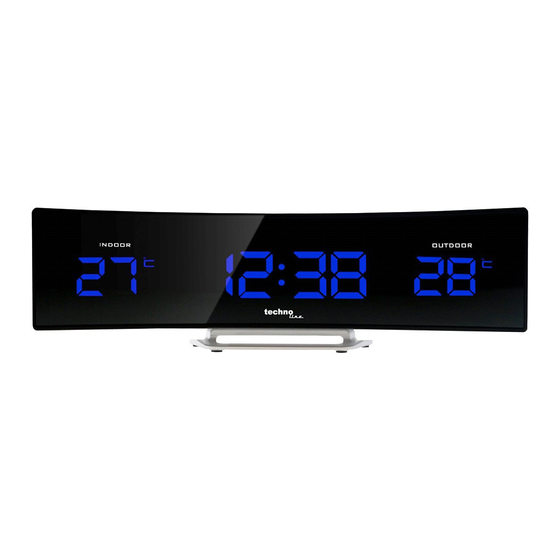
- Page 2 Übersicht A – Vorderansicht A1 – Innentemperatur A4 – Außentemperatur A2 – Alarm angeschaltet A5 – RCC-Anzeige A3 – Uhrzeit A6 – Standfuß B – Draufsicht B1 – DOWN / WAVE Taste B4 – ALARM ON / OFF Taste B2 – SET Taste B5 –...
- Page 3 4) Entfernen Sie die Schutzfolie vom Wecker. Ihr Gerät ist jetzt Einsatzbereit. Hinweis: 1. Beachten Sie, dass der Außensender eine Reichweite von 100m (Freifeld) hat. Die Reichweite wird durch jedes Objekt (Dach, Wände, Böden, Decken, dicke Bäume etc.) minimiert. Für die Tischaufstellung stecken Sie den Fuß auf die Unterseite des Außensenders und für die Wandmontage stecken Sie den Fuß...
- Page 4 Der Wecker startet den Suchlauf jeden Tag um 1:00, 2:00, und 3:00 Uhr. Wenn der Suchlauf bis 3:00 Uhr fehlschlägt, wiederholt sich dies um 4:00 Uhr noch einmal. Schlägt es wieder fehl, wiederholt sich dies um 5:00Uhr. Ist dieser Suchlauf wieder vergebens, startet es automatisch um 1:00Uhr am nächsten Tag.
-
Page 5: Fehlersuche
Ausschalten des Alarms Um den täglichen Alarm zu beenden drücken Sie eine beliebige Taste, außer der Taste, wenn der Alarm aktiv ist. Der Alarm stoppt und das AL Symbol wird statisch; der Alarm ertönt am nächsten Tag zur selben Uhrzeit. Wenn die Außentemperatur nicht angezeigt wird Wenn die Außentemperatur “--“... - Page 6 Entfernen Sie erschöpfte Batterien sofort. Entfernen Sie die Batterien bei Nichtnutzung. Laden Sie die Batterien nicht auf und werfen Sie sie nicht ins Feuer. Sie könnten explodieren.. Bewahren Sie die Batterien nicht in der Nähe von Metallobjekten auf, da ein Kontakt einen Kurzschluss verursachen kann..
- Page 7 WS 6812 LED ALARM CLOCK WITH INDOOR AND OUTDOOR TEMPERATURE GB 1...
-
Page 8: Quick Setup
OVERVIEW A – Front view A1 – Indoor temperature A4 – Outdoor temperature A2 – Alarm On A5 – RCC indicator A3 – Time A6 – Stand B – Top view B1 – DOWN / WAVE button B4 – ALARM ON / OFF button B2 –... - Page 9 Your weather station will receive data signal from the outdoor sensor in few seconds. Then place your outdoor sensor in a dry and shaded area outdoor. 4) Peel off the protective label on the front. Your weather station is ready to work for you. Remarks: 1.
-
Page 10: To Set Time
time signal at 3:00, it will start reception at 4:00. If it fails again, it will start reception at 5:00. If it fails again, it will start automatic reception at 1:00 again in the next day. Manual reception: simply press and hold / WAVE, your clock will give a short beep and start manual reception. -
Page 11: Troubleshooting
IF YOU LOSE THE OUTDOOR TEMPERATURE When the outdoor temperature digits show “--“, the wireless transmission is either interrupted or lost. At normal display, press and hold button of the clock, then take out and reinstall batteries to your outdoor transmitter. If you continue to lose the outdoor temperature display, try placing the transmitter in a different location until you have smooth transmission of temperature data. -
Page 12: Specifications
Keep all batteries out of reach from children. They are a choking hazard. Use the product only for its intended purpose! Consideration of duty according to the battery law Old batteries do not belong to domestic waste because they could cause damages of health and environment. - Page 13 WS 6812 RADIO-RÉVEIL À LED AFFICHANT LES TEMPÉRATURES INTÉRIEURES ET EXTÉRIEURES FR 1...
-
Page 14: Installation Rapide
APERÇU A – Vue de face A1 – Température intérieure A4 – Température extérieure A2 – Alarme activée A5 – Indicateur RCC A3 – Temps A6 – Supporter B – Vue de dessus B1 – Touche DOWN / WAVE B4 – Touche ALARM ON / OFF B2 –... -
Page 15: Piles De Secours
Attendez quelques secondes que la station reçoive le signal de données de son détecteur d'extérieur. Placez ensuite le détecteur à l'extérieur, dans un endroit sec et ombragé. 4) Retirez le film protecteur sur le devant. La station météorologique est prête à fonctionner Remarque : Gardez en tête que votre capteur extérieur a une portée de 30 m en plein air en l'absence d'obstacle. -
Page 16: Pour Régler L'heure
L'icône reste allumée sur l'écran (elle s'arrête de clignoter) lorsque le signal radio a été détecté L'icône s'éteint complètement lorsque le signal radio n'a pas été détecté Réception automatique ou manuelle La station est programmée pour se synchroniser automatiquement sur l'émetteur à 1:00, 2:00 et 3:00. Si elle ne détecte aucun signal à... - Page 17 POUR ACTIVER OU DÉSACTIVER L’ALARME Une seule pression sur AL ON.OFF active ou désactive l'alarme. Lorsque la fonction alarme est activée, le symbole AL apparaît en haut des heures. POUR UTILISER LE RAPPEL D'ALARME (l'intervalle de temps entre rappels est par défaut 5 minutes) Lorsque l'heure correspond à...
-
Page 18: Spécifications
N'exposez pas l'appareil à des forces et des chocs excessifs. N'exposez pas l'appareil à des températures extrêmes, directs du soleil, à la poussière ou à l'humidité. Ne plongez pas l'appareil dans l'eau. Évitez tout contact avec des matériaux corrosifs. ... - Page 19 WS 6812 RELOJ LED CON ALARMA Y CON TEMPERATURA INTERIOR Y EXTERIOR ES 1...
-
Page 20: Visión De Conjunto
VISIÓN DE CONJUNTO A – Vista frontal A1 – Temperatura interior A4 – Temperatura exterior A2 – Alarma encendida A5 – Indicador RCC A3 – Tiempo A6 – Pies de pie B – Vista superior B1 – Botón DOWN / WAVE B4 –... - Page 21 La estación recibirá señal de datos procedente del sensor de exteriores en unos cuantos segundos. Entonces coloque el sensor de exteriores en un área en el exterior, seca y a la sombra. 4) Retire la etiqueta protectora de la parte delantera. La estación meteorológica está lista para trabajar para usted.
- Page 22 Recepción correcta o fallo en la recepción El Icono permanece estático (no parpadea) cuando la recepción es correcta El icono desaparece cuando falló la recepción Recepción automática y recepción manual La Estación inicia la recepción automática cada día a la 1:00, las 2:00 y las 3:00. Si no consigue recibir la señal DFC a las 3:00, iniciará...
- Page 23 PARA USAR EL RETARDO DE ALARMA (La duración del retardo por defecto es de 5 minutos) Cuando la hora llegue a la hora de la alarma fijada, el reloj sonará para despertarlo. El icono AL parpadeará. Pulse una vez para detener la alarma temporalmente; el icono AL sigue parpadeando. La alarma emitirá...
-
Page 24: Especificaciones
No abra la carcasa trasera interior ni manipule ninguno de los componentes de esta unidad. Advertencias de seguridad sobre las baterías Utilizar solamente baterías alcalinas. No utilizar recargables baterías. Coloque las baterías correctamente haciendo coincidir la polaridad (+/-). ... - Page 25 WS 6812 LED-ALARMKLOK MET BINNEN- EN BUITENTEMPERATUUR NL 1...
-
Page 26: Snel Van Start
OVERZICHT A – Vooraanzicht A1 – Binnentemperatuur A4 – Buitentemperatuur A2 – Alarm aan A5 A5 – RCC-indicator A3 – Tijd A6 – Staande poten B – Bovenaanzicht B1 – DOWN / WAVE-knop B4 – ALARM ON / OFF-knop B2 – SET-knop B5 –... - Page 27 Het station zal binnen enkele seconden het gegevenssignaal vanaf de buitensensor ontvangen. Plaats de buitensensor vervolgens buitenshuis op een droge plek in de schaduw. 4) Verwijder de beschermfolie van de display. Het Temperatuurstation is nu gebruiksklaar. Opmerkingen: Vergeet niet dat uw buitensensor een overdrachtbereik heeft van ca. 30 meter in de open lucht en zonder obstakels.
-
Page 28: De Tijd Instellen
Geslaagde ontvangst of mislukte ontvangst Icoontje blijft constant ingeschakeld (stopt met knipperen) wanneer de ontvangst geslaagd is Icoontje verdwijnt wanneer de ontvangts mislukt is Automatische ontvangst en handmatige ontvangst Het station start dagelijks met automatische ontvangst om 1:00, 2:00, en 3:00. Als de DFC signaalontvangst om 3:00 mislukt, wordt de ontvangst gestart om 4:00. - Page 29 UW ALARM IN- OF UITSCHAKELEN Druk eenmaal op AL ON.OFF om het alarm in of uit te schakelen. Wanneer het alarm aanstaat, zal het AL-pictogram verschijnen boven de tijdsgetallen. HET SLUIMERALARM GEBRUIKEN (standaard sluimerduur is 5 minuten) Wanneer de tijd uw ingestelde alarmtijd bereikt, zal uw klok het alarm laten klinken om u te wekken. Het AL-pictogram gaat knipperen.
- Page 30 Niet onderdompelen het apparaat in water Vermijd contact met bijtende stoffen. Gebruik het apparaat niet in een vuur. Deze kan ontploffen. Niet open de behuizing en niet manipuleren structurele componenten van het apparaat. Batterijvoorschriften Gebruik uitsluitend alkaline batterijen, geen oplaadbare batterijen. ...
- Page 31 WS 6812 SVEGLIA A LED CON TEMPERATURA INTERNA ED ESTERNA IT 1...
-
Page 32: Installazione Rapida
PANORAMICA A – Vista frontale A1 – Temperatura interna A4 – Temperatura esterna A2 – Allarme impostato su A5 – Indicatore RCC A3 – Tempo A6 – Piedi in piedi B – Vista dall'alto B1 – Pulsante DOWN / WAVE B4 –... - Page 33 La stazione riceverà il segnale dati dal sensore esterno in pochi secondi. Quindi posizionare il sensore esterno in un area asciutta e all'ombra. 4) Rimuovere la pellicola protettiva dal display. La stazione meteo è ora operative. Nota: Ricordarsi che il sensore esterno ha un raggio di trasmissione di 30 metri in area aperta senza ostruzioni.
- Page 34 L'icona diventa fissa accesa (smette di lampeggiare) quando la ricezione avviene con successo L'icona scompare quando la ricezione è fallita Ricezione automatica e ricezione manuale La stazione avvia la ricezione automatica ogni giorno all'1:00, 2:00 e 3:00. Se la ricezione del segnale DCF alle 3:00 fallisce, essa sarà...
- Page 35 PER UTILIZZARE LA FUNZIONE SNOOZE (la durata predefinita dello snooze è di 5 minuti) Quando l'orario raggiunge l'orario impostato per la sveglia, l'orologio emette un bip per svegliarti. L’icona AL lampeggerà. Premere una volta per interrompere temporaneamente la sveglia, l'icona AL lampeggia. La sveglia suonerà...
-
Page 36: Specifiche Tecniche
Non aprire la cassa interna o manomettere i componenti di questa dispositivo. Avvertenze per l'uso sicuro delle batterie Uilizzare solo batterie alcaline. Non utilizzare batterie ricaricabili. Installare le batterie correttamente rispettando le polarità (+/-). Sostituire sempre il set completo di batterie. ... - Page 37 WS 6812 LED BUDÍK S MĚŘENÍM VNITŘNÍ A VENKOVNÍ TEPLOTY CS 1...
-
Page 38: Rychlé Nastavení
PŘEHLED A – Čelní pohled A1 – Vnitřní teplota A4 – Venkovní teplota A2 – Zapnutí alarmu A5 – Indikátor RCC A3 – Čas A6 – Stojaté nohy B – Pohled shora B1 – Tlačítko DOWN / WAVE B4 – Tlačítko ALARM ON / OFF B2 –... - Page 39 4) Stanice začne za pár sekund přijímat datový signál z venkovního čidla. Potom umístěte venkovní čidlo na suché a stinné venkovní místo. Odstraňte ochrannou fólii z displeje. Teploměrová stanice je nyní funkční. Poznámky: Mějte na paměti, že venkovní čidlo má dosah 30 metrů v otevřeném prostoru bez překážek. Skutečný...
-
Page 40: Nastavení Času
Když selže příjem, tak ikona zmizí Automatický příjem a manuální příjem Stanice začne automaticky přijímat signál každý den v 1:00, 2:00, a 3:00. Pokud se nepodaří příjem signálu DCF ve 3:00 hodiny, začne příjem ve 4:00 hodiny. Pokud se opět nepodaří příjem signálu, začne signál přijímat opět v 5:00 hodin. -
Page 41: Řešení Problémů
Jedním stiskem tlačítka budík dočasně zastavte, ikona AL bude nadále blikat. Budík začne znovu pípat za 5 minut či za vámi nastavenou dobu. ZASTAVENÍ A RESET BUDÍKU NA DALŠÍ DEN Chcete-li zastavit denní buzení, stiskněte během pípání budíku libovolné tlačítko KROMĚ Budík se zastaví... - Page 42 Vždy vyměňte kompletní sadu baterií. Nikdy nemíchejte použité a nové baterie. Okamžitě odstraňte vybité baterie. Baterie vyjměte, když není zařízení v provozu. Nenabíjejte a nevhazujte baterie do ohně, mohly by explodovat. Ujistěte se, že jsou baterie uloženy mimo dosah kovových předmětů, neboť kontakt může způsobit zkrat.
- Page 43 WS 6812 BUDZIK NA DIODY LED ZE WSKAŹNIKIEM TEMPERATURY WEWNĄTRZ I NA ZEWNĄTRZ PL 1...
- Page 44 PRZEGLĄD A – Widok z przodu A1 – Temperatura wewnętrzna A4 – Temperatura zewnętrzna A2 – Włączono alarm A5 – Wskaźnik RCC A3 – Czas A6 – Stopy B – Widok z góry B1 – Przycisk DOWN / WAVE B4 – Przycisk ALARM ON / OFF B2 –...
- Page 45 Stacja odbierze sygnał danych z czujnika zewnętrznego za kilka sekund. Następnie należy ustawić czujnik zewnętrzny w suchym i ocienionym miejscu na zewnątrz.. 4) Usuń folię ochronną z wyświetlacza. Stacja temperatura już działa. Uwagi: Należy pamiętać, że przekaz czujnika zewnętrznego na powietrzu wynosi 100 stóp bez przeszkód.
-
Page 46: Ustawianie Czasu
Ikona znika, jeśli odbiór jest nieudany Odbiór automatyczny i ręczny Stacja rozpoczyna automatyczny odbiór codziennie o godz. 1:00, 2:00 i 3:00. Jeśli nie uda się odbiór sygnału DCF o godz. 3:00, kolejny odbiór rozpocznie się o godz. 4:00. Jeśli nie uda się ponownie, kolejny odbiór rozpocznie się... - Page 47 KORZYSTANIE Z ALARMU DRZEMKI (domyślny czas drzemki wynosi 5 minut) Po osiągnięciu ustawionego przez użytkownika czasu alarmu, zegar wyda sygnał dźwiękowy pobudki. Ikona AL zacznie migać. Nacisnąć jednokrotnie przycisk , aby tymczasowo zatrzymać alarm, miga ikona AL. Budzi zacznie ponownie dzwonić po 5 minutach, lub ustawionym wcześniej okresie drzemki. ZATRZYMYANIE I RESETOWANIE ALARMU WYZNACZONEGO NA NASTĘPNY DZIEŃ...
- Page 48 Nie wyrzucać urządzenia do ognia, gdyż może wybuchnąć. Nie otwierać obudowy i nie ingerują w wewnętrzne części urządzenia. Ostrzeżenia bezpieczeństwa dotyczące baterii Używać tylko baterii alkalicznych. Nie wolno używać akumulatorów. Włożyć baterie prawidłowo, zgodnie z biegunowością (+/-). ...
Need help?
Do you have a question about the WS 6812 and is the answer not in the manual?
Questions and answers