Advertisement
Advertisement
Table of Contents

Subscribe to Our Youtube Channel
Related Manuals for ITS Telecom Ek PR PRO


Summary of Contents for ITS Telecom Ek PR PRO
- Page 1 PR PRO 072003 [EN] User manual 1 ...
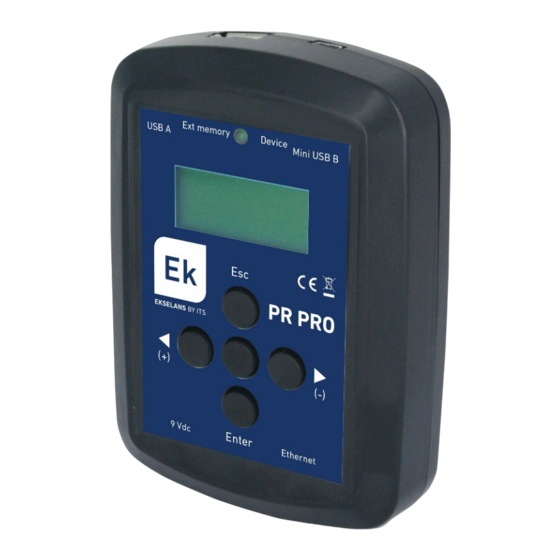
- Page 2 Index 1. Introduction 2. Box content 3. Interfaces 4. Connections 5. Navigation through the programmer 6. Quick steps 6.1. Access into an AP8 programable amplifier and adjust it 6.2. Load a configuration stored in a USB memory stick into the AP8 programable amplifier 6.3.
- Page 3 4. Connections 5. Navigation through the programmer By accessing to the different menus of the programmer it is possible to adjust completely the programmable amplifier. In this menu it is possible to access to the programmable amplifier and adjust it. It is previously required to be connected to it (CONNECT LOAD).
- Page 4 CONFIG ET1. It allows activating or deactivating the previous preamplification. LTE. It allows activating one of the possible filters: LTE2. Channels from 21 to 48 can be selected. LTE1. Channels from 21 to 60 can be selected. ...
- Page 5 When connecting a USB memory stick to the programmer, it is possible to realize some of these file transfers: MENU It allows transferring a structure that simulates an AP8 programmable amplifier inside of the programmer itself. These transfers have the purpose to emulate an AP8 programmable amplifier even not being connected to it.
- Page 6 6.2. Load a configuration stored in a USB memory stick into the AP8 programable amplifier This process can be used to clone the same configuration to several AP8 programmable amplifiers. Make the connections between the antenna and power feeding. Connect physically the programmer and the AP8 programmable amplifier by using USB cable Connect to the programmable amplifier (CONNECT ...
Need help?
Do you have a question about the Ek PR PRO and is the answer not in the manual?
Questions and answers