
Related Manuals for sterling water treatment CRS-3


Summary of Contents for sterling water treatment CRS-3
- Page 1 INSTALLATION MANUAL CRS-3 12630 US 33 N. Churubusco, IN 46723 Ph. (260)693-1972 Fax (260)693-0602 www.sterlingwatertreatment.com CRS-3 Manual 211112...
-
Page 2: Table Of Contents
TABLE OF CONTENTS: SECTION I. INTRODUCTION................2 SECTION II. SPECIFICATIONS..............2 SECTION III: PREPARATION.................3 Major System Components......................3 B. Tools Recommended for Installation..................3 C. Determine System Location......................3 D. Prepare the Area for Installation....................4 E. Prepare the Appliance for Installation..................4 SECTION IV. INSTALLATION STEPS............4 A. -
Page 3: Introduction
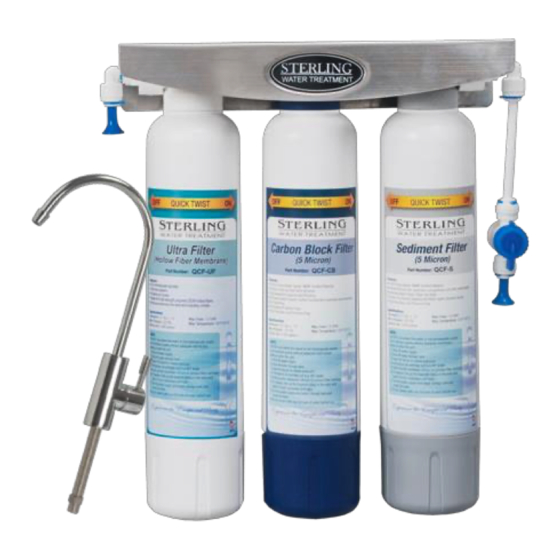
SECTION I. INTRODUCTION Congratulations, you have just purchased one of CARBON BLOCK PRE-FILTER - The carbon filter the finest Drinking Water Appliances available. is a carbon block that has coconut shell activated carbon with a smaller pore size to increase the Like any other fine product, this appliance requires range of organics removed and extend the amount periodic maintenance in accordance with the... -
Page 4: Preparation
C. Determine System Location 1. A filter assembly consisting of the aluminum bracket, filter housings and shut-off valve. The CRS-3 system can be located under a sink or 2. A faucet kit. in a basement depending on space availability and the customer’s preference. -
Page 5: Prepare The Area For Installation
Softened water is preferred as it will extend A. Install the Faucet the life of the UF Membrane. Leak Stop Valve – Drinking water systems See Figure 1 for Faucet Installation Diagram inherently have many connections which could leak. It is necessary to install the The faucet should be positioned so that it empties included Leak Stop Valve very close to into the sink and the spout swivels freely for... -
Page 6: Mount The Faucet
c) Set up the chassis punch per instructions 2. Mount the Faucet: and tighten nut to cut the desired hole a) Familiarize yourself with all components size. shown in faucet diagram. d) Clean up sharp edges with a file if b) Disassemble hardware from the threaded necessary. -
Page 7: Make Initial Tubing Connections
B. Changing Filter cabinet floor and held against the sidewall with the mounting screws. NOTE: THE CRS-3 SYSTEM CONTAINS FILTERS WHICH MUST BE REPLACED AT REGULAR Securely mount the Leak Stop Valve to the base of INTERVALS TO MAINTAIN PROPER the cabinet below the filter assembly. -
Page 8: Installation Drawing & Parts List
C. Installation Drawing & Parts List Part Number Description Luxury long reach faucet, non air gap, RO-DW-1 chrome 4FC4 Faucet connector, ¼” tube X 7/16” UNF TU-2W ¼” OD white poly tubing, per foot 4SE4 Stem elbow, ¼” tube X ¼” stem Male connector, ¼”... -
Page 9: Quick Connect Fittings
TO ATTACH TUBING... D. Quick Connect Fittings Your new CRS-3 Drinking Water Appliance is equipped with user-friendly quick connect push-in fittings. Proper use of the fittings is shown in the diagrams. It is important that the tubing selected for use with these connectors be of high quality exact size and roundness, and with no surface nicks or scratches. -
Page 10: Section Vi: Troubleshooting Guide
SECTION VI. TROUBLE SHOOTING GUIDE Problem Possible Cause Solution Low quantity of Product Feed Water Saddle Valve is Open Valve or unclog. Water from Dispensing plugged or closed. Faucet Clogged Sediment Prefilter or Replace filters. Activated Carbon Prefilter. Low water pressure Feed Water pressure must be above 40 psig. -
Page 11: Leak Stop Valve Compressed Pellet Replacement
Leak Stop Valve – Compressed Pellet Replacement 1) Pull the upper cover upward and separate it from the lower body. 2) Remove the expanded pellet from the retainer. 3) Replace the expanded pellet with the spare compressed pellet. 4) Seat the compressed pellet and retainer into the lower body. 5) Push the upper cover down until it snaps securely in place. -
Page 12: Limited Warranty
How Long Does The Coverage Last? The manufacturer will warrant its CRS-3 Drinking Water System, for a period of one year from the date of purchase. All implied warranties including merchantability and fitness for a particular purpose are limited to one year from the date of purchase for the CRS-3 Drinking Water System.
Need help?
Do you have a question about the CRS-3 and is the answer not in the manual?
Questions and answers