KEENCUT Evolution3 FreeHand User Manual
Hide thumbs
Also See for Evolution3 FreeHand:
- Installation manual (17 pages) ,
- User manual (8 pages) ,
- Installation manual (4 pages)
Table of Contents
Advertisement
Quick Links
Advertisement
Table of Contents

Related Manuals for KEENCUT Evolution3 FreeHand

Summary of Contents for KEENCUT Evolution3 FreeHand
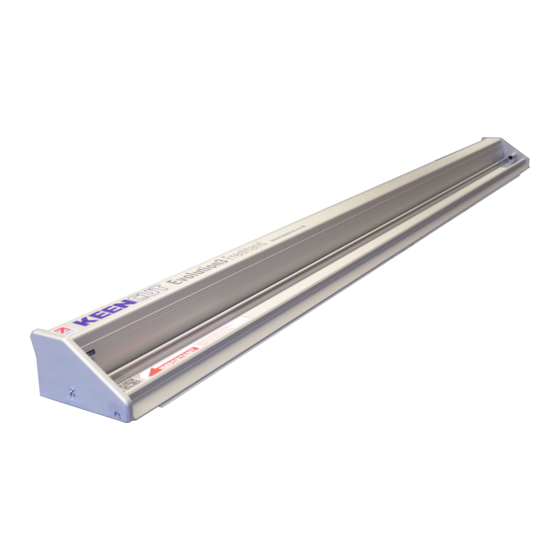
- Page 1 Evolution3 FreeHand User Guide The world’s finest cutting machines www.keencut.com +44 (0) 1536 263158 sales@keencut.co.uk (UK HQ) Scan the QR code or +1 (716) 748 6203 sales@keencut.com (US sales) click here to view this document online > Page 1 of 43...
-
Page 2: Table Of Contents
Evolution3 FreeHand User Guide Contents 1. Introduction ................................. 1.1 The Evolution3 FreeHand user guide ........................2. Get to know your cutter ............................2.1 Swapping tool heads ............................3. Make your first cut ..............................3.1 Align and clamp the material .......................... -
Page 3: Introduction
Evolution3 FreeHand User Guide 1. Introduction 1.1 The Evolution3 FreeHand user guide This User Guide for the Evolution3 FreeHand gives advice on cutting techniques, using the different cutting heads and care and maintenance of your machine. Before using your machine make sure that you have installed and calibrated it correctly. -
Page 4: Get To Know Your Cutter
Evolution3 FreeHand User Guide 2. Get to know your cutter 2.1 Swapping tool heads See how to swap tool heads in this video > Pull and remove end stop. Slide the cutting head to the right. The world’s finest cutting machines www.keencut.com... - Page 5 Evolution3 FreeHand User Guide Lift up the head to remove it. Insert the cutting head of your choice, and slide it to the left. More than one tool can be mounted on the cutter bar if required. Always replace the end stop.
-
Page 6: Make Your First Cut
Evolution3 FreeHand User Guide 3. Make your first cut 3.1 Align and clamp the material IMPORTANT: You must use a cutting mat for any cutting, creasing, or scoring process to prevent damage to the work surface. See how to align and clamp the material in this video >... -
Page 7: Introduction To The Double Graphik Tool Head
Evolution3 FreeHand User Guide 3.2 Introduction to the Double Graphik tool head See how to use the Double Graphik tool head in this video > QuikSwap Graphik tool head for Evolution3 cutters, with two individual blade holders for two way cutting. Graphik blades are stronger and more stable than regular blades. -
Page 8: Insert Graphik Blades Into The Double Graphik Tool Head
Evolution3 FreeHand User Guide 3.3 Insert Graphik blades into the Double Graphik tool head Undo the highlighted knob to remove the magnetic blade clamping plate. Pull the magnetic blade clamping plate away from the cutting head. Insert a Graphik blade, check it is facing the correct way for your desired direction of cutting. - Page 9 Evolution3 FreeHand User Guide Replace the blade clamping plate onto the blade holder but do not tighten fully until the blade depth has been set (see how to adjust the blade depth >). Repeat on the other blade holder if required.
-
Page 10: Double Graphik Tool Head Cutting Technique
Evolution3 FreeHand User Guide 3.4 Double Graphik tool head cutting technique IMPORTANT: You must use a cutting mat for any cutting, creasing, or scoring process to prevent damage to the work surface Place the cutting mat (A) on the work surface then the material to be cut (B) making sure the whole length of the cut line is over the cutting mat. - Page 11 Evolution3 FreeHand User Guide The cutting head can be pulled or pushed to cut the material. Load and align the material to be cut as described in the ‘clamping material’ section (see how to align and clamp the material >), press down the chosen blade holder whilst pushing/pulling the cutting head along the cutter bar.
-
Page 12: Using A Cutting Station
Evolution3 FreeHand User Guide 3.5 Using a cutting station See how to create a cutting station > This process assumes a cutting groove has been made or the work surface has been covered with a cutting mat or other plastic material to act as a cutting mat. - Page 13 Evolution3 FreeHand User Guide Slide the material and the FreeHand back into the cutting position between the two blocks. Hold down the cutter bar and make the cut. The world’s finest cutting machines www.keencut.com +44 (0) 1536 263158 sales@keencut.co.uk (UK HQ)
-
Page 14: Using The Double Graphik Tool Head
Evolution3 FreeHand User Guide 4. Using the Double Graphik tool head 4.1 Change the Graphik blades Undo the highlighted knob to remove the magnetic blade clamping plate. Pull the magnetic blade clamping plate away from the cutting head. Lift off the blunt blade (if there is one) and replace with a new Graphik blade, check it is facing the correct way for your desired direction of cutting. - Page 15 Evolution3 FreeHand User Guide Replace the blade clamping plate onto the blade holder but do not tighten fully until the blade depth has been set. Repeat on the other blade holder if required. The world’s finest cutting machines www.keencut.com +44 (0) 1536 263158 sales@keencut.co.uk (UK HQ)
-
Page 16: Adjust The Blade Depth And Direction
Evolution3 FreeHand User Guide 4.2 Adjust the blade depth and direction To adjust the height of the blade, loosen knob ‘A’ by a half to one full turn. Move knob ‘B’ up or down until the blade is long enough to just cut through the material. - Page 17 Evolution3 FreeHand User Guide The blades also have adjustable cutting depth, so if a thick material is being cut on a long machine such that it is beneficial to make two cuts, one blade can be set to cut half the thickness in one direction and the other to cut full depth on the return journey.
-
Page 18: Advanced Cutting Techniques
Evolution3 FreeHand User Guide 4.3 Advanced cutting techniques NOTE: The following is for a right-handed person. For left-handed use cut at the left-hand end of the cutter and reverse the direction of cut and hand positions. IMPORTANT: You must use a cutting mat for any cutting, creasing, or scoring process... - Page 19 Evolution3 FreeHand User Guide When cutting thick, tough materials such as PVC foam board and fluted plastics such as Correx or Coroplast, set the blade depth so the blade tip protrudes only 1-2mm ( ⁄ ”) through the thickness of the board and cuts from left to right.
- Page 20 Evolution3 FreeHand User Guide Cutting Aluminium Composite Panels is not recommended using the Graphik tool head. See how to cut ACP with the Rocker tool head > Thin materials such as paper and plastic films are easily cut but attention should be given to supporting the material at the beginning of the cut.
-
Page 21: Using The Fabric Tool Head
Evolution3 FreeHand User Guide 5. Using the Fabric tool head 5.1 Change the Fabric tool head blade Loosen the clamping knob. Remove the blade cover. Remove the safety cover. The world’s finest cutting machines www.keencut.com +44 (0) 1536 263158 sales@keencut.co.uk (UK HQ) - Page 22 Evolution3 FreeHand User Guide Remove the blade and magnetic blade boss. There may be a number of clear plastic shims on the threaded shaft, ensure they are clean and in good condition. Separate the boss from the blade and inspect the boss for wear and clean off any debris.
-
Page 23: Use The Fabric Tool Head With A Cutting Mat
Evolution3 FreeHand User Guide 5.2 Use the Fabric tool head with a cutting mat IMPORTANT: You must use a cutting mat for any cutting, creasing, or scoring process to prevent damage to the work surface. Place the cutting mat (A) on the work surface then the material to be cut (B) making sure the whole length of the cut line is over the cutting mat. -
Page 24: Adjust The Fabric Tool Head Blade Pressure
Evolution3 FreeHand User Guide 5.3 Adjust the Fabric tool head blade pressure Turn the highlighted screw to adjust the blade pressure (clockwise to reduce). When adjusting you will see the pressure indicator go up and down. The world’s finest cutting machines www.keencut.com... -
Page 25: Use The Fabric Tool Head Blade Guard
Evolution3 FreeHand User Guide 5.4 Use the Fabric tool head blade guard Rotate the red blade guard, using tab (B), to reveal or hide the blade. If it is difficult to rotate loosen the clamping knob (A) a little. Ensure it is adjusted correctly before cutting so the blade is just able to rotate without sideways movement. -
Page 26: Fabric Tool Head Cutting Technique
Evolution3 FreeHand User Guide 5.5 Fabric tool head cutting technique Take a small piece of the material to be cut, clamp it under the cutter bar. The Fabric tool head cuts in both directions and requires the blade holder to be pressed down fully whilst the rotary blade is cutting the material. - Page 27 Evolution3 FreeHand User Guide Cut in one smooth continuous motion, adjust to increase or decrease the cutting pressure if necessary. When the small piece of material has been cut successfully place the main piece of fabric in the cutter, align and cut in the same way.
-
Page 28: Using The Creaser Tool Head
Evolution3 FreeHand User Guide 6. Using the Creaser tool head 6.1 Different creasing wheels The three creasing wheels supplied with the Creaser tool head will each produce a different style of crease. Experiment on small samples of your material to see which gives best results. -
Page 29: Change The Creasing Wheels
Evolution3 FreeHand User Guide 6.2 Change the creasing wheels Remove the lower clamping knob. Remove the creasing wheel leaving the bearing and clear plastic shim in place. Remove the upper clamping knob. The world’s finest cutting machines www.keencut.com +44 (0) 1536 263158 sales@keencut.co.uk (UK HQ) - Page 30 Evolution3 FreeHand User Guide Choose the creasing wheel you would like to use and exchange it with the lower wheel. Replace both clamping knobs. The world’s finest cutting machines www.keencut.com +44 (0) 1536 263158 sales@keencut.co.uk (UK HQ) Scan the QR code or +1 (716) 748 6203 sales@keencut.com (US sales)
-
Page 31: Creasing Technique
Evolution3 FreeHand User Guide 6.3 Creasing technique IMPORTANT: You must use a cutting mat for any cutting, creasing, or scoring process to prevent damage to the work surface. Place the cutting mat (A) on the work surface then the material to be cut (B) making sure the whole length of the cut line is over the cutting mat. - Page 32 Evolution3 FreeHand User Guide Align your material in the machine, apply downward pressure to the wheel holder and move the cutting head along to create the crease line. Adjust the hand pressure and number of strokes accordingly, you can crease in either direction.
-
Page 33: Using The Rocker Tool Head
Evolution3 FreeHand User Guide 7. Using the Rocker tool head 7.1 The Rocker tool head The Rocker tool head has been especially designed to give perfect comfort for all day, every day, cutting. The tool head fits the curve of your hand, allowing you to cut denser materials with ease. -
Page 34: Fit Or Change The Rocker Tool Head Blade
Evolution3 FreeHand User Guide 7.2 Fit or change the Rocker tool head blade To change the blade, loosen the blade clamping knob. Remove the magnetic cartridge from the Rocker head. Place the blade between the two guides, the magnet will hold it in place, and slide it back to touch the blade depth screw. -
Page 35: Rocker Tool Head Cutting Technique
Evolution3 FreeHand User Guide 7.3 Rocker tool head cutting technique IMPORTANT: it is not recommended to cut ACP using the FreeHand. To cut ACP with the Rocker tool head, it is recommended to use either the SmartFold or the BenchTop. - Page 36 Evolution3 FreeHand User Guide When cutting thinner / less dense materials, ensure the blade depth is adjusted so only the tip of the blade is going through the material. Place your hand on the Rocker tool head as shown and rock it forward to engage the blade.
- Page 37 Evolution3 FreeHand User Guide Extra effort can be applied by holding the grip area on the top of the cutter bar with your other hand and using the strength across your shoulders to push. Thicker materials can be cut in several passes.
-
Page 38: Care And Maintenance
Evolution3 FreeHand User Guide 8. Care and maintenance 8.1 Clean your machine See how to clean your machine in this video > Use a vacuum cleaner to remove any dust and smaller debris. Frequency: daily as required Moisten a cloth with diluted detergent to wipe down the cutter bar and base plate, dry with a cloth. -
Page 39: Maintain The Bearing Track
Evolution3 FreeHand User Guide 8.2 Maintain the bearing track See how to maintain the bearing track in this video > Put a small amount of petroleum jelly (Vaseline) on the scouring surface of a dish washing sponge and rub it up and down the two tracks. -
Page 40: Change The Sightline Strip
Evolution3 FreeHand User Guide 8.3 Change the sightline strip IMPORTANT: Ensure that you have a replacement sightline strip before proceeding When using your FreeHand, the sightline strip may become scored or damaged. Remove any tool heads. Turn over the FreeHand so that the underside is visible. - Page 41 Evolution3 FreeHand User Guide Remove the damaged sightline strip making sure that all residue from the adhesive tape is removed. NOTE: If you are struggling to remove any adhesive residue, lightly use methylated spirit on a paper towel or cloth.
- Page 42 Evolution3 FreeHand User Guide Apply the sightline strip in stages from one end of the cutter bar to the other using the yellow silicone grip as your guide; the back edge of the sightline strip should be touching the front edge of the silicone grip.
- Page 43 Evolution3 FreeHand User Guide The sightline strip is wider than it needs to be and requires trimming to suit cutting line of the machine. Use the Double Graphik tool head to gently cut through the sightline strip in 3 to 4 passes. This will ensure the sightline strip is not distorted and indicates the blades line of cut accurately.
Need help?
Do you have a question about the Evolution3 FreeHand and is the answer not in the manual?
Questions and answers