Table of Contents
Advertisement
Quick Links
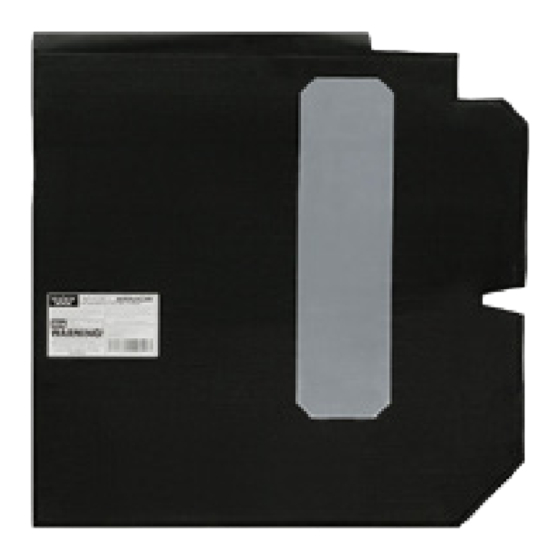
BALLISTIC
DOOR PANELS
INSTALLATION GUIDE
As shown on
CHEVY
TAHOE PPV
®
FOR FRONT DOORS
(2007 – 2014 MODELS)
ALSO COMPATIBLE WITH:
• Chevy
Suburban
®
• Chevy
Silverado and Silverado HD
®
• Chevy
Avalanche
®
• GMC
Yukon and Yukon XL
®
• GMC
Sierra and Sierra HD
®
• Cadillac
Escalade and Escalade ESV
®
10061_B
(2007 - 2014)
(2007 - 2013)
(2007 - 2014)
(2007 - 2013)
(2007 - 2013)
(2007 - 2014)
angelarmor.com
970 235 2961
sales@angelarmor.com
Advertisement
Table of Contents

Summary of Contents for Angel Armor AVAIL NIJ LEVEL IIIA
- Page 1 BALLISTIC DOOR PANELS INSTALLATION GUIDE As shown on CHEVY TAHOE PPV ® FOR FRONT DOORS (2007 – 2014 MODELS) ALSO COMPATIBLE WITH: • Chevy Suburban ® (2007 - 2014) • Chevy Silverado and Silverado HD ® (2007 - 2013) • Chevy Avalanche ®...
-
Page 2: Table Of Contents
Installation Guide Angel Armor Ballistic Door Panel (Level IIIA) for Chevy® Tahoe PPV Table of Contents Introduction Product Description Installation Overview Warnings & Cautions Legal Statements PARTS & TOOLS List Installation Kit Contents Recommended Tools Installation Overview - General Installation Procedure... -
Page 3: Introduction
Installation Guide Angel Armor Ballistic Door Panel (Level IIIA) for Chevy® Tahoe PPV Introduction Product Description Angel Armor Ballistic Door Panels (Level IIIA) Congratulations on your are constructed of proprietary technology that purchase of the Angel Armor™ is not only remarkably strong, but also thin, lightweight and weatherproof. -
Page 4: Warnings & Cautions
Installation Guide Angel Armor Ballistic Door Panel (Level IIIA) for Chevy® Tahoe PPV Warnings and Cautions Do not drop screws or other assembly components inside the door, as they may be difficult to retrieve. If possible, use magnetic Please adhere to the following tools during installation. -
Page 5: Parts & Tools List
Installation Guide Angel Armor Ballistic Door Panel (Level IIIA) for Chevy® Tahoe PPV PARTS & TOOLS list Recommended Tools This section lists tools to be supplied by the This section lists the parts installer. included in the installation kit, Panel/trim removal tools of varying sizes and the tools recommended for installation. -
Page 6: Installation
Installation Guide Angel Armor Ballistic Door Panel (Level IIIA) for Chevy® Tahoe PPV INSTALLATION Important Notes The directions, photographs and This section provides illustrations in this guide depict an instructions for installing Angel installation performed on the driver’s side. The same installation procedure Armor Avail Ballistic Door Panels applies to the passenger door. -
Page 7: Procedure
Installation Guide Angel Armor Ballistic Door Panel (Level IIIA) for Chevy® Tahoe PPV Procedure Detaching the Interior Door Panel and Replacing the Window Regulator Bolt Complete the following steps to Remove the door lock by completing the properly install the Angel Armor... - Page 8 Installation Guide Angel Armor Ballistic Door Panel (Level IIIA) for Chevy® Tahoe PPV Detaching the Interior Door Panel and Replacing the Window Regulator Bolt CONTINUED Remove the 10 mm bolt behind the door handle. Remove the trim cover in the arm rest (see Figure 6 on page 7).
- Page 9 Installation Guide Angel Armor Ballistic Door Panel (Level IIIA) for Chevy® Tahoe PPV Detaching the Interior Door Panel and Replacing the Window Regulator Bolt CONTINUED Lean open the door trim panel by partially inserting the two plastic pins at the bottom of the door trim panel into their retaining holes in the door.
-
Page 10: Inserting The Ballistic Door Panel
Installation Guide Angel Armor Ballistic Door Panel (Level IIIA) for Chevy® Tahoe PPV Inserting the Ballistic Door Panel Hold the ballistic door panel so that its anti-abrasion panel faces the interior of the vehicle. Adjust the window height to 7.5”. - Page 11 Installation Guide Angel Armor Ballistic Door Panel (Level IIIA) for Chevy® Tahoe PPV Inserting the Ballistic Door Panel If the ballistic panel does not clear the airbag sensor, move to the inside of the CONTINUED door to guide it forward of the sensor.
- Page 12 Installation Guide Angel Armor Ballistic Door Panel (Level IIIA) for Chevy® Tahoe PPV Inserting the Ballistic Door Panel CONTINUED Airbag Sensor Figure 15. Proper alignment of fold with window frame Back Edge of Ballistic Door NOTE: If the ballistic door panel is not...
-
Page 13: Re-Attaching The Interior Door Panel
Installation Guide Angel Armor Ballistic Door Panel (Level IIIA) for Chevy® Tahoe PPV Re-attaching the Interior Door Panel Replace the moisture barrier by pressing its adhesive into the attachment points on the door. Align the top edge of the vehicle door trim Figure 17. -
Page 14: Removal Or Decommission
Installation Guide Angel Armor Ballistic Door Panel (Level IIIA) for Chevy® Tahoe PPV Removal or Replace the outer window weatherstrip by Decommission placing it in position and pressing down firmly. This section describes the Re-connect the vehicle battery. process for removing the...


Need help?
Do you have a question about the AVAIL NIJ LEVEL IIIA and is the answer not in the manual?
Questions and answers