
Related Manuals for Angel Armor Avail


Summary of Contents for Angel Armor Avail
- Page 1 BALLISTIC DOOR PANELS INSTALLATION GUIDE DODGE CHARGER PURSUIT ® FOR FRONT DOORS (2011 & NEWER MODELS) angelarmor.com 970 235 2961 sales@angelarmor.com 10060_D...
-
Page 2: Table Of Contents
Installation Guide Angel Armor Ballistic Door Panel (Level IIIA) for Dodge® Charger PURSUIT Table of Contents Introduction Product Description Installation Overview Warnings & Cautions Legal Statements Tools & Parts List Installation Kit Contents Recommended Tools Installation Overview - General Installation Procedure... -
Page 3: Introduction
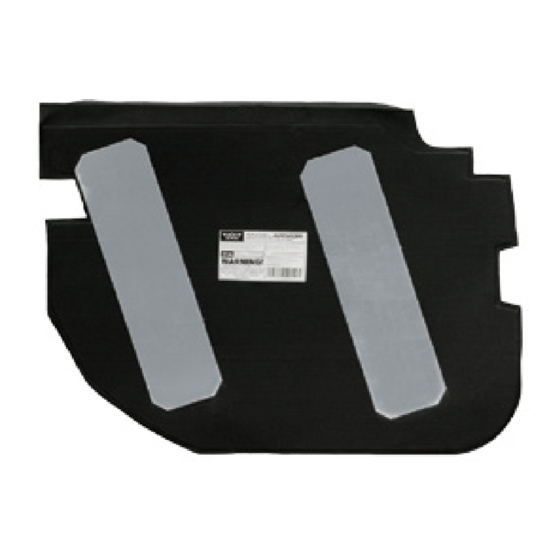
90 seconds for experienced installers. The average user installation takes only 5 to 15 minutes. Watch an installation in action at angelarmor.com. Figure 1. Angel Armor Avail Ballistic Door Panel (Level IIIA) for the Dodge Charger Pursuit 970 235 2961 sales@angelarmor.com angelarmor.com... -
Page 4: Warnings & Cautions
Installation Guide Angel Armor Ballistic Door Panel (Level IIIA) for Dodge® Charger PURSUIT Warnings and Cautions Do not drop screws or other assembly components inside the door, as they may be difficult to retrieve. If possible, use magnetic Please adhere to the following tools during installation. -
Page 5: Tools & Parts List
Installation Guide Angel Armor Ballistic Door Panel (Level IIIA) for Dodge® Charger PURSUIT TOOLS & parts list Angel Armor Brand Label This section lists the tools recommended for installation and the parts included in the installation kit. Recommended Tools Torx T-20 Screwdriver Figure 4. -
Page 6: Installation
Installation Guide Angel Armor Ballistic Door Panel (Level IIIA) for Dodge® Charger PURSUIT INSTALLATION Important Notes The directions, photographs and This section provides illustrations in this guide depict an instructions for installing Angel installation performed on the driver’s side. The same installation procedure Armor Avail Ballistic Door Panels applies to the passenger door. -
Page 7: Procedure
Installation Guide Angel Armor Ballistic Door Panel (Level IIIA) for Dodge® Charger PURSUIT Procedure Removing the Outer Window Weatherstrip Complete the following steps Use caution when removing parts that may to properly install Angel Armor have sharp edges, such as the outer window weatherstrip. -
Page 8: Inserting The Ballistic Door Panel
Installation Guide Angel Armor Ballistic Door Panel (Level IIIA) for Dodge® Charger PURSUIT Inserting the Ballistic Door Panel Insert the panel at an angle, guiding the front, top edge fully into the door, under the side view mirror. Bend the bottom of the Ballistic Door Panel away from you, pressing with your knee or hand. -
Page 9: Replacing The Outer Window Weatherstrip And Completing Installation
Installation Guide Angel Armor Ballistic Door Panel (Level IIIA) for Dodge® Charger PURSUIT Inserting the Ballistic Door Panel Replacing the Outer Window Weatherstrip and Completing CONTINUED Installation Verify that the crease in the nylon fold at the top of the Ballistic Door Panel aligns with... -
Page 10: Removal Or Decommission
Installation Guide Angel Armor Ballistic Door Panel (Level IIIA) for Dodge® Charger PURSUIT Removal or Replacing the Outer Window Decommission Weatherstrip and Completing Installation This section describes the CONTINUED process for removing the Re-connect the vehicle battery. Ballistic Door Panel for...
Need help?
Do you have a question about the Avail and is the answer not in the manual?
Questions and answers