Table of Contents
Advertisement
Advertisement
Table of Contents

Subscribe to Our Youtube Channel
Related Manuals for Cutera Excel V+


Summary of Contents for Cutera Excel V+
- Page 1 perator anual...
- Page 2 This manual is copyrighted with all rights reserved. Under copyright laws, this manual may not be copied in whole or in part or reproduced in any other media without the express written permission of Cutera, Inc. Permitted copies must carry the same proprietary and copyright notices as were affixed to the original. Under the law, copying includes translations into another language.
-
Page 3: Table Of Contents
ontents ............ONTENTS . - Page 4 System Basics ........... 10 Turning On the System .
- Page 5 Genesis V Handpiece Instructions ....... . 46 Selecting the Laser Wavelength ..........46 Selecting the Fluence .
- Page 6 Physical Parameters ......... . . 69 Electrical Requirements .
- Page 7 Manual Reset ..........82 Electronic Fault Detection Circuitry .
- Page 8 viii THIS PAGE IS LEFT BLANK EXCEL V+ OPERATOR MANUAL D2325, REV A, 2/19...
-
Page 9: Peration
Introduction The Cutera excel V+ is a dual-wavelength (532 and 1064 nm) laser system that treats a wide range of dermatologic conditions. Various laser pulse fluence, spot size, and pulse duration parameter combinations can be used to treat unwanted veins, benign vascular lesions and birthmarks, and benign pigmented lesions. -
Page 10: Characteristics Of The 532 Nm Laser Beam
Use for the 1064 nm wavelength. System Preparation The excel V+ system is shipped directly from the factory to your site. Your local Cutera representative will initially uncrate, inspect, set up, and install the system to ensure that it is working properly before use. In addition, Cutera provides training to ensure that your staff is experienced with appropriate performance and safety considerations. -
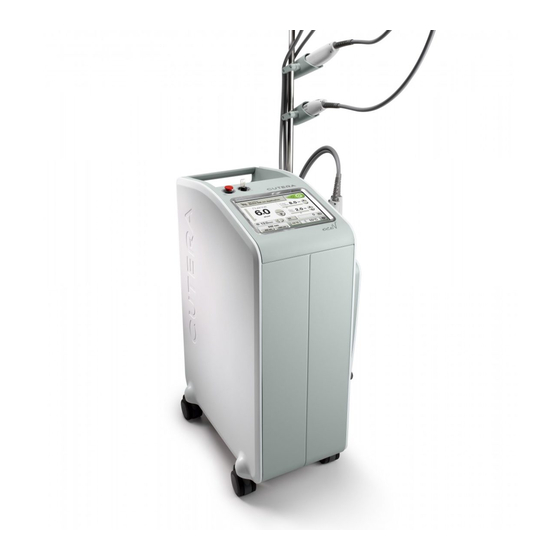
Page 11: Excel V+ System Components
excel V+ System Components The excel V+ consists of a system console with a boom and handpiece holster(s), handpiece(s), and a footswitch. Other components necessary for operation, such as remote interlock plug and all electrical cables, are also included. System Console The system console houses the touchscreen control panel, main power keyswitch, emergency off switch, control electronics, laser source with associated optics, and power supply. - Page 12 Boom CoolView Handpiece Holsters Genesis V Handpiece Optional Standoff Tip Dermastat Handpiece Footswitch System console Remote interlock plug EXCEL V+ OPERATOR MANUAL D2325, REV A, 2/19...
-
Page 13: Connecting The System Components
Connecting the System Components Before connecting the excel V+ components, inspect the individual components, cables, and electrical connections for any dirt, debris or damage. Check all electrical cables to ensure they are not frayed or split. Inspect the handpiece, as instructed in the Maintenance section of this operator manual. WARNING Always turn the system OFF before inspecting the handpiece. - Page 14 Footswitch Remote Interlock Plug EXCEL V+ OPERATOR MANUAL D2325, REV A, 2/19...
-
Page 15: Connecting The Handpiece
Connecting the Handpiece Connect the desired handpiece to the system console, as follows: Align the handpiece connector over the handpiece receptacle on the side of the system console, and press down gently to align the fittings. (CoolView and Genesis V handpieces only) Once aligned, press down firmly until you hear two audible clicks, indicating that both locking tabs are engaged. -
Page 16: Connecting The Handpiece Dummy Plug
Connecting the Handpiece Dummy Plug The excel V+ system console has two handpiece receptacles. If only one handpiece is installed, you must insert a “dummy plug” into the vacant handpiece receptacle, as follows: Align the dummy plug over the handpiece receptacle on the side of the system console and press down gently to align the fittings. -
Page 17: Connecting The Main Power Cable
Connecting the Main Power Cable Ensure that the system main power circuit breaker is OFF (down) and that the system keyswitch is in the O (OFF) position. Insert the receptacle end of the power cable into the power cable receptacle on the system and insert the AC plug into the AC wall socket. -
Page 18: System Basics
System Basics Turning On the System Insert the key in the keyswitch, turn to the (START) position, hold for a full second, and release. Upon release, the key automatically springs back to the l (ON) position. Keyswitch The touchscreen displays the start-up screen, and the system begins a self-test routine. After approximately two minutes, the system emits an audible tone, and the touchscreen displays the CoolView Select Screen, the Genesis V Treatment Screen,... -
Page 19: Restarting The System
Restarting the System To restart the system: Turn the keyswitch to the O (OFF) position. WAIT 5 SECONDS before turning the keyswitch to the (START) position. Release the key. The system will go through its normal start-up sequence. Turning Off the System Under normal operating conditions, turn the keyswitch to the O (OFF) position. -
Page 20: Disconnecting The Handpiece Fiber Connector
Disconnecting the Handpiece Fiber Connector To remove the handpiece fiber connector from the fiber receptacle: Unlock the handpiece fiber connector by gently pushing the connector into the fiber receptacle and then turning counter-clockwise. Remove the fiber connector from the fiber receptacle and replace the protective cap onto the fiber connector. -
Page 21: Disconnecting The System
Disconnecting the System Turn the keyswitch to the O (OFF) position. Set the main circuit breaker to the OFF position. Remove the power plug from the electrical outlet and wrap the power cable around the cable wrap. Place the footswitch on the footswitch storage mount on the rear of the laser console. Coil the footswitch cable and store it inside the footswitch holder. - Page 22 Lock each of the system console wheels by engaging each wheel lock. Wheel locks EXCEL V+ OPERATOR MANUAL D2325, REV A, 2/19...
-
Page 23: General System Functions
General System Functions CoolView Handpiece User Interface Modes excel V+ features two user interface modes for use with the CoolView handpiece: expert and navigation. Expert mode is intended for advanced users with experience selecting the appropriate treatment parameters for various skin types and applications. Navigation mode is intended for users who prefer more guidance in selecting the appropriate treatment parameters. -
Page 24: Coolview Select Screen
CoolView Select Screen When the CoolView handpiece is connected to the console fiber receptacle, the CoolView Select Screen displays after the successful completion of the self-test routine at system start-up. CoolView Select Screen To operate in navigation mode, press the “Tap here to Select 532nm Application” or “Tap here to Select 1064nm Application”... -
Page 25: Coolview Treatment Screen
CoolView Treatment Screen After pressing the “Tap here to Set Parameters” button on the CoolView Select Screen, the CoolView Treatment Screen displays: CoolView Treatment Screen in Expert Mode After pressing the “Tap here to Select 532nm Application” or “Tap here to Select 1064nm Application” button on the CoolView Select Screen, the CoolView Treatment Screen displays with the Skin Type menu open: EXCEL V+ OPERATOR MANUAL... - Page 26 CoolView Treatment Screen in Navigation Mode From the CoolView Treatment Screen, you can: • select the skin type, treatment category, and treatment subcategory (navigation mode only; refer to the Selecting Treatment Parameters in Navigation Mode topic) • select the wavelength (refer to the User-selectable Parameters topic) •...
-
Page 27: Genesis V Treatment Screen
Genesis V Treatment Screen When the Genesis V handpiece is connected to the console fiber receptacle, the Genesis V Treatment Screen displays after the successful completion of the self-test routine at system start-up. Genesis V Treatment Screen From the Genesis V Treatment Screen, you can: •... -
Page 28: Dermastat Treatment Screen
Dermastat Treatment Screen When the Dermastat handpiece is connected to the console fiber receptacle, the Dermastat Treatment Screen displays after the successful completion of the self-test routine at system start-up. Dermastat Treatment Screen From the Dermastat Treatment Screen, you can: •... -
Page 29: System Status: Standby And Ready Modes
System Status: STANDBY and READY Modes The system automatically goes into STANDBY mode at system start-up. In STANDBY mode: • the footswitch is disabled • the internal safety shutter is closed • no treatment or aiming beams are available • the (laser status) button is amber Laser status button (STANDBY mode) - Page 30 Laser status button (READY mode) Location of Laser Status Button (CoolView Treatment Screen shown) To return to STANDBY mode, press the (laser status) button. When the system is in READY mode and the footswitch is depressed, treatment energy is discharged from the handpiece, the system emits an audible tone and a yellow indicator illuminates on the Treatment Screen to indicate laser emission.
-
Page 31: Memory Storage
Memory Storage The memory storage feature enables you to store and recall frequently used treatment parameters. There are three memory banks in the memory storage feature, allowing for storage of three different sets of treatment parameters. To store the treatment parameters currently shown on the touchscreen display: Press the (memory) button to display the memory pop-up window. -
Page 32: Information & Adjustment Screen
Information & Adjustment Screen To access the Information & Adjustment Screen, press the (info) button on the Treatment Screen. From the Information & Adjustment Screen, you can: • adjust the touchscreen backlighting • adjust the volume of the laser emission indicator and other audible tones and voice prompts (refer to the Audible Tones topic) •... -
Page 33: Aiming Beam
Aiming Beam All aiming beam functions are controlled from the Information & Adjustment Screen. There are four intensities in continuous and blink modes, as well as an OFF mode. To adjust the aiming beam intensity and mode: Press the (info) button on the Treatment Screen to go to the Information & Adjustment screen. -
Page 34: Audible Tones And Voice Prompts
Audible Tones and Voice Prompts The excel V+ system console emits a single audible tone with every control screen selection or when an error condition has occurred. Additionally, an audible laser emission indicator is generated during treatment exposure. NOTE If the laser output is greater than 120% of the requested energy, the regular exposure tone is replaced by a higher-pitched tone. -
Page 35: Displays And Indicators
Displays and Indicators The excel V+ system includes various indicators and controls to ensure safe and accurate operation. On the CoolView Treatment Screen: • A pulse counter records the total number of laser pulses that the system has fired since the counter was last reset, and a (reset) button allows you to reset the counter. - Page 36 Illuminated laser emission indicator Pulse counter display Pulse counter reset button Temperature display Genesis V Treatment Screen On the Genesis V handpiece: • An integrated temperature sensor and six LED temperature indicators enable thermal monitoring of the target tissue. The sensor measures the temperature of the target tissue, and the LEDs indicate the measured temperature.
- Page 37 LED temperature indicators • A working distance beam facilitates proper positioning of the handpiece. When the working distance beam is centered within the aiming beam, the handpiece is at the optimal working distance of 3.7 cm and at the correct distance to obtain an accurate temperature reading of the target tissue.
- Page 38 On the Dermastat Treatment Screen: • A pulse counter records the total number of laser pulses that the system has fired since the counter was last reset, and a (reset) button allows you to reset the counter. • A laser emission indicator illuminates when the system is set to READY and the footswitch is pressed.
-
Page 39: User-Selectable Parameters
User-selectable Parameters In pulsed lasers, such as excel V+, fluence and pulse duration affect the nature of laser-tissue interaction. The excel V+ system has sufficient laser peak power to allow for a wide range of fluence and pulse duration combinations, enabling you to select optimal tissue interaction parameters. Even very small target tissues may be targeted with sufficient fluence, at appropriately small pulse durations, to achieve photoselective thermolysis effects. -
Page 40: Selecting Treatment Parameters In Navigation Mode
Selecting Treatment Parameters in Navigation Mode To operate in navigation mode, press the “Tap here to Select 532nm Application” or “Tap here to Select 1064nm Application” button on the CoolView Select Screen or the CoolView Treatment Screen. Location of Navigation Buttons on CoolView Select Screen Location of Navigation Button on CoolView Treatment Screen EXCEL V+ OPERATOR MANUAL D2325, REV A, 2/19... - Page 41 After pressing the Navigation button, the CoolView Treatment Screen displays with the Skin Type menu open: CoolView Treatment Screen with Skin Type Menu Open Press the button that corresponds to the patient’s skin type. The Treatment Category menu displays: CoolView Treatment Screen with Skin Type and Treatment Category Menus Open EXCEL V+ OPERATOR MANUAL D2325, REV A, 2/19...
- Page 42 Press the button that corresponds to the desired treatment category. The Treatment Subcategory menu displays: CoolView Treatment Screen with Skin Type, Treatment Category and Treatment Subcategory Menus Open Press the button that corresponds to the desired treatment subcategory. The CoolView Treatment Screen displays, with the selected skin type, treatment category and treatment subcategory displayed in the Navigation button and the recommended range of settings highlighted in green: Sample CoolView Treatment Screen in Navigation Mode...
- Page 43 Not all navigation selections are available for all combinations of wavelength, skin type and/or treatment category. If a navigation selection is unavailable, it is greyed out, as shown in the example below: Example of Unavailable Navigation Selection (i.e., Red Scar subcategory) If you attempt to select a treatment category or subcategory that is unavailable, one of the following pop- up messages displays: The first two pop-up messages indicate that the desired application is unsupported for the currently...
-
Page 44: Exiting Navigation Mode
Exiting Navigation Mode To exit navigation mode, press the on the Navigation button or press either wavelength button on the CoolView Treatment screen. Navigation button Wavelength buttons Location of Navigation and Wavelength Buttons on CoolView Treatment Screen After exiting navigation mode, the CoolView Treatment Screen displays in expert mode. You can either manually select parameters in expert mode, as described in the following section, or you can select new parameters in navigation mode, as described in the previous section. -
Page 45: Selecting Treatment Parameters In Expert Mode
Selecting Treatment Parameters in Expert Mode To operate in expert mode, press the “Tap here to Set Parameters” button on the CoolView Select Screen. Location of Expert Mode Button on CoolView Select Screen NOTE If you are currently in navigation mode, exit navigation mode as described on the previous page. -
Page 46: Selecting The Laser Wavelength
Selecting the Laser Wavelength The excel V+ features two wavelengths: 532 nm and 1064 nm. To select the wavelength from the CoolView Select Screen, press the “Tap here to Select 532nm Application” or “Tap here to Select 1064nm Application” button. To select the wavelength from the CoolView Treatment Screen, press the “532 nm”... -
Page 47: Selecting The Laser Spot Size
Selecting the Laser Spot Size To select the laser spot size: Press the buttons next to the (spot size) display on the CoolView Treatment Screen to select the approximate laser spot size. Location of Spot Size Controls and Display on CoolView Treatment Screen The selected spot size appears in the (spot size) display on the CoolView Treatment Screen. - Page 48 CoolView Treatment Screen in Navigation Mode with Spot Size Setting Outside Recommended Range EXCEL V+ OPERATOR MANUAL D2325, REV A, 2/19...
-
Page 49: Selecting The Fluence
Selecting the Fluence Fluence is defined as energy per unit area and is measured in joules per square centimeter (J/cm Select the desired fluence by pressing the buttons next to the Fluence display. CAUTION The fluence shown in the Fluence display indicates the fluence delivered to the tissue. - Page 50 CAUTION In navigation mode, if you select a fluence, pulse duration or repetition rate setting that is not within the recommended range of settings for the specified skin type and application, a black and yellow bar displays in the corresponding bar indicator to alert you that the setting is not recommended.
-
Page 51: Selecting The Pulse Duration
Selecting the Pulse Duration Pulse duration, or pulse width, refers to the amount of time during which therapeutically effective laser energy is delivered, measured in milliseconds (ms). Select the desired pulse duration by pressing the buttons next to the Pulse Duration display. NOTE When you reach the minimum pulse duration setting for the current treatment parameters, the... -
Page 52: Selecting The Repetition Rate
Selecting the Repetition Rate Repetition rate refers to the number of laser pulses delivered per second, measured in hertz (Hz). Select the desired repetition rate by pressing the button next to the Rep Rate display. NOTE When the repetition rate is set to the minimum setting, the button is disabled. -
Page 53: Adjusting The Temperature Of The Sapphire Cooling Window
Adjusting the Temperature of the Sapphire Cooling Window The CoolView handpiece features an integrated sapphire cooling window, which allows you to adjust epidermal cooling to increase safety and efficacy. To adjust the temperature of the sapphire cooling window: Press the (temperature) button on the CoolView Treatment Screen to display the temperature pop-up window. -
Page 54: Genesis V Handpiece Instructions
Genesis V Handpiece Instructions Selecting the Laser Wavelength The excel V+ features two wavelengths: 532 nm and 1064 nm. Select the wavelength by pressing the “532 nm” or “1064 nm” button at the bottom left corner of the screen. Location of Wavelength Selection Buttons on Genesis V Treatment Screen EXCEL V+ OPERATOR MANUAL D2325, REV A, 2/19... -
Page 55: Selecting The Fluence
Selecting the Fluence Fluence is defined as energy per unit area and is measured in joules per square centimeter (J/cm Select the desired fluence by pressing the buttons next to the Fluence display. CAUTION The fluence shown in the Fluence display indicates the fluence delivered to the tissue. -
Page 56: Selecting The Pulse Duration (532 Nm Only)
Selecting the Pulse Duration (532 nm only) Pulse duration, or pulse width, refers to the amount of time during which therapeutically effective laser energy is delivered, measured in milliseconds (ms). When using the Genesis V handpiece in 532 nm mode, two pulse duration settings are available: 0.5 ms and 1ms. Select the desired pulse duration by pressing the buttons next to the Pulse Duration display. -
Page 57: Selecting The Repetition Rate
Selecting the Repetition Rate Repetition rate refers to the number of laser pulses delivered per second, measured in hertz (Hz). Select the desired repetition rate by pressing the button next to the Rep Rate display. NOTE When the repetition rate is set to the minimum setting, the button is disabled. -
Page 58: Dermastat Handpiece Instructions
Dermastat Handpiece Instructions Selecting the Fluence Fluence is defined as energy per unit area and is measured in joules per square centimeter (J/cm Select the desired fluence by pressing the buttons next to the Fluence display. CAUTION The fluence shown in the Fluence display indicates the fluence delivered to the tissue. -
Page 59: Selecting The Pulse Duration
Selecting the Pulse Duration Pulse duration, or pulse width, refers to the amount of time during which therapeutically effective laser energy is delivered, measured in milliseconds (ms). Select the desired pulse duration by pressing the buttons next to the Pulse Duration display. NOTE When you reach the minimum pulse duration setting for the current treatment parameters, the... -
Page 60: Selecting The Repetition Rate
Selecting the Repetition Rate Repetition rate refers to the number of laser pulses delivered per second, measured in hertz (Hz). Select the desired repetition rate by pressing the button next to the Rep Rate display. NOTE When the repetition rate is set to the minimum setting, the button is disabled. -
Page 61: Aintenance
aintenance Troubleshooting Guide If your system fails to operate properly, this troubleshooting guide will help you to locate and correct any problems. First, please check for the following items: Electrical power source...verify that the electrical disconnect switch (the circuit breaker) is turned on (in the UP position). - Page 62 Treatment beam is not present, although aiming beam operates properly. Probable Cause There is an internal laser system failure. Suggestion Contact Cutera Service (refer to Appendix D). Treatment and aiming beams are not present. Touchscreen displays and indi- cators are normal. Probable Cause The system is in STANDBY mode.
- Page 63 Check to see if the aiming beam is present. Clean the lens as described in this manual. If the problem is not resolved, contact Cutera Service (refer to Appendix D). EXCEL V+ OPERATOR MANUAL...
-
Page 64: Error Code Guide
NOTE If an error cannot be cleared, or if an error persists or reappears, note the error code(s) and contact Cutera Service (refer to Appendix EXCEL V+ OPERATOR MANUAL D2325, REV A, 2/19... -
Page 65: Annual System Maintenance
Preventive maintenance, safety, power, and calibration checks should be performed annually by a Cutera representative to ensure proper laser performance. System Repair All system repairs should be performed by a Cutera-certified service engineer. For training and information, contact your local Cutera representative. Routine User Maintenance... -
Page 66: Inspecting And Cleaning The Handpiece
Inspecting and Cleaning the Handpiece Inspect and clean the handpiece as described in the following sections. In addition to the external surfaces of the handpiece, the following optical surfaces need to be maintained: • CoolView handpiece: recessed lens, patient contact, and proximal surfaces of cooling window •... -
Page 67: Inspecting And Cleaning The External Surfaces Of The Handpiece
Inspecting and Cleaning the External Surfaces of the Handpiece Inspect and clean the handpiece housing, CoolView treatment guide, Dermastat standoff (if used), and ® umbilical cable between patient use with a germicidal disposable wipe, such as Sani-Cloth Plus or Sani- ®... - Page 68 NOTE For optimal results, use acetone with 0.5% or lower water content, which is available at most camera shops. If unable to obtain acetone with 0.5% or lower water content, contact Cutera Service (refer to Appendix D). NOTE Use only wood stick cotton swabs. Do not use products such as Q- Tips as they contain an adhesive that dissolves when it comes in contact with acetone.
- Page 69 Place a small amount of acetone on a wood stick cotton swab; if necessary, shake the excess acetone off of the tip prior to cleaning the handpiece lens(es). Gently wipe the surface of the lens(es). Refer to the pictures below. Recessed lens Location of CoolView Handpiece Lens Recessed lenses...
-
Page 70: Inspecting And Cleaning The Coolview Handpiece Window
Inspecting and Cleaning the CoolView Handpiece Window The cooling window has two optical surfaces that need to be maintained: the patient contact surface and the proximal surface. Prior to treatment, as well as periodically during treatment, inspect both surfaces of the cooling window for cracks and debris. - Page 71 Clean the proximal surface of the cooling window, as follows: Prior to treatment, clean the proximal surface of the cooling window with a germicidal disposable wipe. During treatment, keep the proximal surface of the cooling window clear of gel by gently wiping periodically with 4x4 gauze.
-
Page 72: Inspecting And Cleaning The Heat Exchanger Intake
Inspecting and Cleaning the Heat Exchanger Intake The heat exchanger intake, located on the bottom of the system console, should be kept free of dust and lint accumulation. If the heat exchanger intake becomes clogged, the system will overheat prematurely, resulting in a temperature-related error code. -
Page 73: Filling The Coolant Reservoir
Filling the Coolant Reservoir The system requires clean distilled water. Systems are delivered without any water in them and must be filled with distilled water upon installation. Occasionally, distilled water may need to be added to “top off” the system reservoir. CAUTION Permanent damage to internal components will occur if improper coolant is used. -
Page 74: Remote Interlock Pin Assignments
Remote Interlock Pin Assignments In order to connect an external door switch to the Remote Interlock plug, the user must purchase a replacement four pin Mini DIN Plug and an external door switch. Connect the external door switch to the pin assignment found in the table below. -
Page 75: Electrical Utilities
220 VAC configuration. This internal change must be made by a Cutera-certified service representative. Call your Cutera representative for information. The 220 VAC configuration must be supplied from a dedicated 220±10% VAC, single-phase, 50/60 Hertz source. -
Page 76: System Specifications
System Specifications Specifications subject to change without notice. Treatment Beam Type High Power, Frequency-doubled Nd:YAG High Power, Long Pulse Nd:YAG Wavelength 532 nm 1064 nm Output 13.5 J Max. 100 J Max. Fluence Coolview: 1.8 to 42 J/cm CoolView: 2 to 300 J/cm Genesis V: 0.5 to 2 J/cm Genesis V: 4 to 7 J/cm Dermastat: 6 to 40 J/cm... -
Page 77: Physical Parameters
Physical Parameters Size (W X D X H): 16.1 in X 24 in X 34.8 in (.41 m x .61 m x .88 m) Weight: 185 lbs (84.1 kg) Operating length of umbilical: 9 ft (2.7 m) Minimum bend radius of umbilical: Storage 5.2 in (132 mm) Momentary... -
Page 78: Classifications
Classifications FDA Classification Class II Medical Device CDRH Classification Class IV Laser Product European MDD 93/42/EEC Laser Classification Class 4 Laser to IEC 60825:2014 Type Applied Part Handpiece Eye Safety Nominal Ocular Hazard Distance 1.45E+5 m at 532 nm 1.33E+5 m at 1064 nm Minimum Optical Density for 5.89 at 532 nm Protective Eyewear... -
Page 79: Calibration Procedure
Calibration of the laser output should be checked periodically. With proper care under normal operating conditions, Cutera recommends calibration every twelve (12) months to ensure that the energy output delivered from the handpiece corresponds accurately to the user-selected settings. The following procedure should also be performed after any service or repair work. -
Page 80: Calibration Instructions
Ensure that all personnel in the room are wearing the appropriate eyewear. Connect the service computer to the serial port. Start the system in service mode and using the Cutera service software, place the system in CALIBRATION mode. Follow the prompts on the calibration screen. -
Page 81: Afety And Egulatory
Additional precautions must be taken to prevent fire, electrical injury and explosion. Cutera does not make recommendations regarding the practice of medicine. Treatment parameters are provided as a guide. Individual treatments should be based on clinical training, clinical observation of laser-tissue interaction and appropriate clinical endpoints. - Page 82 WARNING The excel V+ produces visible green (532 nm) light, as well as invisible (1064 nm) light, both of which can cause permanent eye damage. Never look directly into the handpiece even when wearing protective eyewear. Never look directly into the laser beam or at scattered light from metallic or other reflective surfaces.
-
Page 83: Additional Ocular Protection
Close the treatment room door during operation of the system. External door interlocks that automatically disable the system when the treatment room door is opened may be installed. NOTE A blocking barrier, screen or curtain capable of blocking or filtering the laser beam may be placed to create a controlled area inside a large treatment room. -
Page 84: Additional Safety Considerations
Additional Safety Considerations WARNING Do not use this system in the presence of flammables or explosives such as anesthetics, alcohol, surgical preparation solutions and similar substances. An explosion and/or fire could occur. WARNING No modification of the excel V+ system is allowed. CAUTION The excel V+ system is intended solely for licensed practitioners trained in its proper use. -
Page 85: Fire Hazard
WARNING Only an authorized Cutera service representative should perform service on the system. WARNING Do not attempt to perform maintenance other than that which is outlined in this manual. WARNING Maintenance should only be performed with the system turned off and disconnected from the power source. -
Page 86: Operational Training
Refer to the excel V+ Treatment Guidelines accompanying this operator manual and to the Cutera website for available training options and resources. The Treatment Guidelines can also be obtained from your local Cutera representative or on the Cutera website. -
Page 87: Operational Safety
Operational Safety WARNING Laser plume obscures the operative field and is noxious to those who come in contact with it. The plume presents a possible pollution hazard and should be effectively evacuated. WARNING The handpiece is a fragile instrument and must not be dropped. If it is dropped, you must carefully examine the handpiece for any physical damage prior to use. - Page 88 CAUTION Always verify that the treatment parameters are correct before activating the system. CAUTION The system should always be in STANDBY mode until the handpiece is safely positioned at the area to be treated. CAUTION Before placing the system in READY mode, confirm that the laser aperture on the handpiece is safely positioned to prevent unintended treatment exposure.
-
Page 89: Regulatory Compliance
Regulatory Compliance excel V+ is designed to comply with the following: • 21 CFR Chapter I, Subchapter J, as administered by the Center for Device and Radiological Health of the US Food and Drug Administration (FDA) • US Federal Performing Standards 21 CFR 1040.10 and 1040.11 (2015), IEC 60601-1 (Edition 3.1, 2012), IEC 60601-1-2 (Edition 4.0, 2014), IEC 60601-1-6 (Edition 3.1, 2013), IEC 62366 (Edition 1.1, 2014), IEC 60601-2-22 (Edition 3.1, 2012), and IEC 60825-1 (Edition 3.0, 2014) -
Page 90: Protective Housing
Protective Housing The excel V+ system has a protective housing that prevents unintended human access to laser radiation above Class I limits. The housing must be opened only by a Cutera-certified representative. NOTE No section of the protective system housing can be opened without special tools. -
Page 91: Regulatory Compliance Labels
Regulatory Compliance Labels As required by national and international regulatory agencies, appropriate regulatory compliance labels have been mounted in specified locations. All treatment room staff should be familiar with the location and meaning of these labels. Non-interlock housing label Coolant reservoir label (“Distilled Water Only”) Regulatory compliance labels (Refer to the following page... -
Page 92: System Console Labels
30°C Rx only 15°C Cutera, Inc., 3240 Bayshore Blvd., Brisbane CA 94005 Cutera, Inc., 3240 Bayshore Blvd., Brisbane CA 94005 Cutera, Inc., 3240 Bayshore Blvd., Brisbane CA 94005 Cutera, Inc., 3240 Bayshore Blvd., Brisbane CA 94005 Cutera, Inc., 3240 Bayshore Blvd., Brisbane CA 94005 Cutera, Inc., 3240 Bayshore Blvd., Brisbane CA 94005... -
Page 93: Handpiece Labels
Handpiece Labels Laser Radiation Warning Warning of laser radiation from adjacent aperture. Location of Laser Aperture Label on CoolView Handpiece Laser Radiation Warning Warning of laser radiation from adjacent aperture. Location of Laser Aperture Label on Genesis V Handpiece EXCEL V+ OPERATOR MANUAL D2325, REV A, 2/19... - Page 94 Laser Radiation Warning Warning of laser radiation from adjacent aperture. Location of Laser Aperture Label on Dermastat Handpiece Handpiece Label Located on CoolView and Genesis V handpiece connectors. Located on Dermastat fiber cable. (Genesis V handpiece label shown) EXCEL V+ OPERATOR MANUAL D2325, REV A, 2/19...
-
Page 95: Electromagnetic Compatibility
Electromagnetic Compatibility The excel V+ design complies with IEC 60601-1-2 (Edition 4.0) requirements for electromagnetic compatibility (EMC) with other devices. Like other electrical medical equipment, the excel V+ requires special precautions to ensure EMC with other electrical medical devices and must be installed and operated according to the EMC information provided in this manual. - Page 96 Guidance and Manufacturer’s Declaration: Electromagnetic Immunity The excel V+ is intended for use in the electromagnetic environment specified below. The customer or the user of the excel V+ should ensure that it is used in such environment. Immunity Test IEC 60601 Test Level Compliance Level Electromagnetic Environment: Guidance...
- Page 97 Guidance and Manufacturer’s Declaration: Electromagnetic Immunity The excel V+ is intended for use in the electromagnetic environment specified below. The customer or the user of the excel V+ should ensure that it is used in such an environment. Immunity Test IEC 60601 Test Level Compliance Level Electromagnetic Environment: Guidance...
- Page 98 Recommended Separation Distances Between Portable and Mobile RF Communications Equipment and the excel V+ The excel V+ is intended for use in an electromagnetic environment in which radiated RF disturbances are con- trolled. The user of the excel V+ can help prevent electromagnetic interference by maintaining a minimum dis- tance between portable and mobile RF communications equipment (transmitters) and the excel V+ as recommended below, according to the maximum output power of the communications equipment.
-
Page 99: Linical Pplications
linical pplications General Indications for Use The excel V+ is intended for use in surgical and aesthetic applications requiring selective photothermolysis of target chromophores in soft tissue in the medical specialties of general and plastic surgery and dermatology. 532 nm Indications The 532 nm wavelength is indicated for the coagulation and hemostasis of benign vascular and cutaneous lesions in dermatology including, but not limited to, the following general categories: •... -
Page 100: Contraindications For Use
The 1064 nm wavelength is also indicated for the treatment of wrinkles such as, but not limited to, periocular and perioral wrinkles. Contraindications for Use Contraindications for use: • Pregnant patients • Patients undergoing treatment for skin cancer Warnings • Do not treat over dysplastic nevi or questionable pigmented lesions. •... -
Page 101: Expected Transient Events And Possible Adverse Effects
Expected Transient Events and Possible Adverse Effects • Erythema, edema and purpura may occur following treatment and typically resolve with time. • Hyperpigmentation, hypopigmentation, burns, erosion or blistering may occur, some of which may result in scarring. • Itching, bumps, and rash may occur following treatment. •... -
Page 102: Treatment Information
Treatment Information For treatment-specific guidelines, refer to the excel V+ Treatment Guidelines accompanying this manual. These guidelines can also be obtained from your local Cutera representative or on the Cutera website. Patient Information Prior to treatment, the user should conduct a patient consultation. The consultation should include a complete medical history and exam. -
Page 103: Appendixa - Laser Warning Sign
Appendix A - Laser Warning Sign DANGER INVISIBLE AND VISIBLE LASER RADIATION – AVOID EYE OR SKIN EXPOSURE TO DIRECT OR SCATTERED RADIATION. USE PROPER EYEWEAR WHEN OPERATING AND/OR TREATING PATIENTS. Output: 13.5 J Max at 532 nm 100 J Max at 1064 nm Duration: 0.5-40 ms at 532 nm 0.3-60 ms at 1064 nm... - Page 104 THIS PAGE IS LEFT BLANK EXCEL V+ OPERATOR MANUAL D2325, REV A, 2/19...
-
Page 105: Appendixb - Symbols
Appendix B - Symbols This appendix describes the laser system symbols and their meanings. Standard Symbol Description Location Reference Cutera logo Control panel 417-5007 Mains ON Rear panel (at circuit breaker) and control panel (next to keyswitch) 417-5008 Mains OFF... - Page 106 Standard Symbol Description Location Reference Cutera-defined Pulse counter reset Touchscreen display Cutera-defined Spot size Touchscreen display Cutera-defined Return to previous screen Touchscreen display Cutera-defined Go to Information & Adjustment Touchscreen display screen Cutera-defined Volume of audible tones and Touchscreen display...
- Page 107 Standard Symbol Description Location Reference IEC 60825-1 Remote interlock connector (as Rear panel label defined in 3.67 of IEC 825-1) BS EN ISO Model number Rear panel label 15223-1 BS EN ISO Serial number Rear panel label 15223-1 BS EN ISO Date of manufacture Rear panel label 15223-1...
- Page 108 Standard Symbol Description Location Reference IEC 60601-1 Type BF equipment Rear panel label IEC 60825-1 Laser radiation warning Rear panel label and near laser aperture on CoolView and Gene- sis V handpieces 21 CFR 801.109 US federal law restricts this device Rear panel label to sale by or on the order of a prac- titioner licensed by the law of the...
-
Page 109: Appendixc - Bibliography
Appendix C - Bibliography Anderson RR, Parish JA, Selective Photothermolysis: Precise Microsurgery by Selective Absorption of Pulsed Radiation. Science 1983; 220:524-7. Groot D, Rao J, Johnston P, Nakatsui T. Algorithm for using a long-pulsed Nd:YAG laser in the treatment of deep cutaneous vascular lesions. - Page 110 THIS PAGE IS LEFT BLANK EXCEL V+ OPERATOR MANUAL D2325, REV A, 2/19...
-
Page 111: Appendixd - Cutera Direct Office Locations
Appendix D - Cutera Direct Office Locations Cutera World Headquarters Cutera, Inc. 3240 Bayshore Boulevard Brisbane, CA 94005 Telephone: (888) 4-CUTERA (within US) or (415) 657-5500 (outside US) Service: (866) 258-8763 (within US) or (415) 657-5500 (outside US) Fax: (415) 330-2444 Cutera (APAC) Cutera K.K. - Page 112 THIS PAGE IS LEFT BLANK EXCEL V+ OPERATOR MANUAL D2325, REV A, 2/19...
Need help?
Do you have a question about the Excel V+ and is the answer not in the manual?
Questions and answers