Lennox EL296UHE Series Unit Information
Hide thumbs
Also See for EL296UHE Series:
- Installation instructions manual (58 pages) ,
- User's information manual (7 pages) ,
- User's information manual (7 pages)
Advertisement
S e r v i c e L i t e r a t u r e
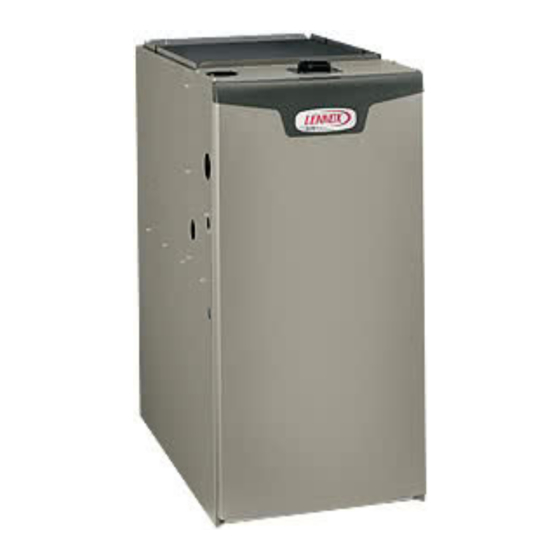
EL296UHE series units are high efficiency condensing
gas furnaces used for upflow or horizontal applications
only, manufactured with Lennox Duralok heat exchangers
formed of aluminized steel. EL296UHE units are available
in heating capacities of 44,000 to 132,000 Btuh and cool-
ing applications up to 5 tons. Refer to Product Specifica-
tions Manual for proper sizing.
Units are factory equipped for use with natural gas. Kits
are available for conversion to LPG operation. EL296UHE
model units are equipped with the SureLight® two-stage
integrated control. EL296UHE unit meets the California
Nitrogen Oxides (NOx) Standards and California Season-
al Efficiency requirements. All units use a redundant gas
valve to assure safety shut-off as required by C.S.A.
All specifications in this manual are subject to change.
Procedures outlined in this manual are presented as a
recommendation only and do not supersede or replace lo-
cal or state codes. In the absence of local or state codes,
the guidelines and procedures outlined in this manual (ex-
cept where noted) are recommendations only and do not
constitute code.
TABLE OF CONTENTS
Specifications ....................................................... Page 2
I Unit Components ................................................ Page 7
II Installation ....................................................... Page 22
III Start Up .......................................................... Page 44
IV Heating System Service Checks .................... Page 45
V Typical Operating Characteristics ................... Page 49
VI Maintenance................................................... Page 50
VII Wiring and Sequence of Operation ............... Page 53
VIII Field Wiring and Jumper Settings ............... Page 56
X Troubleshooting............................................... Page 60
UNIT INFORMATION
UNIT INFORMATION
Corp 1246-L10
Revised 06/2021
EL296UHE SERIES UNITS
Page 1
WARNING
Improper
installation,
service or maintenance can cause property damage,
personal injury or loss of life. Installation and service
must be performed by a licensed professional HVAC
installer (or equivalent), service agency or the gas
supplier.
CAUTION
As with any mechanical equipment, contact with
sharp sheet metal edges can result in personal
injury. Take care while handling this equipment and
wear gloves and protective clothing.
EL296UHE
C C C C
I I I I
HI
HI
adjustment,
alteration,
©2016 Lennox Industries, Inc.
Advertisement
Table of Contents

Subscribe to Our Youtube Channel
Related Manuals for Lennox EL296UHE Series


Summary of Contents for Lennox EL296UHE Series
-
Page 1: Table Of Contents
S e r v i c e L i t e r a t u r e Revised 06/2021 EL296UHE SERIES UNITS EL296UHE series units are high efficiency condensing gas furnaces used for upflow or horizontal applications only, manufactured with Lennox Duralok heat exchangers formed of aluminized steel. -
Page 2: Specifications
SP ECIF ICATIONS Model No. EL296UH045XE36B EL296UH070XE36B EL296UH090XE48C Heating AHRI Ref. No. 5625717 5625718 5625719 Performance AFUE High Input - Btuh 44,000 66,000 88,000 Fire Output - Btuh 43,000 64,000 84,000 Temperature rise range - °F 30-60 35-65 40-70 Gas Manifold Pressure (in. w.g.) 3.5 / 10.0 3.5 / 10.0 3.5 / 10.0... - Page 3 OPT IONAL AC C ESSORIES - ORD ER SEPARAT ELY “B” Width “C” Width “D” Width Models Models Models CABINET ACCESSORIES Horizontal Suspension Kit - Horizontal only 51W10 51W10 51W10 Return Air Base - Upflow only 50W98 50W99 51W00 High Performance Economizer (Commercial Only) 10U53 10U53 10U53...
- Page 4 BLO WER DATA EL296UH045XE36B PERFORMANCE (Less Filter) Air Volume / Watts at Various Blower Speeds External Static High Medium-High Medium Medium-Low Pressure (Black) (Brown) (Blue) (Yellow) (Red) in. w.g. Watts Watts Watts Watts Watts 0.00 1345 1255 1150 0.10 1305 1225 1105 0.20...
- Page 5 BLO WER DATA EL296UH110XE60C PERFORMANCE (Less Filter) Air Volume / Watts at Different Blower Speeds Single Side Return Air - Air volumes in bold (over 1800 Bottom Return Air, Side Return Air with Return Air from cfm) require Optional Return Air Base and field fabricated External Both Sides or Return Air from Bottom and One Side.
- Page 6 PARTS IDENTIFICATION Field Make Up Box Burner Box Assembly Heat Exchanger Gas Valve Combustion Pressure Air Inducer Switch Assembly Bag Assemblies (shipping location) Door Interlock Primary Limit Switch Constant Torque Indoor Blower Motor Outer Access Panel Inner Access Panel Two-Stage Integrated Control FIGURE 1 Page 6...
-
Page 7: I Unit Components
I-UNIT COMPONENTS 3. Circuit Breaker (CB8) EL296UHE unit components are shown in figure 1. The A 24V circuit breaker is also located in the control box. gas valve, combustion air inducer and burners can be ac- The switch provides overcurrent protection to the trans- cessed by removing the access panel. - Page 8 After the 15-second pre-purge period, the SureLight ® TABLE 1 nitor warms up for 20 seconds after which the gas valve SureLight Control 5 Pin Terminal Designation ® opens for a 4-second trial for ignition. The ignitor remains Pin # Function energized during the trial until flame is sensed.
- Page 9 INTEGRATED CONTROL 24VAC Indoor Ignitor and Combustion Blower Terminals Air Inducer Neutrals Flame Sense S4 DIP Switches Diagnostic Push Button On Board Links THERMOSTAT CONNECTIONS (TB1) 3/16” QUICK CONNECT TERMINALS DS = DEHUMIDIFICATION SIGNAL FLAME SENSE SIGNAL W2 = HEAT DEMAND FROM 2ND STAGE T/STAT HI COOL 24VAC W1 = HEAT DEMAND FROM 1ST STAGE T/STAT HI HEAT 24VAC...
- Page 10 INTEGRATED CONTROL CONFIGURATION GUIDE 2ND STAGE HEAT ON DELAY 7 MIN UPSTAGE THERMOSTAT SELECTION DELAY COOLING BLOWER-OFF DELAY TWO STAGE THERMOSTAT 12 MIN UPSTAGE *45 SECOND DELAY COOL BLOWER 1−STAGE OFF DELAY THERMOSTAT (TIMED STAGING) −SEE SW #2 HSI/CAI 2 SECOND COOL BLOWER HEATING BLOWER−OFF DELAY OFF DELAY...
- Page 11 TABLE 3 Integrated Control Diagnostic Modes Display Action (when button released) No Change Remain in idle mode Solid “E” Enter diagnostic recall mode Solid “F” Enter flame signal mode TABLE 4 Code Diagnostic Codes/Status of Equipment Action Required to Clear and Recover Idle mode (Decimal blinks at 1 Hertz -- 0.5 second ON, 0.5 second OFF).
- Page 12 TABLE 4 Continued Code Diagnostic Codes/Status of Equipment Action Required to Clear and Recover E125 Control failed self-check, internal error, Hardware problem on the control. Cycle power on control. Replace failed hardware. Will restart if error recovers. if problem prevents service and is persistent. Critical alert. Cleared Integrated control not communicating.
- Page 13 TABLE 4 Continued Code Diagnostic Codes/Status of Equipment Action Required to Clear and Recover E270 Soft lockout - Exceeded maximum number of Check for proper gas flow. Ensure that ignitor is lighting burner. retries. No flame current sensed. Check flame sensor current. Clears when heat call finishes successfully.
- Page 14 Integrated Control DIP Switches TABLE 5 EL296UHE units are equipped with a two-stage integrat- Blower Off Heating Mode Delay Switch Settings ed control. This control manages ignition timing, heating Blower Off Delay mode fan off delays and indoor blower speeds based on Switch 3 Switch 4 Seconds...
- Page 15 B- Indoor Blower Motor BLOWER WHEEL REPLACEMENT IMPORTANT Center Blower Wheel in Blower Housing Each blower is statically and dynamically balanced as an assembly before installation in the unit. EL296UHE units are equipped with a constant torque ECM motor. It has a DC motor coupled to an electronic control module both contained in the same motor housing.
- Page 16 Multi−Meter (set to VAC) Multi−Meter (set to VAC) Test 1 Test 3 (if necessary) Turn on power to unit. Check for 120 volts across terminals Check for 120 volts across terminals “L1” and “Neutrals” on “L” and “N” on input plug P48. If voltage is present continue the integrated control.
- Page 17 Replacing the Motor Module Motor Test 1 - Disconnect electrical power to unit. 2 - Remove unit access panel. 3 - Unplug the two harnesses from the motor control module. See figure 9. Unplug the Two Harness Connection TWO HARNESS CONNECTIONS MOTOR MOTOR CONTROL MODULE...
- Page 18 The switch may have a different set point for each unit Field Test Mode. The menu will display the flame signal. model number. See Lennox Repair Parts Handbook if lim- See table 9 for flame signal. it switch must be replaced. When removing switch make TABLE 9 note of orientation.
- Page 19 HEATING COMPONENTS Burner Assembly Intake Air Top Cap Sensor Rollout Switch Rollout Switch Ignitor Manifold And Gas Orifices Burner Box Cover Two-Stage Gas Valve FIGURE 14 Page 19...
- Page 20 Test 1 Check ignitor circuit for correct resistance. Remove 5-pin plug from control. Check ohms reading across terminals 1 and 5. Reading should be between 39 and 70 ohms. If value is correct, this is the only test needed. If the reading on the meter is not correct, (0 or infinity) then a second test is needed.
- Page 21 0.50 0.85 (Figure 16) -110 0.45 0.81 EL296UHE series units are equipped with a dual combus- -135 0.45 0.85 tion air pressure switch (first and second stage) located on the CEHB. The switch is connected to the cold end header TABLE 13 box by means of flexible silicone hoses.
-
Page 22: Installation
II-PLACEMENT AND INSTALLATION CAUTION All pipe, fittings, primer and solvent cement must conform Solvent cements for plastic pipe are flammable with American National Standard Institute and the Ameri- liquids and should be kept away from all sources of can Society for Testing and Materials (ANSI/ASTM) stan- ignition. - Page 23 TABLE 15 OUTDOOR TERMINATION USAGE* STANDARD CONCENTRIC Wall Kit 1-1.2 inch 2 inch 3 inch Flush Mount Vent Pipe 2 inch 3 inch Input Size Field 71M80 (US) 69M29 (US) 60L46 (US) Dia. in. 51W11 (US) Fabricated 44W92 44W92 44W93 22G44 (US) 44J40 (US) 51W12...
- Page 24 7 - Immediately after applying last coat of cement to Removal of the Furnace from Common Vent pipe, and while both inside socket surface and end In the event that an existing furnace is removed from a of pipe are wet with cement, forcefully insert end of venting system commonly run with separate gas applianc- pipe into socket until it bottoms out.
- Page 25 7 - If a venting problem is found during any of the Vent Piping Guidelines preceding tests, the common venting system must NOTE - Lennox has approved the use of DuraVent® and be modified to correct the problem. Resize the Centrotherm manufactured vent pipe and terminations common venting system to the minimum vent pipe as an option to PVC.
- Page 26 Horizontal Installation Offset Requirements Piping Size Process Exhaust Pipe 12” Min. 12” Max. What is the Horizontal furnace capacity? Gas Furnace Which style termination being used? Standard or concentric? NOTE - Which needs ward unit. A minimum of 1/4” (6mm) drop for each 12” (305mm) most elbows? of horizontal run is mandatory for drainage.
- Page 27 TABLE 17 Maximum Allowable Intake or Exhaust Vent Length in Feet NOTE - Size intake and exhaust pipe length separately. Values in table are for Intake OR Exhaust, not combined total. Both Intake and Exhaust must be same pipe size Standard Termination at Elevation 0 - 4500 ft Number 1-1/2”...
- Page 28 TABLE 17 Continued Maximum Allowable Intake or Exhaust Vent Length in Feet NOTE - Size intake and exhaust pipe length separately. Values in table are for Intake OR Exhaust, not combined total. Both Intake and Exhaust must be same pipe size. Concentric Termination at Elevation 0 - 4500 ft Number 1-1/2”...
- Page 29 TABLE 18 Maximum Allowable Exhaust Vent Lengths With Furnace Installed in a Closet or Basement Using Ventilated Attic or Crawl Space For Intake Air in Feet NOTE - Size intake and exhaust pipe length separately. Values in table are for Intake OR Exhaust, not combined total. Both Intake and Exhaust must be same pipe size.
- Page 30 TYPICAL EXHAUST AND INTAKE PIPE CONNECTIONS IN UPFLOW DIRECT OR NON-DIRECT VENT APPLICATIONS 2” EXHAUST EXHAUST INTAKE INTAKE 2” 2” 2” 2” 2” 3” 3” 045/070 Only 1−1/2” TRANSITION Exhaust 2” 6” Min Exhaust DO NOT transition from larger to smaller DO NOT transition pipe in horizontal runs from smaller to larger...
- Page 31 Intake Piping TYPICAL AIR INTAKE PIPE CONNECTIONS HORIZONTAL NON−DIRECT VENT APPLICATIONS The EL296UHE furnace may be installed in either direct (Horizontal Right−Hand Air Discharge Application Shown) vent or non-direct vent applications. In non-direct vent applications, when intake air will be drawn into the furnace from the surrounding space, the indoor air quality must be considered and guidelines listed in Combustion, Dilution PVC pipe...
- Page 32 General Guidelines for Vent Terminations CAUTION In Non-Direct Vent applications, combustion air is taken If this unit is being installed in an application with from indoors or ventilated attic or crawlspace and the flue combustion air coming in from a space serviced by gases are discharged to the outdoors.
- Page 33 TABLE 19 Maximum Allowable Exhaust Vent Pipe Length (in ft. ) Without Insulation In Unconditioned Space For Winter Design Temperatures Two - Stage High Efficiency Furnace Winter Design Unit Input Size Vent Pipe Temperatures1 °F Diameter (°C) 1-1/2 in 32 to 21 2 in (0 to -6) 2-1/2 in...
- Page 34 ‡ Permitted only if veranda, porch, deck or balcony is fully open on a minimum of two sides beneath the floor. Lennox recommends avoiding this location if possible. FIGURE 28...
- Page 35 ‡ Permitted only if veranda, porch, deck or balcony is fully open on a minimum of two sides beneath the floor. Lennox recommends avoiding this location if possible. FIGURE 29 Page 35...
- Page 36 Details of Intake and Exhaust Piping Terminations for Exiting Exhaust and Intake Vent Direct Vent Installations (different pressure zone) NOTE - In Direct Vent installations, combustion air is taken from outdoors and flue gases are discharged to outdoors. NOTE - Flue gas may be slightly acidic and may adverse- ly affect some building materials.
- Page 37 7 - If intake and exhaust piping must be run up a side wall to position above snow accumulation or other obstructions, piping must be supported. At least one FIELD-PROVIDED Accelerator not required REDUCER MAY BE bracket must be used within 6” from the top of the for 3”...
- Page 38 FIELD FABRICATED WALL TERMINATION NOTE − FIELD−PROVIDED REDUCER MAY BE 2” (51mm) 3” (76mm) REQUIRED TO ADAPT LARGER VENT PIPE SIZE Vent Pipe Vent Pipe TO TERMINATION A− Minimum clearance above grade or average 12” (305 mm) 12” (305 mm) snow accumulation B−...
- Page 39 Crawl Space and Extended Horizontal Venting 12” (305mm) ABOVE AVE. SNOW Lennox provides kit 51W18 (USA) and kit 15Z70 (Cana- ACCUMULATION da) to install 2” or 3” PVC exhaust piping through the floor joists and into the the crawl space. See figure below.
- Page 40 Page 41 line. If this is not possible, a heat cable kit may be used on the condensate trap and line. Heating cable kit is available from Lennox in various lengths; 6 ft. (1.8m) - kit no. 26K68 and 24 ft.
- Page 41 CONDENSATE TRAP LOCATIONS Condensate Trap With Optional Overflow Switch (Unit shown in upflow position with remote trap) From Evaporator Coil HorizontalFurnace4” Min. to 5” Max.above FieldProvidedVent condensatedrain connection) Min. 1” Above Condensate Drain Connection 1” Min. 2” Max. FurnaceCondensate DrainConnection *5’...
- Page 42 Furnace with Evaporator Coil Using a Separate Drain (Unit shown in horizontal left-hand discharge position) Field Provided Vent Evaporator (4” min. to 5” max. above Coil condensate connection) 4”min 5”max 5’ max. PVC Pipe Only Condensate Drain Connection (Trap at coil is optional) Drain Pan Piping from furnace and evaporator coil must slope down a minimum 1/4”...
- Page 43 TRAP / DRAIN ASSEMBLY USING 1/2” PVC OR 3/4” PVC Optional Condensate Drain Connection Adapter 3/4 inch slip X 3/4 inch mpt (not furnished) 90° Street Elbow 3/4 inch PVC (not furnished) Adapter 3/4 inch slip X 3/4 inch mpt (not furnished) Condensate Drain Connection In Unit 1 (25 mm) Min.
-
Page 44: Start Up
III-START-UP 3 - Turn off all electrical power to the unit. 4 - This furnace is equipped with an ignition device A-Preliminary and Seasonal Checks which automatically lights the burners. Do not try to light the burners by hand. 1 - Inspect electrical wiring, both field and factory installed for loose connections. -
Page 45: Heating System Service Checks
Use of a specialty Gas Leak Detector is strongly recommended. It All units are CSA design certified without modifications. is available through Lennox under part number 31B2001. Refer to the EL296UHE Installation Instruction. See Corp. 8411-L10, for further details. - Page 46 MANIFOLD PRESSURE CHECK SET UP Gas Valve Regulator Manifold Post Vent Hose (to burner box) 2” Long Clamp Square Tubing 5/16” Round Hose Reducer Fitting 10” Long Square Tubing Measuring Device Figure 52 F- Proper Gas Flow (Approximate) G- Proper Combustion Furnace should operate at least 5 minutes before check- Furnace should operate minimum 15 minutes with correct ing gas flow.
- Page 47 TABLE 23 Manifold and Supply Line Pressure 0-10,000ft. For -1 Units EL296 Unit Manifold Pressure in wc Supply Line Pressure in wc Low Fire High Fire All Sizes Natural 13.0 LP/Propane 10.0 11.0 13.0 NOTE - A natural to L.P. propane gas changeover kit is necessary to convert this unit. Refer to the changeover kit installation instruction for the conversion procedure.
- Page 48 I- Proper Ground and Voltage 2 - In addition, measure the AC voltage from Line Hot to Line Neutral (spade terminals) on the integrated con- Furnace must be properly grounded for proper perfor- trol. See figure 53. This voltage should be in the range mance.
-
Page 49: Typical Operating Characteristics
V-TYPICAL OPERATING CHARACTERISTICS C-External Static Pressure 1 - 1 - Tap locations shown in figure 55. A-Blower Operation and Adjustment 2 - Punch a 1/4” diameter hole in supply and return 1 - Blower operation is dependent on thermostat control air plenums. -
Page 50: Maintenance
Condensate Hose Screens Before using any filter with this system, check the specifications provided by the filter manufacturer against the data given in the appropriate Lennox Product Specifications bulletin. Additional... - Page 51 Cleaning Heat Exchanger 21 - Remove screws along vestibule sides and bottom which secure vestibule panel and heat exchanger If cleaning the heat exchanger becomes necessary, follow assembly to cabinet. Remove two screws from the below procedures and refer to figure 1 when disas- blower rail which secure bottom heat exchanger sembling unit.
- Page 52 45 - Reconnect gas supply piping. Turn on power and 6 - Disconnect combustion air intake pipe. It may be gas supply to unit. necessary to cut the existing pipe to remove burner box assembly. 46 - Follow lighting instructions on unit nameplate to light and operate furnace for 5 minutes to ensure 7 - Remove four screws which secure burner box the furnace is operating properly.
-
Page 53: Wiring And Sequence Of Operation
VII- Wiring and Sequence of Operation Page 53... - Page 54 Electronic Ignition When the delay ends, the indoor blower motor is energized on the low fire heating speed, the HUM The two-stage, variable speed integrated control used in contacts close energizing the humidifier and 120V EL296UHE units has an added feature of an internal ACC terminal is energized.
- Page 55 Applications Using A Single-Stage Thermostat 4 - After the 20-second warm-up period has ended, the gas valve is energized on low fire (first stage) See figure 58 for ignition control sequence and ignition occurs. At the same time, the control B - Heating Sequence -- Integrated Control Thermostat module sends a signal to begin an indoor blower Selection DIP Switch 1 ON in “Single-Stage”...
-
Page 56: Field Wiring And Jumper Settings
VIII- EL296UHE Field Wiring Applications TABLE 28 EL296 Field Wiring Applications DIP Switch Settings and On-Board Links DIP Switch 1 On Board Links Must Be Cut To Select Thermostat Thermostat Wiring Connections System Options Heating Stages 1 Heat / 1 Cool FURNACE OUTDOOR T'STAT... - Page 57 TABLE 28 EL296 Field Wiring Applications (Continued) DIP Switch Settings and On-Board Links DIP Switch 1 On Board Links Must Be Cut To Select Thermostat Thermostat Wiring Connections System Options Heating Stages 2 Heat / 2 Cool FURNACE OUTDOOR T'STAT TERM.
- Page 58 TABLE 28 EL296 Field Wiring Applications (Continued) DIP Switch Settings and On-Board Links DIP Switch 1 Wiring Connections Thermostat On Board Links Must Be Cut To Select Thermostat Heating System Options Stages Dual Fuel FURNACE HEAT PUMP T'STAT TERM. STRIP Single Stage Heat Pump CUT ON-BOARD LINK...
- Page 59 TABLE 28 EL296 Field Wiring Applications (Continued) DIP Switch Settings and On-Board Links DIP Switch 1 Wiring Connections Thermostat On Board Links Must Be Cut To Select Thermostat Heating System Options Stages Dual Fuel FURNACE HEAT PUMP T'STAT TERM. STRIP Single Stage Heat Pump CUT ON-BOARD LINK...
-
Page 60: Troubleshooting
IX- Troubleshooting HEATING SEQUENCE OF OPERATION NORMAL AND ABNORMAL HEATING MODE POWER ON GAS VALVE OFF. COMBUSTION AIR INDUCER OFF. INDOOR BLOWER OFF. (RESET CONTROL BY CONTROL SELF-CHECK OKAY? TURNING MAIN POWER OFF.) POLARITY REVERSED. POLARITY OKAY? STATUS ERROR CODE 5 + 4. IS THERE A SIGNAL HOLDS UNTIL UNIT IS PROPERLY GROUNDED. - Page 61 HEATING SEQUENCE OF OPERATION CONTINUED THERMOSTAT CALLS FOR HEAT STATUS LED - HEARTBEAT. (Refer to box A on previous page) GAS VALVE OFF. COMBUSTION AIR INDUCER FIRST-STAGE (LOW FIRE) PRESSURE OFF. INDOOR BLOWER OFF. UNIT WILL RETRY SWITCH CLOSED WITHIN 2.5 MINUTES? AFTER 5-MINUTE WAIT PERIOD.
- Page 62 HEATING SEQUENCE OF OPERATION CONTINUED THERMOSTAT CALLS FOR HEAT. STATUS LED -- HEARTBEAT. SEE BOX A. FLAME SIGNAL ABOVE ( 1.40 microamps) LOW FLAME SIGNAL (Does not affect control operation) STATUS ERROR CODE 1 + 2. SINGLE-STAGE THERMOSTAT MODE TWO STAGE THERMOSTAT MODE (DIP SWITCH SET AT “ON”) (DIP SWITCH SET AT “OFF”) START SECOND-STAGE RECOGNITION...
- Page 63 HEATING SEQUENCE OF OPERATION CONTINUED SEE BOX A NORMAL OPERATION. SEE BOX B THERMOSTAT CALLS FOR HEAT. RETURN TO FIRST-STAGE HEAT MODE. FIRST-STAGE CONTINUES UNTIL SECOND- STAGE PRESSURE SWITCH CAN BE PROVEN SECOND-STAGE (HIGH FIRE) HEAT or HEAT DEMAND IS SATISFIED. A FIVE (5) PRESSURE SWITCH CLOSED? MINUTE WAIT PERIOD IS INITIATED BEFORE RETRY.
- Page 64 COOLING SEQUENCE OF OPERATION POWER ON SIGNAL POLARITY REVERSED. CONTROL WILL CONTINUE TO CALL FOR COOLING IS POLARITY REVERSED? IN THIS CONDITION. STATUS ERROR CODE 5 + 4. SIGNAL IMPROPER GROUND AT LED. CONTROL WILL CONTINUE TO CALL FOR COOLING IS THERE IN THIS CONDITION.
- Page 65 CONTINUOUS LOW SPEED FAN SEQUENCE OF OPERATION MANUAL FAN SELECTION MADE AT THERMOSTAT. AFTER 2 SECOND DELAY, INDOOR BLOWER IS ENERGIZED ON CONTINUOUS FAN SPEED. THERMOSTAT CALLS FOR FIRST STAGE COOL. THERMOSTAT CALLS FOR FIRST-STAGE HEAT. INDOOR BLOWER RAMPS TO FIRST STAGE AFTER 45-SECOND DELAY, INDOOR BLOWER COOLING SPEED AFTER A 2-SECOND DELAY.
Need help?
Do you have a question about the EL296UHE Series and is the answer not in the manual?
Questions and answers
Watt is the meaning of the digital troubleshooting code A 975 for a gaz furnace Lennox E L 296 UH