Advertisement
Quick Links
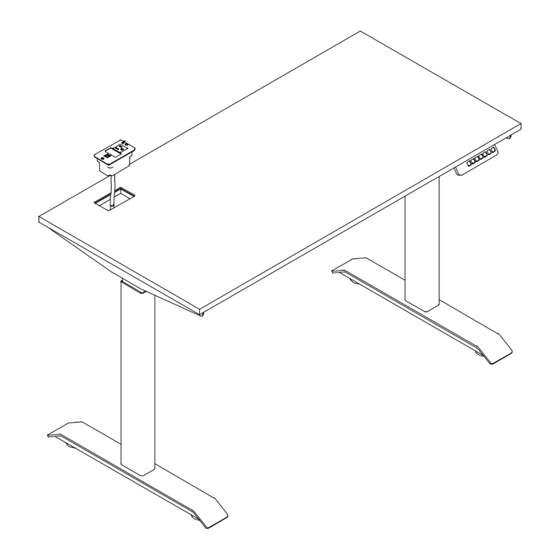
DESCRIPTION: CARSON WHITE/BLACK DESK BASE & TOP
Important note/Note importante:
1. Before you begin: Lay out all parts on a clean surface to check if the tags and numbers are correc
Avant de commencer : Disposer toutes les pièces sur une surface propre pour vérifier si les étiquettes
et les numéros sont corrects.
2. Don't screw tightly before all the screws are put into the corresponding holes.
les vis soient placées dans les perforations correspondantes avant de commencer à visser.
3. Please use the screws correctly, otherwise you might damage the desk panel./ Utiliser les vis
correctement, sinon vous risquez d'endommager le panneau du bureau.
4. It is recommended to install this desk by two people./ Il est fortement recommandé de mobiliser au
moins deux personnes pour le montage.
HARDWARE IDENTIFICATION / IDENTIFICATION DES PIECES MONTAGE
2
3
4
9
13
ASSEMBLY INSTRUCTIONS
NOTICE D'ASSEMBLAGE
MODEL#/N°DE MODÈLE# CARWHDS1&S2/CARBKDS1&S2
1
5
6
10
1
3
69.5
M
2
14
15
Page 1 of 10
/
S'assurer que toutes
8
7
4
11
16
t./
18
12
17
Advertisement

Subscribe to Our Youtube Channel
Related Manuals for Carson CARWHDSK


Summary of Contents for Carson CARWHDSK
- Page 1 ASSEMBLY INSTRUCTIONS NOTICE D'ASSEMBLAGE MODEL#/N°DE MODÈLE# CARWHDS1&S2/CARBKDS1&S2 DESCRIPTION: CARSON WHITE/BLACK DESK BASE & TOP Important note/Note importante: 1. Before you begin: Lay out all parts on a clean surface to check if the tags and numbers are correc Avant de commencer : Disposer toutes les pièces sur une surface propre pour vérifier si les étiquettes et les numéros sont corrects.
- Page 2 Component name Amount(PCS) Numéro Nom de la composante Quantité (PCES) frame(with holes) cadre (avec perforations) side panel panneau latéral lift pole pôle d'appui feet pieds connecting pole pôle de connexion wire supporter support de fil N2 controller commande N2 frame with controller(with holes) cadre avec commande (avec perforations) power cord cordon d'alimentation...
- Page 3 Step 1 Step 2 · Take controlling box from installing shelf and put it aside. · Use four M6*10 hexagon flat round head screws to fix frame and standing pole;(8pcs) · Separate installing shelf and controlling box installing shelf, take out two central beams inside.
- Page 4 Step 5 Step 6 · Insert controller into frames and connect accessories, fix them with · Use eight M6*10 hexagon flat round screws to lock wire supporter ; wire clips and frame; Étape 6 · Utiliser huit vis hexagonales à tête ronde plate M6x10 pour verrouiller Étape 5 .
- Page 5 3 level default heights setting up/down desk height 69.5 Please make sure there is no obstacle during the operation,and there Note is a gap between desk and wall.And all wires are long enough to allow the up-down of desk. Advice Please set up as 1 the most comfortable height when you sit down, and set up as 2 the most comfortable height when you stand up.
- Page 6 3 niveaux monter/ hauteur du bureau hauteurs par défaut réglage descendre 69.5 S’assurer qu'il n'y a pas d'obstacle pendant le montage, d’avoir un espace Note entre le bureau et le mur et que tous les fils sont suffisamment longs pour permettre de monter et descendre le bureau.
- Page 7 Delete limit position Press M button, the digital tube shows“S-”,release the button.Press M button again for 2S,it shows“555". 69.5 The upper and lower limits have been deleted. long press for 2S Lock Press M button, the digital tube shows “S-”,long press M button for 5S, the digital tube shows numbers.
- Page 8 Supprimer les positions limites Appuyer sur le bouton M, jusqu'à que le tube numérique affiche « S- », relâcher ensuite ce bouton. Appuyer à 69.5 nouveau sur le bouton M pour 2 secondes jusqu'à que le tube numérique affiche « 555 », les positions limites supérieure et inférieure seront donc supprimées.
- Page 9 Sensitivity setting on retreating upon obstacle Under the reset condition(the digital tube shows RST),long press the up button for 5S,the sensitivity can be adjusted. 69.5 switch display “10.5”--10kg long press for 5S “10.6”--15kg “10.7”--20kg Setting of memory position Press M button,it shows“S-”,select and press one of the memory buttons,current height will be remembered.
- Page 10 Réglage de sensibilité sur le recul face à l'obstacle En mode réinitialisation, le tube numérique affiche « RST » .Appuyer longuement sur le bouton monter «˄» pendant 5 secondes pour régler la sensibilité. 69.5 L'affichage indiquera « 10.5 »--10kg Appuyer pendant 5 secondes «...
Need help?
Do you have a question about the CARWHDSK and is the answer not in the manual?
Questions and answers