Samson TROVIS 3730-3 Mounting And Operating Instructions
Smart positioner (hart)
Hide thumbs
Also See for TROVIS 3730-3:
- Mounting and operating instructions (180 pages) ,
- Operating instructions manual (132 pages) ,
- Safety manual (20 pages)

Subscribe to Our Youtube Channel
Related Manuals for Samson TROVIS 3730-3


Summary of Contents for Samson TROVIS 3730-3
- Page 1 EB 8484-3 EN Translation of original instructions TROVIS 3730-3 Smart Positioner (HART ® Firmware version 2.00.13 Edition August 2021...
- Page 2 Note on these mounting and operating instructions These mounting and operating instructions assist you in mounting and operating the device safely. The instructions are binding for handling SAMSON devices. The images shown in these instructions are for illustration purposes only. The actual product may vary.
-
Page 3: Table Of Contents
Contents Safety instructions and measures ..............1-1 Notes on possible severe personal injury ............1-3 Notes on possible personal injury ..............1-4 Notes on possible property damage .............1-4 Special instructions concerning explosion protection ........1-5 Warnings on the device ..................6 Markings on the device ................2-1 Nameplate ....................2-1 Options ......................2-1 Firmware versions ..................2-2... - Page 4 Contents 5.6.6 Attachment according to VDI/VDE 3845 ............5-26 5.6.7 Reversing amplifier for double-acting actuators ...........5-30 5.6.8 Attachment of external position sensor ............5-30 5.6.9 Attaching positioners with stainless steel housings ........5-36 5.6.10 Air purging function for single-acting actuators ...........5-36 5.7 Establishing pneumatic connections ............5-37 5.7.1 Supply air ....................5-38 5.7.2 Signal pressure connection ................5-38 5.7.3 Signal pressure reading ................5-39 5.7.4 Supply pressure ..................5-39 5.8 Establishing electrical connections ..............5-40 5.8.1...
- Page 5 Periodic inspection and testing of the positioner ...........10-2 Decommissioning ..................11-1 Removal ....................12-1 Repairs ....................13-1 13.1 Servicing explosion-protected devices ............13-1 13.2 Returning devices to SAMSON ..............13-1 Disposal ....................14-1 Certificates ....................15-1 Annex A (configuration instructions) ............16-1 16.1 Code list ....................16-1 16.1.1 Structure of the main display ..............16-1 16.1.2...
-
Page 7: Safety Instructions And Measures
In case operators intend to use the positioner in other applica- tions or conditions than specified, contact SAMSON. SAMSON does not assume any liability for damage resulting from the failure to use the de- vice for its intended purpose or for damage caused by external forces or any other external factors. - Page 8 Î Check with the plant operator for details on further protective equipment. Revisions and other modifications Revisions, conversions or other modifications of the product are not authorized by SAMSON. They are performed at the user's own risk and may lead to safety hazards, for example. Fur- thermore, the product may no longer meet the requirements for its intended use.
-
Page 9: Notes On Possible Severe Personal Injury
Safety instructions and measures Referenced standards, directives and regulations Devices with a CE marking fulfill the following requirements of the Directives: − TROVIS 3730-3: 2011/65/EU, 2014/30/EU − TROVIS 3730-3-110/-510/-810/-850: 2011/65/EU, 2014/30/EU, 2014/34/EU Devices with an EAC marking fulfill the requirements of the following Regulations: − TROVIS 3730-3: TR CU 020/2011 and TR CU 012/2011 with the applicable GOST standards: − ГОСТ 31610.0-2014 (IEC 60079-0:2011 − ГОСТ 31610.11-2014 (IEC 60079-11:2011) − TROVIS 3730-3-110/-510/-810/-850: TR CU 020/2011 See Annex for declarations of conformity and EAC certificates. Referenced documentation The following documents apply in addition to these mounting and operating instructions: − Operating instructions for valve diagnostics: u EB 8389-3 − The mounting and operating instructions of the components on which the positioner is mounted (valve, actuator, valve accessories etc.). -
Page 10: Notes On Possible Personal Injury
Safety instructions and measures 1.2 Notes on possible personal injury WARNING Risk of personal injury due to moving parts on the valve. During initialization of the positioner and during operation, the valve moves through its entire travel range. Injury to hands or fingers is possible if they are inserted into the valve. Î During initialization, do not insert hands or fingers into the valve yoke and do not touch any moving valve parts. Sudden loud noise when the pneumatic actuator vents. -
Page 11: Special Instructions Concerning Explosion Protection
Safety instructions and measures Malfunction due to initialization not yet completed. The initialization causes the positioner to be calibrated to adapt it to the mounting situa- tion. After initialization is completed, the positioner is ready for use. Î Initialize the positioner on first start-up. Î Re-initialize positioner after changing the mounting position. Risk of positioner damage due to incorrect grounding of the electric welding equipment. -
Page 12: Warnings On The Device
Safety instructions and measures Equipment with type of protection Ex nA Î In equipment operated with type of protection Ex nA (non-sparking equipment), only con- nect, isolate or switch circuits while energized during installation, maintenance or repair. Î Use certified cable glands and blanking plugs with appropriate type of protection and IP rating ≥ 6X and suitable for the certified temperature range. Î Connect the signal circuit using screw terminals (terminal 11/12) for electrical conductors with a wire cross-section from 0.2 to 2.5 mm². The tightening torque is 0.5 to 0.6 Nm. Equipment with type of protection Ex t Î In equipment operated with type of protection Ex t (protection by enclosure), only con- nect, isolate or switch circuits while energized during installation, maintenance or repair. Î... - Page 13 EB 8484-3 EN...
- Page 14 EB 8484-3 EN...
-
Page 15: Markings On The Device
Markings on the device 2 Markings on the device 2.1 Nameplate Explosion-protected version Version without explosion protection SAMSON TROVIS 3730-3 SAMSON TROVIS 3730-3 HART Positioner HART Positioner Supply Supply Input Input See technical data for ambient temperature Firmware Hardware Model 3730-3 * See EU Type Exam. -
Page 16: Firmware Versions
Markings on the device 2.3 Firmware versions Firmware revisions 2.00.11 2.00.13 Initialization optimized 2.4 Article code Positioner TROVIS 3730-3- x x x 0 x x x x x 0 x x 0 x x x x 0 0 x x x x x With LCD, autotune, HART communication ®... - Page 17 Markings on the device Positioner TROVIS 3730-3- x x x 0 x x x x x 0 x x 0 x x x x 0 0 x x x x x Option C Without 2x Software limit switches + binary output (PLC) 2x Software limit switches + binary output (NAMUR) 2x Inductive limit switches + Binary output (NAMUR); –50 to +85 °C Option D Without External travel sensor with M12x1 connector;...
- Page 18 Markings on the device Positioner TROVIS 3730-3- x x x 0 x x x x x 0 x x 0 x x x x 0 0 x x x x x Hardware version 1.00.00 Firmware version 2.00.13 EB 8484-3 EN...
-
Page 19: Design And Principle Of Operation
Design and principle of operation 3 Design and principle of oper- The positioner is operated by a rotary push- button (10) for menu navigation on the ation plain-text display (11). Î See Fig. 3-1 The extended EXPERTplus diagnostics are in- The TROVIS 3730-3 Electropneumatic Posi- tegrated into the positioner. They provide in- formation on the control valve and positioner tioner is mounted on pneumatic control valves and used to assign the valve position... - Page 20 Design and principle of operation Serial Interface µC Exhaust Supply 9 Output 38 1 Control valve 2 Travel sensor 3 A/D converter 4 Microcontroller 5 Pressure reducer Available options 6 Air booster M.1 Forced venting (Slot B only) 7 i/p converter M.2 Position transmitters 8 D/A converter M.3 Binary input 9 Communication interface M.4 Software limit switches with binary output (PLC)
-
Page 21: Optional Additional Functions
The regardless of the set point. A voltage above options can only be exchanged or retrofitted 15 V keeps the forced venting function inac- by SAMSON's After-sales Service. tive. Inductive limit contacts Binary input Inductive slot sensors issue a signal to a con-... -
Page 22: Mounting Versions
Design and principle of operation 3.2 Mounting versions In addition, a binary input can be deactivat- The TROVIS 3730-3 Positioner is suitable for Binary output the following types of attachment using the A fault alarm output signalizes a fault to the corresponding accessories (see the 'Installa- control station. -
Page 23: Configuration Using The Trovis-View Software
Note TROVIS-VIEW provides a uniform user inter- face that allows users to configure and pa- rameterize various SAMSON devices using device-specific database modules. The 3730-3 device module can be downloaded free of charge from our website at u www.samsongroup.com >... -
Page 24: Technical Data
Class 3 Pressure dew point: Class 3 or at least 10 K below the lowest ambient temperature to be expected Hysteresis ≤0.3 % Sensitivity ≤0.1 % Characteristic Linear/Equal percentage/Reverse equal percentage/SAMSON butterfly valve Transit time Exhaust and supply adjustable separately up to 240 s by software Direction of action Reversible Air consumption, steady Independent of supply air approx. 65 l state Air output capacity (when ∆p = 6 bar) Actuator (supply) 8.5 m... - Page 25 Design and principle of operation Environmental conditions and permissible temperatures Permissible environmental conditions according to EN 60721-3 Storage 1K6 (relative humidity ≤95 %) Transport –20 to +85 °C: All versions –40 to +85 °C: With metal cable glands Operation –55 to +85 °C: Low-temperature version with metal cable glands Observe the limits in the test certificate for explosion-protected versions. Resistance to vibration According to DIN EN 60068-2-6: Vibrations (sinusoidal) 0.15 mm, 10 to 60 Hz; 20 m/s², 60 to 500 Hz per axis 0.75 mm, 10 to 60 Hz; 100 m/s², 60 to 500 Hz per axis Bumps (half sine) According to DIN EN 60068-2-29: 150 m/s², 6 ms; 4000 bumps per axis Noise According to DIN EN 60068-2-64: 10 to 200 Hz: 1 (m/s²)²/Hz 200 to 500 Hz: 0.3 (m/s²)²/Hz 4 h/axis Recommended ≤20 m/s²...
- Page 26 Design and principle of operation Materials Housing and cover Die-cast aluminum EN AC-AlSi12(Fe) (EN AC-44300) acc. to DIN EN 1706, chromate and powder coating · Special version: stainless steel 1.4408 Window Makrolon 2807 ® Cable glands Polyamide, nickel-plated brass, stainless steel 1.4305 Other external parts Stainless steel: 1.4571 and 1.4301 Communication TROVIS VIEW with SSP/HART Revision 7 ® Weight Aluminum housing: approx. 1.0 kg · Stainless steel housing: approx. 2.2 kg Table 3-2: Optional additional functions Position transmitters Version...
- Page 27 Design and principle of operation ≤1.0 mA (non-conducting) R = 10 kΩ (non-conducting) Signal state ≥2.2 mA (conducting) R = 348 Ω (conducting) Static destruction limit 32 V DC/24 V AC 16 V DC/50 mA Inductive limit contacts Version For connection to switching amplifier according to EN 60947-5-6, SJ2-SN proximity switches, reverse polarity protection Measuring plate not de- ≥3 mA tected Measuring plate detected ≤1 mA Static destruction limit 20 V DC Perm.
- Page 28 Design and principle of operation Table 3-3: Summary of explosion protection approvals Certification Type of protection/comments Number BVS 18 ATEX E 044 X II 2G Ex ia IIC T6 Gb/ EU type examina- II 2D Ex ia IIIC T85 °C Db IP66 tion certificate Date 2018-06-07 Number BVS 18 ATEX E 044 X II 2D Ex tb IIIC T85 °C Db EU type examina- tion certificate Date 2018-06-07 Number BVS 18 ATEX E 044 X II 3G Ex nA IIC T6 Gc/ EU type examina- II 3D Ex tb IIIC T85 °C Gb tion certificate Date...
- Page 29 Design and principle of operation Certification Type of protection/comments Number IEx 20.0090X INMETRO Date 2021-01-11 Ex tb IIIC T85°C Db Valid until 2024-01-11 Number IEx 20.0090X Date 2021-01-11 INMETRO Ex nA IIC T4/T6 Gc Valid until 2024-01-11 EB 8484-3 EN 3-11...
-
Page 30: Dimensions In Mm
Design and principle of operation 3.5 Dimensions in mm Attachment according to IEC 60534-6 Connecting plate Pressure gauge bracket Direct attachment 3-12 EB 8484-3 EN... - Page 31 Design and principle of operation Attachment according to VDI/ VDE 3847-1 onto Type 3277 Actuator Lever (see page 3-16) Attachment according to VDI/ VDE 3847 to a NAMUR rib EB 8484-3 EN 3-13...
- Page 32 Design and principle of operation Attachment according to VDI/VDE 3847-2 with single-acting actuator Attachment according to VDI/VDE 3847-2 with double-acting actuator For attachment using intermediate plate 3-14 EB 8484-3 EN...
- Page 33 Design and principle of operation Attachment to rotary actuators according to VDI/VDE 3845 Heavy-duty version Type 3710 Reversing Amplifier Ø101 Light version Type 3710 Reversing Amplifier EB 8484-3 EN 3-15...
-
Page 34: Fixing Levels According To Vdi/Vde 3845 (September 2010)
Design and principle of operation Lever Lever 25 mm 50 mm 66 mm 70 mm 100 mm 116 mm 100 mm 200 mm 216 mm 200 mm 300 mm 316 mm 3.6 Fixing levels according to VDI/VDE 3845 (September 2010) Fixing level 2 (bracket surface) Fixing level 1 (actuator surface) Actuator Dimensions in mm Size Ød 5.5 for M5... -
Page 35: Shipment And On-Site Transport
Î Observe the storage instructions. Î Avoid long storage times. 4.2 Removing the packaging Î Contact SAMSON in case of different from the positioner storage conditions or longer storage times. Observe the following sequence: Î Do not remove the packaging until im-... - Page 36 Shipment and on-site transport − Observe storage temperature depending on the permissible ambient temperature (see the 'Design and principle of opera- tion' section). − Store the positioner with the cover closed. − Seal the pneumatic and electrical con- nections. EB 8484-1 EN...
-
Page 37: Installation
Installation 5 Installation NOTICE The work described in this section is only to Risk of malfunction due to incorrect mount- be performed by personnel appropriately ing parts/accessories. qualified to carry out such tasks. Î Only use the mounting parts and acces- sories listed in these mounting and oper- ating instructions to mount and install the DANGER positioner. -
Page 38: Preparation For Installation
Installation 5.2 Preparation for installation The positioner is adapted to the actuator and to the rated travel by the lever on the back of Before mounting, make sure the following the positioner and the pin inserted into the conditions are met: lever. − The positioner is not damaged. The travel tables on page 5-4 show the − The air supply is not yet connected to the maximum adjustment range at the position-... - Page 39 Installation Vent opening Fig. 5-1: Vent opening (back of the positioner) Rotary knob Locking screw Fig. 5-5: Shaft lock Fig. 5-2: Permissible mounting Fig. 5-3: M lever with pin position 35 positions Lever Disk spring Follower pin Fig. 5-4: Mounting the lever and follower pin EB 8484-3 EN...
-
Page 40: Travel Tables
Travel [mm] 5.0 to 25.0 120/175/ 7.0 to 35.0 240/350 355/700/750 10.0 to 50.0 Table 5-2: Attachment according to IEC 60534-6 (NAMUR) SAMSON valves with Type 3271 Adjustment range at positioner Actuator Other control valves Actuator size Rated travel Min. travel Max. travel Required... -
Page 41: Installing A Volume Restriction
Installation 5.5 Installing a volume restriction We recommend using a volume restriction − For linear actuators with a transit time <1 s (e.g. with an actuator area smaller than 240 cm²) − For rotary actuators with a volume of less than 300 cm³ Volume restriction in the connection block (direct attachment). See Fig. 5-6. Î... -
Page 42: Positioner Attachment
Installation 5.6 Positioner attachment mounting screw is located in the groove of the actuator stem. 4. Mount cover plate (10) with narrow side Note of the cut-out (Fig. 5-8, on the left) point- We recommend using a volume restriction ing towards the signal pressure connec- for a transit time <1 s (see section 5.5). tion. - Page 43 Installation Symbols Switchover plate (9) Lever Actuator stem Disk spring extends Follower pin Follower clamp Left attachment Right attachment Screw plug Stopper Connecting plate Actuator stem Seals retracts Pressure gauge bracket Pressure gauge mounting Signal pressure input for left Signal pressure Switchover plate attachment Marking input for right...
-
Page 44: Attachment According To Iec 60534-6
Installation b) Type 3277 Actuator Fasten the positioner on the cover plate (10) using the two fastening screws. Î Actuators with 175 to 750 cm² (Fig. 5-9) 7. Make sure that the tip of the gasket (16) Î Required mounting parts and accesso- projecting from the side of the connec- ries: Table 5-6 on page 5-50. tion block is positioned to match the ac- tuator symbol for the actuator's fail-safe Î... - Page 45 Installation 10 14 Cut-out of cover plate (10) 11 11.1 View A View B 12.1 12.2 Lever Disk spring Follower pin Follower clamp Cover plate Cover 11.1 Vent plug Connection block 12.1 Screw Actuator stem 12.2 Stopper or connection for external piping retracts extends Switch plate Gasket...
- Page 46 Installation The positioner is attached to the control valve 4. Mount connecting plate (6) or pressure using a NAMUR bracket (10). gauge bracket (7) with pressure gauges (8) on the positioner. Make sure that the 1. Seal the signal pressure output at the two seals (6.1) are seated properly. back of the positioner with the screw plug (4, order no. 0180-1254) and the 5.
- Page 47 Installation Attachment to rod-type yoke Rods with 20 to 35 mm diameter Attachment to NAMUR rib Additional bracket for actuators with 2800 cm² and travel ≥ 60 mm XL and L lever Lever 14.1 Disk spring Follower pin Follower plate Follower plate Connecting plate Seals Pressure gauge bracket Pressure gauge mounting kit Stem connector Bracket NAMUR bracket Screw Bolt 14.1 Screws U-bolt...
-
Page 48: Attachment To Type 3510 Micro-Flow Valve
Installation 5.6.3 Attachment to on the positioner. Make sure that the two seals (6.1) are seated properly. Type 3510 Micro-flow 8. Unscrew the standard M lever (1) includ- Valve ing follower pin (2) from the positioner Î See Fig. 5-11 shaft. Î Required mounting parts and accesso- 9. - Page 49 Installation 12.1 11.1 10.1 Lever Disk spring Follower pin Follower plate Connecting plate Seals Pressure gauge bracket Pressure gauge mounting kit S lever Stem connector Bracket Bolt Screws Bracket 10.1 Screw Hex bar 11.1 Screws 12.1 Screws Fig. 5-11: Attachment to Type 3510 Micro-flow Valve EB 8484-3 EN 5-13...
- Page 50 Installation Attachment to Type 3277 Actuator (see pin position 35, reposition it in the hole Fig. 5-12) for pin position 50 and screw tight. Î Required mounting parts and accesso- For actuators 175, 240 and 350 cm² ries: Table 5-8 on page 5-51. with 15 mm travel, keep the follower pin (2) in pin position 35. Mount the positioner on the yoke as shown in Fig. 5-12. The signal pressure is routed to 5.
- Page 51 Installation 13.1 17.2 18 17.1 18.1 11.1 12.1 Exh. 6.2 6.1 Lever Disk spring Follower pin Follower clamp 12.1 Gasket Screw plug Adapter block Stopper 13.1 Screws Adapter bracket Turnboard Screws 17.1 Molded seal Molded seal 17.2 Screws Screws Dummy plate Cover 18.1 Screws 11.1 Vent plug...
- Page 52 Installation Make sure the molded seal (6.2) is prop- Actuator stem erly seated. extends retracts 15. Mount cover (11) on the other side to the yoke. Make sure that the vent plug is lo- Connecting plate cated at the bottom when the control Adapter block valve is installed to allow any condensed water that collects to drain off.
- Page 53 Installation 13.1 17.1 17.2 18.1 Exh. Lever 14.1 Disk spring Follower pin Follower plate Follower plate 13.1 Screws Screw plug Bolt 6.2 6.1 Stopper 14.1 Screws Adapter bracket Formed plate Screws Bracket Molded seal Turnboard Screws 17.1 Molded seal NAMUR connection 17.2 Screws block Dummy plate...
- Page 54 Installation the screw and toothed lock washer (11). − Place the lever (1) on the shaft of the po- Align the marking on the NAMUR valve sitioner and fasten it tight using the disk connection (on the side marked '1') to spring (1.2) and nut (1.1). 50 % travel.
-
Page 55: Attachment According To Vdi/Vde 3847-2
Installation Make sure the molded seal (6.2) is prop- erly seated. 11. For single-acting actuators without air purging, connect the Y1 port of the adapter block to the signal pressure con- nection of the actuator. Seal the Y2 port with a blanking plug. For double-acting actuators and actua- tors with air purging, connect the Y2 port of the adapter block to the signal pressure connection of the second actua- tor chamber or spring chamber of the actuator. - Page 56 Installation a) Version for single-acting 7. Fasten the positioner onto the adapter bracket (4) using the fastening screws actuator (6). Î Make sure that the seals are correctly Mounting on Type 31a Actuator seated. (edition 2020+), SRP version Î See Fig. 5-17 1. Seal the signal pressure output at the back of the positioner with the screw plug (4, order no. 0180-1254) and the associated O-ring (order no.
- Page 57 Installation 1 Adapter block 2 Fastening screws 3 Follower wheel 4 Adapter bracket 5 Fastening screws 6 Fastening screws Fig. 5-17: Mounting on a single-acting actuator EB 8484-3 EN 5-21...
- Page 58 Installation b) Version for double-acting 7. Fasten the positioner onto the adapter bracket (4) using the fastening screws actuator (6). A reversing amplifier must be additionally 8. Mount the Type 3710 Reversing Amplifi- mounted for applications with double-acting er (7) together with the two guide bush- ings (8) and terminal plate (9) onto the (DAP) actuators or applications with single- acting (SAP) actuators that include partial adapter bracket using the associated fas- stroke testing.
- Page 59 Installation 1 Adapter block 2 Fastening screws 3 Follower wheel 4 Adapter bracket 5 Fastening screws 6 Fastening screws 7 Reversing amplifier 8 Guide bushings 9 Terminal plate 10 Fastening screws Fig. 5-19: Mounting on a double-acting actuator or single-acting actuator with partial stroke testing EB 8484-3 EN 5-23...
- Page 60 Installation Intermediate plate for AA4 interface Mounting a solenoid valve Î See Fig. 5-20. Î See Fig. 5-21. An intermediate plate (1) must be mounted A solenoid valve (12) can also be mounted between the adapter block and adapter in place of the blank plate (12). The orienta- bracket for SRP and DAP rotary actuators in tion of the turnboard (14) determines the sizes 900 and 1200 with AA4 interface.
- Page 61 Installation 12 Dummy plate 13 Solenoid valve 14 Turnboard Fig. 5-21: Mounting a solenoid valve EB 8484-3 EN 5-25...
-
Page 62: Attachment According To Vdi/Vde 3845
M lever (1). Use the Prior to attaching the positioner to the metal follower pin (Ø 5 mm) included in SAMSON Type 3278 Rotary Actuator, the mounting kit and screw tight into the mount the associated adapter (5) to the free hole for pin position 90°. - Page 63 Installation (7, 8) 10.1 80 mm 130 mm Slot Legend for Fig. 5-22 and Fig. 5-23 Control valve opens counterclockwise Lever Control valve opens clockwise Disk spring Follower pin Follower clamp Coupling wheel Screw Disk spring Scale plate Actuator shaft Adapter for Type 3278 Connecting plate Seals Slot Pressure gauge bracket...
- Page 64 Installation 8. Stick the scale plate (4.3) on the coupling 3. For SAMSON Type 3278 and VETEC wheel so that the arrow tip indicates the S160 Rotary Actuators, fasten the closed position and it can be easily read adapter (5) onto the free end of the shaft and for VETEC R Actuator, place on the...
- Page 65 Actuator shaft or adapter Adapter Connecting plate (only for G ¼) 10.1 10.1 Attachment according to VDI/VDE 3845 SAMSON Type 3278 (Sept. 2010) VETEC S160, VETEC R Fixing level 1, AA1 to AA4 size Fig. 5-25: Attachment to rotary actuators (heavy-duty version) EB 8484-3 EN 5-29...
-
Page 66: Reversing Amplifier For Double-Acting Actuators
Fig. 5-26: Positioner unit with sensor mounted For the use with double-acting actuators, the on a micro-flow valve positioner must be fitted with a reversing am- plifier: Î Required mounting parts and accesso- Î SAMSON Type 3710 Reversing Amplifier, ries: see Table 5-11 EB 8392 In the positioner version with an external po- The following applies to all reversing am-... - Page 67 Installation For the pneumatic connection either a con- − Turn the connecting plate (9) so that the necting plate (6) or a pressure gauge bracket correct symbol for the fail-safe action (7) must be fixed to the housing, depending "actuator stem extends" or "actuator stem on the accessory chosen. Make sure the seals retracts"...
- Page 68 Installation with the M lever in pin position 35 on the 6. Place the mounting plate together with sensor. If necessary, remove the follower the sensor onto the actuator yoke so that pin (2) from its pin position and move it the follower pin (2) rests on the top of the to the hole for the recommended pin po- follower clamp (3).
- Page 69 Installation b) Mounting the position sensor travel. For other actuator sizes or travels, se- lect the lever and pin position from the travel with attachment according to table in section 5.4.1. L and XL levers are in- IEC 60534-6 cluded in the mounting kit. 3. Place the lever (1) and disk spring (1.2) Î...
- Page 70 Installation c) Mounting the position sensor 2. Screw the position sensor (20) onto the bracket (21). to Type 3510 Micro-flow 3. Select the S lever (1) from the accessories Valve and screw the follower pin (2) into the hole for pin position 17. Place the lever Î...
- Page 71 Installation d) Mounting on rotary actuators lower pin (Ø 5 mm) from the accessories and screw it into the hole for pin position Î Required mounting parts and accesso- 90°. ries: see Table 5-11 4. Place the lever (1) and disk spring (1.2) Î See Fig. 5-30. on the sensor shaft. Place the lever in mid-position and hold it in place. Screw 1.
-
Page 72: Attaching Positioners With Stainless Steel Housings
Installation 5.6.9 Attaching positioners Attachment to rotary actuators All mounting kits from Table 5-10 can be with stainless steel used except for the heavy-duty version. Con- housings necting plate in stainless steel. Positioners with stainless steel housings re- 5.6.10 Air purging function for quire mounting parts that are completely single-acting actuators made of stainless steel or free of aluminum. -
Page 73: Establishing Pneumatic Connections
Installation 5.7 Establishing pneumatic Note connections The adapter uses one of the M20x1.5 con- nections in the housing which means only one cable gland can be installed. WARNING Risk of injury by possible movement of Should other valve accessories be used exposed parts (positioner, actuator or which vent the actuator (e.g. -
Page 74: Supply Air
Installation 5.7.1 Supply air WARNING Sudden loud noise when the pneumatic actuator vents. Output 38 Supply 9 Î Wear hearing protection when working near the valve. NOTICE Risk of malfunction due to incorrect se- quence of mounting, installation and Output 38 Supply 9 start-up. -
Page 75: Signal Pressure Reading
Installation Type 3277 Actuator Actuator stem extends FA (AIR TO OPEN) Î The signal pressure connection is fixed. Fail-close (for globe and angle valves): Î Required supply pressure = Upper bench Attachment according to IEC 60534-6 range value + 0.2 bar, at least 1.4 bar. (NAMUR) Î For "actuator stem retracts" fail-safe ac- Actuator stem retracts FE (AIR TO CLOSE) tion: connect the signal pressure to the Fail-open (for globe and angle valves): connection on top of the actuator. -
Page 76: Establishing Electrical Connections
Installation 5.8 Establishing electrical Selecting cables and wires connections Î Observe the relevant clauses of EN 60079-14 for installation of intrinsi- cally safe circuits. DANGER Î Seal cable entries left unused with plugs. Risk of fatal injury due to the formation of Î Fit equipment used in ambient tempera- an explosive atmosphere. -
Page 77: Cable Entry With Cable Gland
Installation 5.8.2 Electrical power and IP rating ≥ 6X and suitable for the certi- fied temperature range. The signal circuit is connected using screw NOTICE terminals (terminal 11/12) for electrical con- Risk of malfunction due to incorrect se- ductors with a wire cross-section from 0.2 to quence of mounting, installation and 2.5 mm². The tightening torque is 0.5 to start-up. 0.6 Nm. Î Observe the following sequence. 1. - Page 78 Installation –42 Inductive limit contact 1 –52 Inductive limit contact 2 Fig. 5-32: Terminal assignment of inductive limit contacts –46/–92 Software limit contact 1 (PLC/NAMUR) +45/+91 –56/–94 Software limit contact 2 (PLC/NAMUR) +55/+93 Fig. 5-33: Terminal assignment of software limit contacts 5-42 EB 8484-3 EN...
- Page 79 Installation Option A –32 Fig. 5-34: Terminal assignment of position transmitter Option B –82 Fig. 5-35: Terminal assignment of forced venting EB 8484-3 EN 5-43...
- Page 80 Installation Option B Option A –88 –88 Fig. 5-36: Terminal assignment of binary input –96/–84 Fault indicator, PLC/NAMUR +95/+83 Fig. 5-37: Terminal assignment of binary output (fault alarm output) 5-44 EB 8484-3 EN...
- Page 81 Installation –12 Fig. 5-38: Connecting the mA control signal EB 8484-3 EN 5-45...
-
Page 82: Establishing Hart Communication
Installation 5.8.3 Establishing HART Alternatively, a 250 Ω resistor can be con- ® nected in series and a 22 μF capacitor can communication be connected in parallel to the analog output Communication between computer and posi- of positioners without explosion protection tioner using an FSK modem or handheld and positioners with type of protection Ex tb communicator (if necessary, using an isola- (Fig. 5-40). The load for the controller output tion amplifier) is based on the HART proto-... - Page 83 Installation Connection in safe area Handheld communicator or second FSK modem 4 to 20 mA TROVIS 3730-3 Controller/control station Connection in hazardous area Safe area Hazardous area TROVIS 3730-3 Explosion-protected Controller/control station isolation amplifier Handheld communicator or second FSK modem (explosion-protected) Fig. 5-39: Connection with FSK modem EB 8484-3 EN 5-47...
-
Page 84: Accessories
Installation 5.9 Accessories Table 5-4: General accessories Designation Order no. Reversing amplifier for double-acting actuators Type 3710 Black plastic (6 to 12 mm clamping range) 8808-1011 Blue plastic (6 to 12 mm clamping range) 8808-1012 Cable gland M20x1.5 Nickel-plated brass (6 to 12 mm clamping range) 1890-4875 Nickel-plated brass (10 to 14 mm clamping range) 1992-8395 Stainless steel 1.4305 (8 to 14.5 mm clamping range) 8808-0160 Powder-coated aluminum 0310-2149 Adapter M20x1.5 to ½ NPT Stainless steel 1400-7114 M lever 0510-0510 L lever 0510-0511 XL lever 0510-0512 XXL lever 0510-0525 For mounting on the connection block 100041955... - Page 85 Installation Table 5-5: Direct attachment to Type 3277-5 (see section 5.6.1 a)) Designation Order no. Standard version for actuators 120 cm² or smaller 1400-7452 Mounting parts Version compatible with paint for actuators 120 cm² or smaller 1402-0940 Old switchover plate for Type 3277-5xxxxxx.00 Actuator (old) 1400-6819 New switchover plate for Type 3277-5xxxxxx.01 Actuator (new) 1400-6822 Accessories for New connecting plate for Type 3277-5xxxxxx.01 Actuator (new) , G NPT 1400-6823 actuator Old connecting plate for Type 3277-5xxxxxx.00 Actuator (old): G 1400-6820 Old connecting plate for Type 3277-5xxxxxx.00 (old): NPT 1400-6821 G ...
- Page 86 Installation Table 5-6: Direct attachment to Type 3277 (see section 5.6.1 b)) Mounting parts/accessories Order no. Standard version for actuators 175, 240, 350, 355, 700, 750 cm² 1400-7453 Version compatible with paint for actuators 175, 240, 350, 355, 700, 750 cm² 1402-0941 G ¼ 1400-8819 Connection block with seals and screw ¼ NPT 1402-0901 Stainless steel/brass 1402-1637 Pressure gauge mounting kit up to max. 6 bar Stainless steel/stainless steel 1402-1638 Volume restriction for connection block (recommended for <240 cm²) 100041955 Piping with screw fittings Order no. 1) G ¼/G ...
- Page 87 Mounting parts Order no. VDI/VDE 3847 interface adapter 1402-0257 ISO 228/1-G ¼ 1402-0268 Aluminum ¼-18 NPT 1402-0269 Connecting plate, including connection for air purging of actuator spring chamber ISO 228/1-G ¼ 1402-0270 Stainless steel ¼-18 NPT 1402-0271 Mounting kit for attachment to SAMSON Type 3277 Actuator with 175 to 750 cm² 1402-0868 Mounting kit for attachment to SAMSON Type 3271 Actuator or third-party actuators 1402-0869 Travel pick-off for valve travel up to 100 mm 1402-0177 Travel pick-off for 100 to 200 mm valve travel (SAMSON Type 3271 Actuator only) 1402-0178 EB 8484-3 EN 5-51...
- Page 88 Size AA1 to AA4, version with CrNiMo steel bracket 1400-7448 Size AA1 to AA4, heavy-duty version 1400-9244 Size AA5, heavy-duty version (e.g. Air Torque 10 000) 1400-9542 Bracket surface corresponds to fixing level 2, heavy-duty version 1400-9526 1400-8815 Attachment for rotary actuators with max. 180° opening angle, fixing level 2 1400-9837 Attachment to SAMSON Type 3278 with 160/320 cm², CrNiMo steel bracket 1400-7614 Attachment to SAMSON Type 3278 with 160 cm² and to VETEC Type S160, Type R and Type M, 1400-9245 heavy-duty version 1400-5891 Attachment to SAMSON Type 3278 with 320 cm² and to VETEC Type S320, heavy-duty version 1400-9526 Attachment to Camflex II 1400-9120 G ¼...
- Page 89 CrNiMo steel bracket 1400-7473 Size AA1 to AA4, heavy-duty version 1400-9384 Attachment to Size AA5, heavy-duty version (e.g. Air Torque 10 000) 1400-9992 rotary actuators Bracket surface corresponds to fixing level 2, heavy-duty version 1400-9974 SAMSON Type 3278 with 160 cm² and VETEC Type S160 and Type R, heavy- 1400-9385 duty version 1400-5891 SAMSON Type 3278 with 320 cm² and VETEC Type S320, heavy-duty version 1400-9974 G 1400-7461 ¼ Connecting plate (6) NPT...
- Page 90 Installation 5-54 EB 8484-3 EN...
-
Page 91: Operation
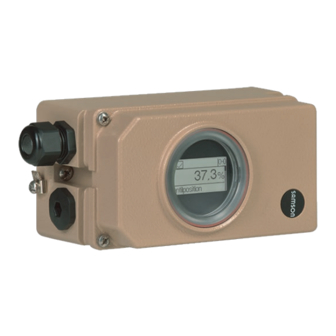
Operation 6 Operation WARNING Sudden loud noise when the pneumatic actuator vents. Î Wear hearing protection when working near the valve. Display Rotary pushbutton Initialization key (INIT) AIR TO OPEN/AIR TO CLOSE slide switch SSP interface Fig. 6-1: Operating controls of TROVIS 3730-3 Positioner 6.1 Rotary pushbutton The rotary pushbutton for on-site operation is located next to the display (bottom right or top left, depending on the mounting position). -
Page 92: Air To Open/Air To Close Slide Switch
Operation 6.2 AIR TO OPEN/AIR TO CLOSE slide switch Î See the 'Start-up and configuration' section. 6.3 Initialization key (INIT) WARNING Risk of injury by exposed moving parts on the positioner, actuator or valve. Î Do not touch or block exposed moving parts. NOTICE The process is disturbed by the movement of the actuator or valve. Î... -
Page 93: Display
Operation 6.4 Display Note The display's operating range is from –20 to +65 °C. The readability of the display is restrict- ed outside this temperature range. As soon as the electrical power (mA control signal) is connected, the wizard is displayed during the first start-up (see the 'Start-up and configuration' section) and, in all other cases, the main display (Fig. 6-2, left) appears, which is marked by the display numbering 0-0 to 0-10 (at the top right-hand corner of the display). -
Page 94: Display Icons
Operation Table 6-1: Summary of readings in the main display View Description Start screen: Valve position in % Valve position in degrees Set point in % Set point deviation in % Messages Note Some of the messages (display 0-9) can be confirmed: in this case, select the message and press (only possible when the configuration is enabled, see the 'Start-up and configura- tion' section). - Page 95 Operation Table 6-3: NAMUR status Icon Meaning Failure Function check Out of specification Maintenance demanded OK (no message) Table 6-4: Other icons Icon Meaning Write protection, configuration not enabled Option installed in Slot C Option installed in Slot D Binary contact 1 active Binary contact 2 active Binary contact 3 active EB 8484-3 EN...
- Page 96 EB 8484-3 EN...
-
Page 97: Start-Up And Configuration
Start-up and configuration 7 Start-up and configuration The work described in this section is only to be performed by personnel appropriately quali- fied to carry out such tasks. DANGER Risk of fatal injury due to the ignition of an explosive atmosphere. Î Observe EN 60079-14 (VDE 0165, Part 1) for work on the positioner in potentially ex- plosive atmospheres. -
Page 98: First Start-Up
Start-up and configuration NOTICE Risk of malfunction due to incorrect sequence of mounting, installation and start-up. Î Observe the following sequence. 1. Remove the protective caps from the pneumatic connections. 2. Mount the positioner on the valve. 3. Connect the supply air. 4. -
Page 99: Start-Up Settings
Start-up and configuration 7.2 Start-up settings Î Perform the start-up settings, keeping the following sequence: Action Section 1. Enable configuration 2. Select 'Start-up' menu 3. Set the actuator type 7.4.1 4. Determining the fail-safe position 7.4.2 5. Specify pin position 7.4.3 6. -
Page 100: Start-Up Menu
Start-up and configuration 7.4 Start-up menu 1. Press (in start screen) to change to the main menu. until Start-up [7] appears. 2. Turn 3. Press to go to the Start-up menu. 7.4.1 Setting the actuator type Three different parameters are available for selection: − Linear actuator − Rotary actuator − Linear actuator (expert) with separate setting options for pin position and nominal range... -
Page 101: Specifying The Pin Position
Start-up and configuration 7.4.3 Specifying the pin position The setting options depend on the entered actuator type: − For linear actuator: Pin position [7.2] 'None', 17, 25, 35, 50, 70, 100, 200 or 300 mm − For rotary actuator: Pin position [7.3]: 90° − For linear actuator (expert): Pin position [7.4]: 10 to 655 mm 1. Turn (within Start-up [7] menu) until Pin position [7.2/7.3/7.4] appears. -
Page 102: Selecting The Initialization Mode
Start-up and configuration 7.4.5 Selecting the initialization mode During initialization the positioner adapts itself optimally to the friction conditions and the signal pressure required by the control valve. The type and extent of autotuning depends on the initial- ization mode selected. The following initialization modes are available: MAX: Maximum range The positioner determines travel/angle of rotation of the closing member from the CLOSED position to the opposite travel stop and adopts this travel/angle of rotation as the operating... -
Page 103: Setting The Initialization Mode
Start-up and configuration 7.4.6 Setting the initialization mode Note Configuration is locked again if no settings are entered within 5 min. Enable configuration: see 7.3. Setting the MAX and NOM initialization modes: 1. Turn (within Start-up [7] menu) until Initialization mode [7.10] appears. to set the MAX or NOM initialization mode. - Page 104 Start-up and configuration until Adopt valve position 1 [7.15] appears. 7. Turn 8. Press to confirm the entered first valve position as valve position 1. 9. Turn until Set point (open-loop control) [7.14] appears. 10. Press and turn to move the valve to the second end position. Enter a value from –34.0 to +34.0°.
-
Page 105: Initializing The Positioner
Start-up and configuration until Nominal range [7.5/7.6/7.7] appears. 8. Turn 9. Press and turn to set the actuator's nominal range. 10. Press to confirm the setting. 11. Turn until Current valve position [7.19] appears. 12. Press and turn to set the current valve position in % (see step 1), at which the valve is currently blocked. - Page 106 Start-up and configuration WARNING Risk of injury by exposed moving parts on the positioner, actuator or valve. Î Do not touch or block exposed moving parts. NOTICE The process is disturbed by the movement of the actuator or valve. Î Do not perform the initialization while the process is running. First isolate the plant by closing the shut-off valves.
-
Page 107: Adjusting The Switching Points
Start-up and configuration 7.6 Adjusting the switching points The switching points of the limit switches are usually adjusted so that a signal is issued in the travel/angle end positions. Optionally, the switching point can also be adjusted to any posi- tion within the travel/angle range, e.g. if an intermediate position is to be indicated. Both switching points are adjusted at two adjustment screws on the top of the rotary knob: − Limit contact 1: adjustment screw 1 − Limit contact 2: adjustment screw 2 The adjustment screws are marked: I for adjustment screw 1 and II for adjustment... -
Page 108: Adjusting The Closed Position
Start-up and configuration 7.6.1 Adjusting the CLOSED position 1. Initialize the positioner (see section 7.5). 2. Move the valve using the manual mode (see the 'Operation' section) to 5 % (read the val- ue off the display). 3. Undo the locking screw (3). 4. Turn the adjustment screws to adjust the tags until they leave or enter the field causing the switching amplifier to respond. You can measure the switching voltage for checking pur- poses. 5. Keep hold of the rotary knob and tighten the locking screw (3) (tightening torque 1.1 ± 0.1 Nm). -
Page 109: Operation
Operation 8 Operation The work described in this section is only to be performed by personnel appropriately quali- fied to carry out such tasks. DANGER Risk of fatal injury due to the ignition of an explosive atmosphere. Î Observe EN 60079-14 (VDE 0165, Part 1) for work on the positioner in potentially ex- plosive atmospheres. -
Page 110: Hart ® Communication
Operation 8.2 HART communication ® Conditions for HART communication: ® Î Supply the positioner with at least 3.6 mA. Î Connect the FSK modem in parallel to the current loop. A DTM file (Device Type Manager) conforming to the Specification 1.2 is available for com- munication. This allows the device, for example to be run with the PACTware user interface. All the positioner's parameters are accessible over the DTM and the user interface. Î... -
Page 111: Dynamic Hart Variables
Operation 8.2.1 Dynamic HART variables ® The HART specification defines four dynamic variables consisting of a value and an engi- ® neering unit. These variables can be assigned to device parameters as required. The univer- sal HART command 3 reads the dynamic variables out of the device. This allows manufac- ® turer-specific parameters to also be transferred using a universal command. In the TROVIS 3730-3 Positioner, the dynamic variables can be assigned as follows in the Configuration folder (> HART communication): Table 8-1: Dynamic HART variables assignment... -
Page 112: Changing Operating Mode
Operation 8.3 Changing operating mode After initialization has been completed successfully, the positioner is in automatic mode (AU- TO). Switchover from automatic to manual mode (MAN) is bumpless. 1. Press (in start screen) to change to the main menu (Target mode menu is displayed). again. -
Page 113: Resetting The Positioner
Operation Note A zero calibration is not possible if there is zero point shift of more than 5 %. (within Start-up [7] menu) until Start zero calibration [7.22] appears. 1. Turn 2. Press to start zero calibration. 3. Confirm warning with OK. 4. Wait until zero calibration is completed. After zero calibration, the positioner remains in the Start zero calibration [7.22] menu item. - Page 114 Operation Table 8-2: Reset function Reset function Description Example Reset diagnosis Resets all diagnostic functions Diagnosis analyses of operating including graphs and histograms. hours in the past are no longer relevant. Reset (standard) Resets the positioner to the state as The attachment situation has upon delivery. Actuator and valve- changed.
-
Page 115: Malfunctions
Note in hazardous areas. Contact SAMSON's After-sales Service for malfunctions not listed in the table. The status classification of error messages can be DANGER changed in SAMSON's TROVIS-VIEW soft- Risk of bursting in the pneumatic actuator ware. - Page 116 Malfunctions Table 9-2: Troubleshooting Error ID Status Message Recommended action/description Init: rated travel not achieved Î Check positioner attachment, pin position and supply pressure. Init: travel too small Î Check positioner attachment, pin position and supply pressure. Init: no movement Î...
- Page 117 Malfunctions Error ID Status Message Recommended action/description Test in progress The positioner is in the test mode (e.g. initialization process, step response test etc.). Î Wait until the test is completed or cancel IP shutdown Î Check power supply/electrical signal. Brownout Î Check power supply/electrical signal. Operating mode not AUTO The positioner is in an operating mode other than AUTO.
- Page 118 Malfunctions Error ID Status Message Recommended action/description Emergency mode active Î Check travel measurement. Logging suspended Î Briefly, the data volume was too high to process. External position sensor error Î Check sensor and sensor lead for possible defects. Working range in closed position Î Check positioner attachment and valve. The working range may have shifted and is close to the end position.
-
Page 119: Emergency Action
Malfunctions Further troubleshooting Description of fault Measures No reading on the display Î Check electrical connection and power supply. Î Check the ambient temperature (the display's operating range is from –30 to +65 °C). Actuator moves too slowly Î Check the supply pressure. Î Correct setting for filter (transit time). Î Check the cross-section of the piping and screw fittings. - Page 120 EB 8484-1 EN...
-
Page 121: Servicing
Î Wear hearing protection when working near the valve. DANGER The positioner was checked by SAMSON Risk of fatal injury due to the ignition of an before it left the factory. explosive atmosphere. Î Observe EN 60079-14 (VDE 0165, −... -
Page 122: Firmware Updates
Contact your local SAMSON engineering and sales office or subsidiary We recommend inspection and testing ac- (u www.samsongroup.com > About cording to Table 10-1 at the minimum. SAMSON > Sales offices) to request a firmware update. Required specifications Please submit the following details on re- questing a firmware update: −... -
Page 123: Decommissioning
Decommissioning 11 Decommissioning To decommission the positioner, proceed as follows: The work described in this section is only to 1. Disconnect and lock the air supply and be performed by personnel appropriately signal pressure. qualified to carry out such tasks. 2. Open the positioner cover and discon- nect the wires for the control signal. - Page 124 11-2 EB 8484-3 EN...
-
Page 125: Removal
Removal 12 Removal The work described in this section is only to be performed by personnel appropriately qualified to carry out such tasks. DANGER Risk of fatal injury due to the ignition of an explosive atmosphere. Î Observe EN 60079-14 (VDE 0165, Part 1) for work on the positioner in po- tentially explosive atmospheres. - Page 126 12-2 EB 8484-3 EN...
-
Page 127: Repairs
Î Do not perform any repair work on your 13.2 Returning devices to own. Î Contact SAMSON's After-sales Service SAMSON for repair work. Defective positioners can be returned to SAMSON for repair. 13.1 Servicing explosion-... - Page 128 13-2 EB 8484-3 EN...
-
Page 129: Disposal
Disposal 14 Disposal We are registered with the German national register for waste electric equipment (stiftung ear) as a producer of electrical and electronic equipment, WEEE reg. no.: DE 62194439 Î Observe local, national and internation- al refuse regulations. Î Do not dispose of components, lubricants and hazardous substances together with your other household waste. - Page 130 14-2 EB 8484-3 EN...
-
Page 131: Certificates
Certificates 15 Certificates The following certificates are included on the next pages: − EU declaration of conformity for TROVIS 3730-3 − EU declaration of conformity for TROVIS 3730-3-110, -510, -810 − EU declaration of conformity for TROVIS 3730-3-850 − TR CU certificate for TROVIS 3730-3 − Declaration according to TR CU 020/2011 for TROVIS 3730-3 − EU type examination certificate for TROVIS 3730-3-110, -510, -810 − Statement of conformity for TROVIS 3730-3-850 −... - Page 132 Management par la qualité totale Development Valve Attachments and Measurement Technologies SAMSON AKTIENGESELLSCHAFT · Weismüllerstraße 3 · D 60314 Frankfurt am Main Revision 08 Fon: +49 69 4009-0 · Fax: +49 69 4009-1507 · E-Mail: samson@samson.de · Internet: www.samson.de 15-2 EB 8484-3 EN...
- Page 133 Management par la qualité totale Development Valve Attachments and Measurement Technologies SAMSON AKTIENGESELLSCHAFT · Weismüllerstraße 3 · D 60314 Frankfurt am Main Revision 08 Fon: +49 69 4009-0 · Fax: +49 69 4009-1507 · E-Mail: samson@samson.de · Internet: www.samson.de EB 8484-3 EN 15-3...
- Page 134 Management par la qualité totale Development Valve Attachments and Measurement Technologies SAMSON AKTIENGESELLSCHAFT · Weismüllerstraße 3 · D 60314 Frankfurt am Main Revision 08 Fon: +49 69 4009-0 · Fax: +49 69 4009-1507 · E-Mail: samson@samson.de · Internet: www.samson.de 15-4 EB 8484-3 EN...
- Page 135 EB 8484-3 EN 15-5...
- Page 136 15-6 EB 8484-3 EN...
- Page 137 EB 8484-3 EN 15-7...
- Page 138 15-8 EB 8484-3 EN...
- Page 139 EB 8484-3 EN 15-9...
- Page 140 15-10 EB 8484-3 EN...
- Page 141 EB 8484-3 EN 15-11...
- Page 142 15-12 EB 8484-3 EN...
- Page 143 EB 8484-3 EN 15-13...
- Page 144 15-14 EB 8484-3 EN...
- Page 145 EB 8484-3 EN 15-15...
- Page 146 15-16 EB 8484-3 EN...
- Page 147 EB 8484-3 EN 15-17...
- Page 148 15-18 EB 8484-3 EN...
- Page 149 EB 8484-3 EN 15-19...
- Page 150 15-20 EB 8484-3 EN...
- Page 151 EB 8484-3 EN 15-21...
- Page 152 15-22 EB 8484-3 EN...
- Page 153 EB 8484-3 EN 15-23...
- Page 154 15-24 EB 8484-3 EN...
- Page 155 EB 8484-3 EN 15-25...
- Page 156 15-26 EB 8484-3 EN...
- Page 157 EB 8484-3 EN 15-27...
- Page 158 15-28 EB 8484-3 EN...
-
Page 159: Annex A (Configuration Instructions)
Annex A (configuration instructions) 16 Annex A (configuration instructions) 16.1 Code list 16.1.1 Structure of the main display Display/numbering Description Start screen: Valve position in % Valve position in degrees Set point in % Set point deviation in % Messages 16.1.2 Menu structure and parameters (menu level) Note The availability of executed menu items and parameters depends on the positioner's configu- ration. - Page 160 Annex A (configuration instructions) Menu Adjustment range/values [default setting]/description Manual set point (MAN) –25.0 to 125.0 % [0.0 %] Adjust the manual set point with the rotary pushbutton. The current travel/angle is displayed in % when the positioner is initialized. If the positioner is not initialized, the position of the lever in relation to the longitudinal axis is indicated in degrees (°).
- Page 161 Annex A (configuration instructions) Menu Adjustment range/values [default setting]/description Nominal range for rotary 24.0 to 100.0° [90.0°] actuator [3.6] to 655.0 mm Nominal range for linear actuator (expert) Max. nom. range Maximum possible nominal range displayed, depending on values entered for pin position and nominal range. Detected nominal range Determined nominal range for rotary actuators displayed.
- Page 162 Annex A (configuration instructions) Menu Adjustment range/values [default setting]/description Direction of rotation 7.20 Counterclockwise/[Clockwise] Determine the lever's direction of rotation. For example: The valve closes when the plug stem moves downward. This action causes the positioner's lever to turn counterclockwise (when looking at the display).
- Page 163 Annex A (configuration instructions) Menu Adjustment range/values [default setting]/description Configuration Set point processing Lower w-range value 8.1.1 [0.0] to 75.0 % The lower set point range value must be lower than upper range value (w-end), 0 % = 4 mA. The set point range is the difference between w-end and w-start and must be Δw ≥ 25 % = 4 mA.
- Page 164 Annex A (configuration instructions) Menu Adjustment range/values [default setting]/description Lower x-range value 8.1.5 [0.0] to 99.0 % Lower range value for travel/angle in nominal or operating range The operating range is the actual travel/angle of the valve and is limited by the lower travel/angle range value and the upper travel/angle range value. Usually, the operating range and the nominal range are identical. The nominal range can be limited to the operating range by the lower and upper x-range values. The value is displayed or must be entered.
- Page 165 Annex A (configuration instructions) Menu Adjustment range/values [default setting]/description Upper end position 8.1.11 [Deactivated]/Activated 51.0 to 100.0 % [99.0 %] End position w >= (set 8.1.12 point cutoff increase) If the set point w reaches up to the entered percentage at the final value that causes the valve to open, the actuator is immediately filled with air (with AIR TO OPEN) or completely vented (with AIR TO CLOSE). This action always lead to the valve being completely opened. Example: set the cutoff to 99 % for three-way valves.
- Page 166 Annex A (configuration instructions) Menu Adjustment range/values [default setting]/description The control parameters are explained in the SAMSON brochure u Controllers and Controlled Systems as part of the Technical Information series (www.samsongroup.com > Service & Support > Downloads > Documentation). Dead band 8.4.1...
- Page 167 Annex A (configuration instructions) Menu Adjustment range/values [default setting]/description Limit contact 3 8.5.11... Terminal designation ..1 Read only Function ..3 Read only Mode ..4 Below limit Above limit Edge control ..5 Conducting/high Locking/low Limit ..6 –20.0 to 120.0 % Current state ..7 Read only Start DO test.
- Page 168 Annex A (configuration instructions) Parameters of options Note The availability of parameters depends on the options used. Menu Adjustment range/values [default setting]/description Configuration Options Option A 8.5.3 Terminal designation 8.5.3.1 Read only Function 8.5.3.3 Binary input (24 V) Configuration 8.5.3.4 Contact (switch) Contact (0 to 24 V) Action upon active 8.5.3.5 Switching state binary input...
- Page 169 Annex A (configuration instructions) Menu Adjustment range/values [default setting]/description Limit 8.5.3.15 –20.0 to 120.0 % Current state 8.5.3.16 Read only Signal of analog output 8.5.3.17 Read only Current state 8.5.3.18 Read only Signal of analog output 8.5.3.19 Read only Start DO test. 8.5.3.20 Confirm to start. Start AO test. 8.5.3.21 Confirm to start.
- Page 170 Annex A (configuration instructions) Menu Adjustment range/values [default setting]/description Error message at position 8.5.6.14 None transmitter high Error message in case of 8.5.6.15 Yes/No condensed state Limit 8.5.6.16 –20.0 to 120.0 % Current state 8.5.6.17 Read only Signal of analog output 8.5.6.18 Read only Current state 8.5.6.19 Read only Signal of analog output...
- Page 171 Annex A (configuration instructions) Menu Adjustment range/values [default setting]/description Fixed value 9.11 Active/Not active (communication) Fixed value over binary 9.12 Reading in % input Fixed value over binary 9.13 Active/Not active input Diagnosis/maintenance Device state 10.1 Status messages 10.1.1 Condensed state 10.1.1.1 Start-up 10.1.1.2 Configuration 10.1.1.29 Messages which may be displayed:...
- Page 172 Annex A (configuration instructions) Menu Adjustment range/values [default setting]/description Tests 10.2 Step response test (PST) 10.2.1 Test to check the valve's ability to move and assess its dynamic control response (PST: partial stroke test/FST: full stroke test). Start PST 10.2.1.1 Start test Test status 10.2.1.3 Reading as progress bar Canceled: x monitoring 10.2.1.4 Reading in %. Canceled when range is violated.
- Page 173 Annex A (configuration instructions) Menu Adjustment range/values [default setting]/description Rated travel not 10.1.1.8 The detected rated travel is smaller than the value in the achieved setting. Recommended action: Check positioner attachment, pin position and supply pressure. 10.1.1.9 Confirm to clear message. No movement 10.1.1.10 Possible cause: valve blockage. Recommended action: Check positioner mounting, pin position and supply air.
- Page 174 Annex A (configuration instructions) Menu Adjustment range/values [default setting]/description Angle limitation 10.1.1.21 The maximum permissible angle of rotation (±30°) has been exceeded. Recommended action: Check positioner attachment, lever and pin position. 10.1.1.22 Confirm to clear message. Timeout 10.1.1.23 Initialization took too long. Possible cause: valve blockage. Recommended action: Check positioner mounting, pin position and supply air. Check piping and configuration of the mounting parts.
- Page 175 Annex A (configuration instructions) Menu Adjustment range/values [default setting]/description Process data 10.1.1.35 Status indicators Operating mode 10.1.1.36 The positioner is in an operating mode other than not AUTO AUTO. An error does not exist. Forced venting 10.1.1.37 The forced venting is active. function Recommended action: Check supply voltage.
- Page 176 Annex A (configuration instructions) Menu Adjustment range/values [default setting]/description Hardware fault 10.1.1.49 Internal device error. Initialization key (INIT) jammed. Recommended action: Restart the positioner. Contact our after-sales service. Limit for total valve 10.1.1.50 Limit of total valve travel limit exceeded. travel exceeded Recommended action: Check the control valve to ensure it functions properly. Lower end position 10.1.1.51 Possible cause: mounting arrangement or travel linkage shifted of positioner has slipped.
- Page 177 Annex A (configuration instructions) Menu Adjustment range/values [default setting]/description Temperature inside 10.1.1.62 Warning not affecting the positioner's functioning. device below min. Recommended action: Check the ambient temperature. limit Temperature inside 10.1.1.63 Warning not affecting the positioner's functioning. device above max. Recommended action: Check the ambient temperature. limit Angle limitation 10.1.1.64...
- Page 178 Annex A (configuration instructions) Reset functions Menu Adjustment range/values [default setting]/description Reset functions Reset diagnosis 11.1 Resets all diagnostic functions including graphs and histograms. Reset (standard) 11.2 Resets the positioner to the state as upon delivery. Actuator and valve-specific settings remain unchanged. Reset (advanced) 11.3 All parameters will be reset to their defaults adjusted upon delivery. Restart 11.4 The positioner is shut down and restarted. Reset initialization 11.5 All parameters for the start-up settings are reset.
-
Page 179: Valve Characteristic Selection
The characteristics that can be selected in menu item 8.1.9 are shown in the following in graph form. Note A characteristic can only be defined (user-defined characteristic) using an operating software (e.g. SAMSON's TROVIS-VIEW or DD/DTM/EDD). Linear Travel/angle [%] Set point [%]... - Page 180 Annex A (configuration instructions) Butterfly valve, equal percentage Butterfly valve, linear Travel/angle [%] Travel/angle [%] Set point [%] Set point [%] Rotary plug valve, linear Rotary plug valve, equal percentage Travel/angle [%] Travel/angle [%] Set point [%] Set point [%] Segmented ball valve, linear Segmented ball valve, equal percentage Travel/angle [%] Travel/angle [%]...
-
Page 181: Annex B
Contact our after-sales service for support concerning service or repair work or when malfunctions or defects arise. You can reach our after-sales service at af- tersalesservice@samsongroup.com. Addresses of SAMSON AG and its subsid- iaries The addresses of SAMSON AG, its subsid- iaries, representatives and service facilities worldwide can be found on our website (www.samsongroup.com) or in all SAMSON product catalogs. - Page 182 17-2 EB 8484-3 EN...
- Page 184 EB 8484-3 EN SAMSON AKTIENGESELLSCHAFT Weismüllerstraße 3 · 60314 Frankfurt am Main, Germany Phone: +49 69 4009-0 · Fax: +49 69 4009-1507 samson@samsongroup.com · www.samsongroup.com...
Need help?
Do you have a question about the TROVIS 3730-3 and is the answer not in the manual?
Questions and answers