Advertisement
Quick Links
Option A & B both continues to step 5.
5
Screw the other Mounting Bracket
to the opposite end of the Flex Arm
with A6 screws (4x).
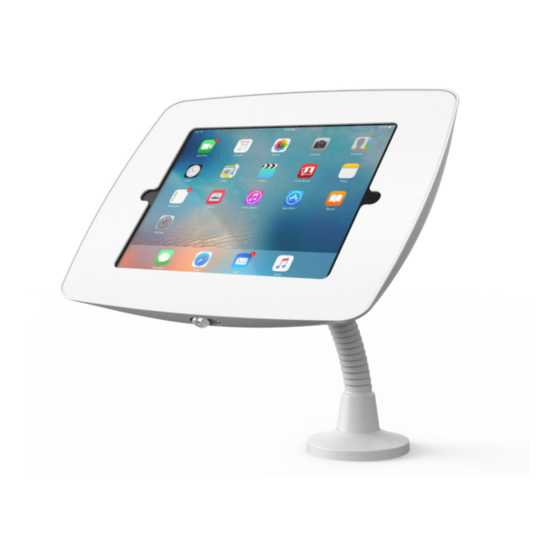
7
Place the required Adapter Pads (G)
onto the matching slots in the case,
numbered 1-4.
9
Install the faceplate and lock with
the key provided (F).
6
Screw the Fusion case onto the
Mounting Bracket of the Flex Arm
with A1 screws & washer (4x).
8
Place the tablet into the case and
plug in the power cable.
10
Optional hex socket screw provided
for added security (D).
Fusion | Flex Arm
Installation Guide
www.bosstab.com
Advertisement

Subscribe to Our Youtube Channel
Related Manuals for Bosstab Fusion


Summary of Contents for Bosstab Fusion
- Page 1 Installation Guide Option A & B both continues to step 5. Screw the other Mounting Bracket Screw the Fusion case onto the to the opposite end of the Flex Arm Mounting Bracket of the Flex Arm with A6 screws (4x).
- Page 2 Mounting Cover Mounting Bracket Flex Arm OPTION A OPTION B UNDER table mounting ABOVE table mounting Cable above Cable below Feed a power cable through the Flex Screw the Flex Arm onto the surface Screw one Mounting Bracket onto the Feed a power cable through the Flex Arm and into your pre-cut hole of Flex Arm with A6 screws (4x).
Need help?
Do you have a question about the Fusion and is the answer not in the manual?
Questions and answers