Table of Contents
Advertisement
Available languages
Available languages
Quick Links
PROFESSIONAL MEDICAL PRODUCTS
MONITOR SPOT-CHECK PC-200
PC-200 SPOT-CHECK MONITOR
Manuale d'uso - User manual
ATTENZIONE: Gli operatori devono leggere e capire
completamente questo manuale prima di utilizzare il prodotto.
ATTENTION: The operators must carefully read and completely
understand the present manual before using the product.
35160
Gima S.p.A.
Via Marconi, 1 - 20060 Gessate (MI) - Italy
Made in P.R.C.
Gima S.p.A. - Via Marconi, 1 - 20060 Gessate (MI) Italy
Italia: tel. 199 400 401 - fax 199 400 403
Export: tel. +39 02 953854209/221/225 fax +39 02 95380056
gima@gimaitaly.com - export@gimaitaly.com
www.gimaitaly.com
z
Σ
IVD
1
0476
z
Σ
Advertisement
Chapters
Table of Contents

Related Manuals for Gima PC-200


Summary of Contents for Gima PC-200
- Page 1 Gima S.p.A. - Via Marconi, 1 - 20060 Gessate (MI) Italy Italia: tel. 199 400 401 - fax 199 400 403 Export: tel. +39 02 953854209/221/225 fax +39 02 95380056 gima@gimaitaly.com - export@gimaitaly.com www.gimaitaly.com PROFESSIONAL MEDICAL PRODUCTS MONITOR SPOT-CHECK PC-200 PC-200 SPOT-CHECK MONITOR Manuale d’uso - User manual...
- Page 2 ITALIANO Questo Manuale è stato scritto per il dispositivo di serie Monitor Spot-Check. Il manuale descrive, conformemente al Monitor Spot-Check le caratteristiche, i requisiti, le principali strutture, le specifiche, i metodi corretti di trasporto, di installazione, d’uso, di funzionamento, di riparazione, di manutenzione e di stoccaggio, ecc. così come le procedure di sicurezza per proteggere sia l’utente che l’attrezzatura.
- Page 3 ITALIANO Istruzioni d’uso Caro Cliente, Grazie per aver acquistato questo prodotto di qualità. Si consiglia di leggere le informazioni seguenti molto attentamente prima di utilizzare il dispositivo. Leggere queste istruzioni con attenzione prima di usare il Monitor Spot-Check. Queste istruzioni descrivono le procedure operative che devono essere seguite rigidamente. La mancata osservanza di queste istruzioni può...
- Page 4 ITALIANO Si prega di controllare il Monitor completamente per verificare che gli accessori possano funzionare in modo sicuro e normale. Quando l’utente è collegato al dispositivo, la dispersione totale di corrente può oltrepassare i limiti e causare un pericolo potenziale per l’utente come risultato. ...
- Page 5 ITALIANO Attenzione: Si prega di stoccare e far funzionare il dispositivo a specifiche condizioni di temperatura, umidità e pressione atmosferica. Delle condizioni ambientali eccessive possono influenzare il risultato della misurazione. Per evitare danni al dispositivo, se il Monitor si bagna, si prega di non avviarlo finché non è...
-
Page 6: Table Of Contents
ITALIANO Indice CAPITOLO 1 PANORAMICA ....................8 Caratteristiche ......................8 Nome del prodotto e Modello ..................8 Struttura ........................9 Utilizzo designato ......................9 Ambiente di lavoro e alimentazione ................9 Struttura globale ......................10 CAPITOLO 2 INSTALLAZIONE E COLLEGAMENTO ............11 CAPITOLO 3 ISTRUZIONI OPERATIVE .... - Page 7 ITALIANO Misurazione di Temperatura ..................28 Misurazione del Glucosio nel sangue (Opzionale) ............. 28 Misurazione ECG (Opzionale) ..................28 Dimensione e Peso ....................28 CAPITOLO 5 INDIVIDUAZIONE E CORREZIONE ERRORI ..........29 CAPITOLO 6 LISTA DEL CONTENUTO ................30 CAPITOLO 7 MANUTENZIONE E ASSISTENZA ..............31 Manutenzione Tecnica ....................
-
Page 8: Capitolo 1 Panoramica
ITALIANO Capitolo 1 PANORAMICA 1.1 Caratteristiche Piccolo, leggero e facile da trasportare e far funzionare; • Può misurare la pressione sanguigna, la saturazione d’ossigeno, le pulsazioni, la temperatura, ecc. • Il dispositivo trasmette i dati di misurazione al dispositivo centrale con comunicazione Wireless. • I dati misurati possono essere mostrati, salvati o gestiti dal dispositivo centrale, come smartphone, tablet, e computer con i sistemi Android, IOS e Windows. 1.2 Nome del prodotto e Modello Nome: Monitor Spot-Check Modello e Configurazione: Configurazione... -
Page 9: Struttura
ITALIANO NOTA: “√” significa che la funzione è disponibile, e “--” significa che questa funzione non è disponibile. 1.3 Struttura Questo dispositivo consiste di una unità principale, di accessori funzionali (fascia, sensore , sonda per la temperatura a infrarosso) e di un pacchetto software che funziona sul sistema centrale. -
Page 10: Struttura Globale
ITALIANO Output: corrente d.c.5.0V 1.2° Alimentazione interna fornita con batteria integrata: d.c. 3.7V (batteria ricaricabile) con capacità 1000mAh. 1.6 Struttura globale Questo è un dispositivo costituito da moduli di misurazione di vari parametri fisiologici, così da eseguire la funzione tutti in uno. Il modulo di misurazione per ogni parametro fisiologico è... -
Page 11: Capitolo 2 Installazione E Collegamento
ITALIANO Misurazione NIBP: il modulo per questa misurazione è dentro l’unità principale e il relativo sistema pneumatico realizza la misurazione e invia i dati alla scheda madre. Misurazione SpO : la sonda contiene il circuito di misurazione per realizzare la misurazione delle pulsazioni e della saturazione d’ossigeno. - Page 12 3. Se la scansione è riuscita, il risultato, un link per scaricare l’APP “Android PC-200/300SNT.apk”, verrà mostrato sullo schermo. 4. Aprire il link per scaricare il software dell’APP “Android PC-200/300SNT.apk”. Installare l’APP se è stata scaricata correttamente. Istruzioni per la Misurazione • Assicurarsi che l’APP sia correttamente collegata...
-
Page 13: Capitolo 3 Istruzioni Operative
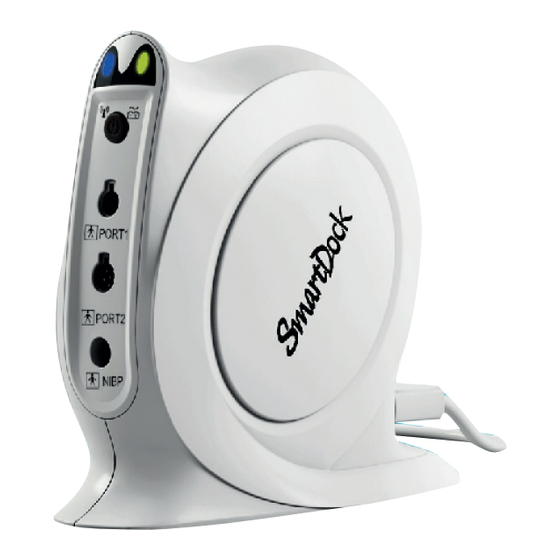
ITALIANO Capitolo 3 ISTRUZIONI OPERATIVE 3.1 Aspetto Indicatore Indicatore di collegamento dell’alimentazione Wireless Interruttore Connettori di segnale Connettore fascia Interfaccia dati USB Alimentazione DC esterna, presa d’ingresso Figura 3.1A Pannello frontale Figure 3.1B Pannello retrostante... - Page 14 ITALIANO Figura 3.1C Vista laterale Descrizione: 1. Indicatori: Per i dettagli si veda la tabella seguente Indicatore di collegamento Lampeggiamento blu Wireless non collegato Wireless Luce blu Wireless collegato Alimentazione con batteria integrata Indicatore Luce gialla Tensione batteria normale dell’alimentazione Luce arancione Tensione batteria bassa Indicatore di collegamento...
-
Page 15: Effettuare Una Misurazione
ITALIANO 2. Interruttore: Esercitare una lunga pressione per accendere/spegnere il dispositivo. Quando il Wireless è collegato, esercitare una pressione breve sull’interruttore può iniziare/ annullare la misurazione NIBP. Se la connessione Wireless manca per più di 5 minuti, il dispositivo si spegnerà in automatico. ... -
Page 16: Misurazione Della Pressione Sanguigna
ITALIANO 3.2.1 Misurazione della pressione sanguigna 1. Per mettere la fascia, aprirla e avvolgerla intorno alla parte superiore del braccio regolando la stretta appropriata. Per la corretta posizione della fascia fare riferimento alla figura 3.2. Figura 3.2 Posizione della fascia 2. -
Page 17: Misurazione Spo
ITALIANO Misurazioni continue possono causare porpora, nevralgia e mancanza di sangue. NON avvolgere la fascia su arti con tubi per trasfusioni o intubazioni o su aree con lesioni della pelle, altrimenti, possono essere causati danni a detti arti. ... -
Page 18: Misurazione Di Temperatura
ITALIANO 4. Il dispositivo inizia la misurazione. Il risultato misurato verrà visualizzato dall’APP sul dispositivo centrale. Figura 3.3 dimostrazione per la sonda SpO Istruzioni di sicurezza per la misurazione SpO NON mettere la sonda SpO e la fascia per la pressione sullo stesso arto, altrimenti la misurazione della pressione sanguigna potrebbe influenzare la misurazione della SpO ... - Page 19 ITALIANO Punta di misurazione Schermata di visualizzazione della sonda per la temperatura Tasto di misurazione completa Schermo di visualizzazione Coperchio della punta Tasto on/off di misurazione di alimentazione Coperchio batteria Figura 3.4A sonda infrarossi per temperatura Figura 3.4B Procedura operativa: 1.
- Page 20 ITALIANO Descrizione: • Quando si inserisce la punta di misurazione della sonda per la temperatura nell’orecchio, si prega di metterla abbastanza in profondità, poi effettuare una breve pressione sul tasto di misurazione. • Se la sonda di temperatura rileva una mancanza hardware, sullo schermo della sonda a infrarossi compare “Err” e non è possibile entrare in modalità di misurazione. • Se è necessario fare una misurazione ulteriore, premere il tasto misurazione e ripetere le fasi 2 e 3. • La temperatura corporea normale varia in un intervallo. La tabella seguente mostra l’intervallo di variazione di temperatura in diverse parti del corpo, quindi è...
-
Page 21: Misurazione Del Glucosio Nel Sangue (Opzionale)
ITALIANO Istruzioni di sicurezza per la Misurazione di temperatura NON misurare se il soggetto è in movimento. Il paziente con problemi di timpanite od otite NON deve utilizzare il dispositivo per la misurazione. Quando la sonda a infrarossi per la temperatura è collegata al dispositivo, la sonda a infrarossi sarà... - Page 22 ITALIANO Si prega di fare riferimento alla Guida Utente per il “Sistema di monitoraggio del glucosio nel sangue Smartest Persona” per la descrizione dettagliata della funzione 5. Interfaccia dati: può essere utilizzata per collegare il dispositivo per la trasmissione dei dati. 6.
- Page 23 ITALIANO Figura 3.6B Istruzioni per il test 2. Bucare il dito e lasciar formare una goccia di sangue. 3. Applicare la goccia sul bordo frontale della striscia mentre l’icona del sangue lampeggia sul misuratore. Attendere 6 secondi e il Misuratore mostrerà il risultato del test. 4.
-
Page 24: Misurazione Ecg (Opzionale)
ITALIANO La striscia di controllo deve essere usata il prima possibile dopo averla scartata, e le strisce non utilizzate devono essere tenute in una bottiglia in condizioni ermetiche. Fare la misurazione solo una volta entro 1 min. La punta con il sangue raccolto è un elemento da smaltire. Si raccomanda di rimettere il cappuccio di plastica e gettarla nel raccoglitore apposito. - Page 25 ITALIANO � Start / Stop: Misurazione ECG Start/stop. Figura 3.7B Misurazione sul palmo Figura 3.7C Misurazione sul petto Figura 3.7D Misurazione sulla gamba Per ottenere un segnale ECG chiaro e di qualità, può essere utilizzato il conduttore della misurazione. Collegare il conduttore saldamente alla sua presa sul dispositivo. Sistemare gli elettrodi e collegare il conduttore Figura 3.7E per ottenere il segnale Conduttore II ECG;...
- Page 26 ITALIANO � Istruzioni di sicurezza per la misurazione ECG 1. Controllare il dispositivo per assicurarsi che non ci siano danni visibili che possano influenzare la sicurezza dell’utente e la prestazione della misurazione. Quando ci sono danni evidenti, smettere di utilizzare l’unità. 2.
-
Page 27: Capitolo 4 Specifiche Tecniche
ITALIANO Capitolo 4 SPECIFICHE TECNICHE 4.1 Misurazione Pressione sanguigna 1. Tecnica: Oscillometrica 2. Intervallo di misurazione della pressione: 0mmHg~300mmHg (39.9kPa) 3. Pressione sanguigna, intervallo di misurazione: SIS: 60mmHg~240mmHg DIA: 30mmHg~180mmHg 4.2 Misurazione SpO 1. Tecnica: ottica con doppia lunghezza d’onda Lunghezza d’onda: Luce rossa: 663nm, Luce infrarossa: 890nm Alimentazione massima uscita ottica: inferiore a 2mW media massima 2. -
Page 28: Misurazione Di Temperatura
ITALIANO 4.4 Misurazione di Temperatura 1. Intervallo di misurazione: 32.0°C~43.0°C 2. Accuratezza della misurazione: ±0.2°C per intervallo di TEMP da 35.0°C a 42.0°C, e ±0.3°C è per il resto. 4.5 Misurazione del Glucosio nel sangue (Opzionale) 1. Tecnica: Amperometrica, ossidasi glucosio 2. -
Page 29: Capitolo 5 Individuazione E Correzione Errori
ITALIANO Capitolo 5 INDIVIDUAZIONE E CORREZIONE ERRORI Problema Possibile causa Soluzione Non è possibile La batteria integrata è esaurita Ricaricare collegando l’adattatore accendere di alimentazione il dispositivo Alcune parti fornite da altri Rimuovere le parti relative sono inserite al connettore e provare nuovamente. -
Page 30: Capitolo 6 Lista Del Contenuto
ITALIANO Capitolo 6 LISTA DEL CONTENUTO Elemento Descrizione: Quantità Controllo Monitor Spot-Check Un pezzo Borsa Un pezzo Manuale d’uso Un pezzo Fascia Un pezzo cavo USB Un pezzo Caricatore (con spina USB) Un pezzo Sonda per la temperatura Un pezzo Sonda SpO Smart Un pezzo... -
Page 31: Capitolo 7 Manutenzione E Assistenza
ITALIANO Capitolo 7 MANUTENZIONE E ASSISTENZA Il dispositivo deve essere sottoposto alla dovuta manutenzione per assicurare le massime prestazioni e una lunga durata di servizio. In aggiunta al periodo di garanzia, l’azienda offre anche un servizio di assistenza a lungo termine per ogni cliente. È necessario che l’utente legga e segua le istruzioni operative, le informazioni importanti e le misure di manutenzione. -
Page 32: Manutenzione Della Batteria
ITALIANO quella annuale, il dispositivo deve essere completamente ispezionato da personale qualificato, includendo le verifiche di funzione e sicurezza. Se l’ospedale manca di assicurare un programma di manutenzione soddisfacente, il dispositivo potrebbe disabilitarsi e causare danni al paziente. Se ci sono indicazioni di danni a un cavo e a un trasduttore se viene indicato il loro deterioramento, è... -
Page 33: Pulizia E Disinfezione Dell'unità Principale
ITALIANO NON colpire o urtare con forza. NON utilizzare questa batteria in altri dispositivi. NON utilizzare questa batteria con temperature sotto i -20°C o sopra i 60°C. Per conservare la potenza della batteria e per prolungare la sua vita, si prega di caricare la batteria di routine. -
Page 34: Pulizia E Disinfezione Degli Accessori
ITALIANO Diluire il detergente. NON utilizzare materiali ruvidi. Il dispositivo deve essere disinfettato. Prima pulire il dispositivo. Non lasciare che il liquido per la pulizia scorra negli spinotti di connessione del dispositivo al fine di evitare danni. ... -
Page 35: Stoccaggio
ITALIANO Strofinare il termometro con un panno leggero se si è sporcato. Strofinare il termometro e tenerlo nella confezione per la manutenzione dopo l’uso. 7.4 Stoccaggio Se il dispositivo non viene utilizzato per un lungo periodo di tempo, pulirlo e rimetterlo nella confezione, che deve essere tenuta in un posto asciutto e con buona ventilazione a riparo dalla polvere e da gas corrosivi. -
Page 36: Simboli
ITALIANO Simboli Simbolo Descrizione: Simbolo Descrizione: Interruttore/ tasto di scelta rapida DC 5V 1A Potenza DC esterna ingresso per misurazione NIBP Tipo BF parti applicate Porta riservata Fare riferimento al Manuale Alimentazione Wireless Numero di serie NIBP Connettore Fascia NIBP Dispositivo Classe II Il connettore di segnale PORTA1 /... -
Page 37: Garanzia
La garanzia è valida per il tempo di 12 mesi dalla data di fornitura GIMA. Durante il periodo di validità della garanzia si provvederà alla riparazione e/o sostituzione gratuita di tutte le parti difettose per cause di fabbricazione ben accertate, con esclusione delle spese di mano d’opera o eventuali... - Page 38 ENGLISH This Manual is written for the current Spot-Check Monitor. The Manual describes, in accordance with the Spot-Check Monitor’s features and requirements, main structure, functions, specifications, correct methods for transportation, installation, usage, operation, repair, maintenance and storage, etc. as well as the safety procedures to protect both the user and equipment. Refer to the respective chapters for details.
- Page 39 ENGLISH Instruction to User Dear Customers, Thank you for purchasing this quality product. Please read the following information very carefully before using this device. Read these instructions carefully before using this Spot-Check Monitor. These instructions describe the operating procedures to be followed strictly. Failure to follow these instructions can cause monitoring abnormity, equipment damage and personal injury.
- Page 40 ENGLISH When the user is connected with other devices, the total leakage current may exceed the limitation and cause potential danger to the user as a result. All combinations of equipment must be in compliance with standard of IEC 60601-1-1 medical and electric system requirements.
- Page 41 ENGLISH Attentions: Please store and operate the device in specified temperature, humility and atmospheric pressure. The excessive ambient environment may affect the measuring result. To avoid damaging device, if the monitor gets wet, please do not start it until it is air-dry. ...
- Page 42 ENGLISH Table of contents CHAPTER 1 OVERVIEW ......................44 Features .........................44 Product Name and Model ..................44 Conformation ......................45 Intended Use ......................45 Working Environment and Power Supply ...............45 Overall structure .....................46 CHAPTER 2 INSTALLATION AND CONNECTION .............47 CHAPTER 3 OPERATION INSTRUCTION ................49 Appearance ......................49 Make Measurement ....................51 3.2.1 Blood Pressure Measurement ...............52...
- Page 43 ENGLISH Temperature Measurement ..................64 Blood Glucose Measurement (Optional) ..............64 ECG Measurement (Optional) ................64 Dimension and Weight ...................64 CHAPTER 5 TROUBLESHOOTING ..................65 CHAPTER 6 PACKING LIST ....................66 CHAPTER 7 MAINTENANCE AND SERVICE ..............67 Technical Maintenance ...................67 7.1.1 Daily Examination ..................67 7.1.2 Routine Maintenance ..................67 7.1.3 Battery Maintenance ..................68 Cleaning and Disinfection of the Main Unit ............69 Cleaning and Disinfection of Accessories .............70...
-
Page 44: Chapter 1 Overview
ENGLISH Chapter 1 OVERVIEW 1.1 Features • Small in size, light in weight, easy to carry and operate; • Blood pressure, oxygen saturation, pulse rate and temperature etc. can be measured; • The device transmits measuring data to the host device via wireless communication. • The measured data can be displayed, stored and manged on the host device, such as smart phone, tablet, and computer, which can be can Android, IOS and Windows system. 1.2 Product Name and Model Name: Spot-Check Monitor Model and Configuration: Configuration Model NIBP Pulse Rate Temperature... -
Page 45: Conformation
ENGLISH 1.3 Conformation The Spot-Check Monitor consists of the main unit, functional accessories (cuff, SpO sensor, infrared temperature probe) and the software package running on the host system. 1.4 Intended Use The Spot-Check Monitor is applicable for measuring adult’s physiological parameters, such as body temperature (TEMP), functional oxygen saturation (SpO ), pulse rate (PR), and non-invasive blood pressure (NIBP). -
Page 46: Overall Structure
ENGLISH 1.6 Overall structure The Spot-Check Monitor is a device consisting several physiological parameter measurement modules, so as to perform all-in-one measuring function. The measurement module for each physiological parameter locates at either smart sensor or main unit. The measured data are collected to the mother board, then transmitted to the host device for display and further processing. -
Page 47: Chapter 2 Installation And Connection
ENGLISH NIBP measurement: the NIBP measurement module inside the main unit and the related pneumatic system perform NIBP measurement and send data to the mother board. measurement: the SpO probe contains the measuring circuit to perform the pulse rate and oxygen saturation measurement. The result data is sent to the mother board. TEMP measurement: the temperature probe contains the measuring circuit to perform the temperature measurement. - Page 48 3. If successfully scanned, the the scanning result, that is a web link for downloading the APP software “Android PC-200/300SNT.apk” will be displayed on the smart phone. 4. Open this web link by a web browser to download the APP software “Android PC-200/300SNT.apk”.
-
Page 49: Chapter 3 Operation Instruction
ENGLISH Chapter 3 OPERATION INSTRUCTION 3.1 Appearance Wireless Power indicator connection indicator Power switch Signal connectors Cuff connector USB data interface External DC power input socket Figure 3.1A Front panel Figure 3.1B Rear panel... - Page 50 ENGLISH Figure 3.1C Side view Description: 1. Indicators: details see the below table: Wireless connection Blue flashing Wireless link is not connected indicator Blue light Wireless link is connected Power supply by built-in battery Yellow light Battery voltage is normal Power supply indicator Orange light Battery voltage is low...
-
Page 51: Make Measurement
ENGLISH 2. Power switch: long time press it to power on/off Spot-Check Monitor. When wireless link is connected, short press the power switch can start/cancel NIBP measurement. If the wireless connection fails for over 5 minutes, the device will power off automatically. ... -
Page 52: Blood Pressure Measurement
ENGLISH 3.2.1 Blood Pressure Measurement 1. When putting on the cuff, spread the cuff and wrap it around the upper arm evenly to appropriate tightness. The correct cuff position refers to figure 3.2. Figure 3.2 Cuff position 2. Connect the hose from the cuff to the connector on the lower-side of the device with the mark of “NIBP”. -
Page 53: Spo Measurement
ENGLISH Do NOT wrap the cuff on limbs with transfusion tube or intubations or skin lesion area, otherwise, damages may be caused to the limbs. The measurement should be taken at appropriate intervals. Continuous measurement at too short internals may lead to pressed arm, reduced blood flow and lower blood pressure, and resulting inaccurate reading of blood pressure. -
Page 54: Temperature Measurement
ENGLISH Figure 3.3 Demonstration for SpO probe Safety instruction for SpO measurement Do NOT put the SpO probe and pressure cuff on the same limb, otherwise the blood pressure measurement may affect the SpO measurement. Please do NOT use nail polisher or other cosmetic product on the nail. ... - Page 55 ENGLISH Measuring tip The whole display screen of temperature probe Measuring key Display screen Cover of measuring tip Power on/off key Battery cover Figure 3.4A The infrared temperature probe Figure 3.4B Operation procedure: 1. Connect the infrared temperature probe to the signal connector (with mark of “PORT1” or “PORT2”).
- Page 56 ENGLISH • If the temperature probe detects a hardware failure, the display screen on the infrared temperature probe will show “Err” and will not enter into measuring mode. • If you need to make a measurement once more, please press the measuring key and repeat step 2 and step 3. • Normal body temperature varies in a range. The following table shows the temperature varying range at different body position, so it is meaningless to simply compare the temperature readings from different position. Temperature varying range at different body positions: 34.7 ~ 37.3 °C Oral...
-
Page 57: Blood Glucose Measurement (Optional)
ENGLISH probe will be always at power-on status, so pressing the power on/off key on the temperature probe will not take effect. 3.2.4 Blood Glucose Measurement (Optional) By use of the optional link cable for Smartest Persona Glucose Meter, connect the Smartest Persona Glucose Meter to the signal connector on the Spot-Check Monitor with the mark of “Port1”... - Page 58 ENGLISH 7. Ejector: remove the used strip. Operation for Lancing Device and Blood Lancet 1. Unscrew the lancing device by turning the end cap counter clockwise. 2. Insert a new lancet firmly into the lancet holder. 3. Twist off the protective tip of the lancet. 4.
- Page 59 ENGLISH Figure 3.6B Testing instruction 2. Lance the finger and let a blood drop form. 3. Apply the blood drop to the front edge of the test strip when the blood drop icon is still blinking on the Meter. Wait for 6 seconds, and the Meter will display the test result. 4.
-
Page 60: Ecg Measurement (Optional)
ENGLISH The testing strip should be used as soon as possible after unpacking, and the unused strips should be kept in the bottle with airproof condition. Take measurement only once within 1 min. The blood-collect pinhead is a disposable item. It’s recommended to insert it back to the plastic cover and throw it into the specific dustbin. - Page 61 ENGLISH � Start / Stop: Start/Stop ECG measurement. Figure 3.7B Palm measurement Figure 3.7C Chest measurement Figure 3.7D Leg measurement To obtain clear and high quality ECG signal, the lead wire measurement can be used. Connect the lead wire firmly to the lead wire socket of the device.
- Page 62 ENGLISH � Safety Instruction for ECG Measurement 1. Check the device to make sure that there is no visible damage that may affect user’s safety and measurement performance. Stop using the unit, when there is obvious damage. 2. Do NOT make diagnosis oneself by the measurement and measurement results, always consult the doctor if abnormal information is presented frequently.
-
Page 63: Chapter 4 Technical Specifications
ENGLISH Chapter 4 TECHNICAL SPECIFICATIONS 4.1 Blood Pressure Measurement 1. Technique: Oscillometric 2. Pressure measuring rang: 0mmHg~300mmHg (39.9kPa) 3. Blood pressure measuring range: SYS: 60mmHg~240mmHg DIA: 30mmHg~180mmHg 4.2 SpO Measurement 1. Technique: optical with dual-wavelength Wavelength: Red light: 663nm, Infrared light: 890nm Maximal optical output power: less than 2mW maximum average 2. -
Page 64: Temperature Measurement
ENGLISH 4.4 Temperature Measurement 1. Measuring range: 32.0°C~43.0°C 2. Measuring accuracy: ±0.2°C is for TEMP range from 35.0°C to 42.0°C, and ±0.3°C is for the rest. 4.5 Blood Glucose Measurement (Optional) 1. Technique: Amperometric, glucose oxidase 2. Measuring range: 1.1mmol/L~33.3mmol/L (20~600mg/dL) 3. -
Page 65: Chapter 5 Troubleshooting
ENGLISH Chapter 5 TROUBLESHOOTING Trouble Possible reason Solution Can not turn on The built-in battery is drained Recharging by connecting the power the device supply adapter Some parts provided by others are Remove the related parts inserted to the connector and try again. -
Page 66: Chapter 6 Packing List
ENGLISH Chapter 6 PACKING LIST Item Description Quantity Check Spot-Check Monitor One piece Handbag One piece User Manual One piece Cuff One piece USB cable One piece Charger (with USB socket) One piece Temperature probe One piece Smart SpO probe One piece Smartest Persona Glucose Meter (with lancing device and link cable) -
Page 67: Chapter 7 Maintenance And Service
ENGLISH Chapter 7 MAINTENANCE AND SERVICE The Spot-Check Monitor should be properly maintained to ensure its maximum performance and long service life. In addition to the warranty period, the company also offers long-term service for each customer. It is important that the user read and follow the operating instructions, important information and maintenance measures. -
Page 68: Battery Maintenance
ENGLISH If the hospital fails to carry out a satisfactory maintenance program about the monitor, it may be disabled and cause harm to the patient. If there is any indication of cable and transducer damage or they deteriorate, they are prohibited from any further use. -
Page 69: Cleaning And Disinfection Of The Main Unit
ENGLISH routinealy. Generally, charge the battery every 3 months if the device has not been used for more than 3 months. Only use the battery with the specification recommended by the manufacturer. Whether the monitor is on or off, the built-in battery will be charged as long as the monitor is connected to an AC adapter and AC power is on. -
Page 70: Cleaning And Disinfection Of Accessories
ENGLISH Clean the exterior of the connector only. Do NOT let any liquid flow into the shell or any parts of the monitor. Do NOT let the cleaner and disinfectant stay on its surface. Do NOT perform high pressure sterilization to the monitor. ... -
Page 71: Storage
ENGLISH 7.4 Storage If the equipment will not be used for long time period of time, wipe it clean and keep it in the packaging, which shall be kept in a dry good ventilation place free from dust and corrosive gases. Storage environment: Ambient temperature: -20°C~60°C Relative humidity: ≤93% Atmospheric pressure: 53.0kPa~106.0kPa... -
Page 72: Symbols
ENGLISH Symbols Symbol Description Symbol Description Power switch / Shortcut key DC 5V 1A External DC power input for NIBP measurement Type BF applied parts The reserved port Refer to Manual Power supply Wireless Serial Number NIBP NIBP cuff connector Class II device The signal connector PORT1 /... -
Page 73: Warranty Clause
The warranty is valid for 12 months from the date of supply of GIMA. During the period of validity of the warranty, GIMA will repair and/or replace free of charge all the defected parts due to production reasons.
Need help?
Do you have a question about the PC-200 and is the answer not in the manual?
Questions and answers