Table of Contents
Advertisement
Quick Links
Advertisement
Table of Contents

Related Manuals for EuropAce ECH 7111S


Summary of Contents for EuropAce ECH 7111S
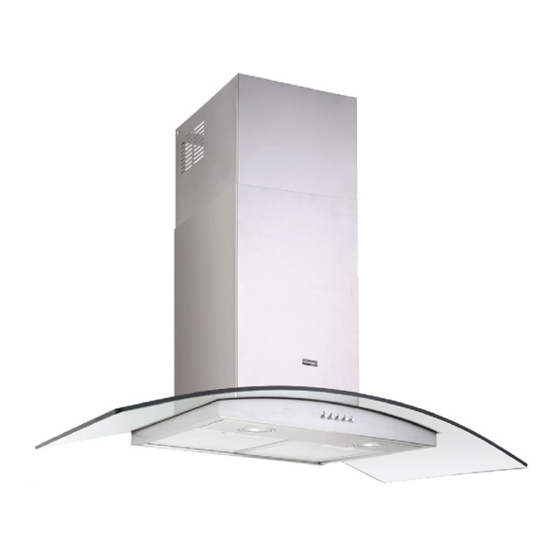
- Page 1 DELUXE CHIMNEY HOOD ECH 7111S Thank you for purchasing EuropAce Products.
-
Page 2: Table Of Contents
Table of Contents From the Manufacturer • Specifications • SAFETY : Read this irst ! • Description of Parts • Ducted vs. Recirculation ersion • Installation • Wall rilling and racket ixing Mounting the ood ody Connections Chimney Assembly Operation •... -
Page 3: From The Manufacturer
From the Manufacturer This appliance and it’s packaging are produced by • processes that minimize waste and respect the environment. Please help us to continue the protection of the environment • by disposing of the packaging in a correct manner. Safety ! Cling film, polystyrene and plastic wrappings must be kept •... -
Page 4: Specifications
Specifications RECIRCULATION MODE AIR OUTLET Insert the connection extension pieces • 220-240V 50Hz Input Air outlet connection laterally in air outlet connection. Total Power 402W Make sure that the outlet of the extension • Motor Power 400W pieces is horizontally and vertically Lamp Power aligned with the chimney outlets. - Page 5 SAFETY : Read this First ! Do not connect the appliance if there are obvious signs of transportation • damage. Read this user manual thoroughly before attempting to use this • appliance. Installation and repair should be attempted only by qualified technical •...
- Page 6 Fix the hood body to wall using 2 (ST5 x 25) screw, tighten the screw • Multiple plugs and extension cables must not be used. Overload is • firmly. Note: Adjust the hood body alignment if necessary. dangerous and may cause a fire. Place mounting bracket on the wall at desired height level, aligning •...
-
Page 7: Description Of Parts
Description of Parts Mounting the hood body Before attaching the hood body, tighten the two screws Vr located on the • A. Chimney Mounting Bracket hood body mounting points. B. Upper Chimney Cover Hook the hood body onto the support screws. •... - Page 8 Ducted vs. Recirculation mode Ducted vs. Recirculation mode You can choose to install the hood as a ducted or recirculation mode :- You can choose to install the hood as a ducted or recirculation mode :- Ducted mode (Vented mode) •...
- Page 9 Installation Installation Wall drilling and bracket fixing Wall drilling and bracket fixing Wall mounting Wall mounting Do ensure that the appliance is mounted on a solid surface which could Do ensure that the appliance is mounted on a solid surface which could withstand the appliance’s weight withstand the appliance’s weight Draw a vertical line at the center of the wall.
- Page 10 Fix the hood body to wall using 2 (ST5 x 25) screw, tighten the screw • firmly. Note: Adjust the hood body alignment if necessary. Place mounting bracket on the wall at desired height level, aligning • bracket center at vertical line (see D). Mark the center of the bracket holes and drill 8mm holes.
- Page 11 Mounting the hood body Before attaching the hood body, tighten the two screws Vr located on the • hood body mounting points. Hook the hood body onto the support screws. • Fully tighten the support screws. • Adjust screws Vr to level the hood body. •...
- Page 12 Specifications RECIRCULATION MODE AIR OUTLET Insert the connection extension pieces • Air outlet 220-240V 50Hz Input connection laterally in air outlet connection. Total Power 402W Make sure that the outlet of the extension • Motor Power 400W pieces is horizontally and vertically aligned with the chimney outlets.
- Page 13 Chimney assembly SAFETY : Read this First ! Do not connect the appliance if there are obvious signs of transportation • damage. Read this user manual thoroughly before attempting to use this • appliance. Installation and repair should be attempted only by qualified technical •...
-
Page 14: Ducted Vs. Recirculation Ersion
Operation Table of Contents From the Manufacturer • Specifications • SAFETY : Read this irst ! • Description of Parts • Ducted vs. Recirculation ersion • Installation • Wall rilling and racket ixing Mounting the ood ody Connections Chimney Assembly Operation •... -
Page 15: Schematic Diagram
Troubleshooting Troubleshooting From the Manufacturer This appliance and it’s packaging are produced by Schematic Diagram • Symptoms Symptoms Possible Cause Possible Cause Action Action processes that minimize waste and respect the environment. Ensure the plug Ensure the plug Motor does not Motor does not No electrical supply No electrical supply... - Page 16 The Warranty Card is not provided in the product packaging. You can register the product warranty online at our website https://www.europace.com.sg/ewarranty/ within 7 (seven) days from the date of purchase. You will enjoy an additional 3 months of the product standard warranty when you register online.
- Page 17 - Full parts warranty apply to Refrigerators, Air Conditioners & Freezers (Outdoor warranty). Check out the warranty coverage of your appliance at www.europace.com.sg b) The owner waives all or any claims to compensation monetary or otherwise which he/she may be entitled to and shall agree to accept any compensation whatsoever by way of additional repairs or otherwise which we in our absolute discretion may deem t to o er.
- Page 18 g) This warranty will not cover chemical cleaning, maintenance service, general service and overhaul, which if con rm is chargeable. h) Defects or fault in the appliance which has been used for commercial purposes or which have been rented/leased or which have been otherwise subject to other than household use.
- Page 19 RELATED PRODUCTS & MAIN CONTACT HOTLINE System Split Aircons | Tel: 6858 0801| Email: systemac@strategic.com.sg (Twin City) Portable & Casement Aircons | Tel: 6291 0800 | Email: portableac@strategic.com.sg (Jia Yue) Refrigerators, Washing machines, Cookers & other major appliances | Tel: 6289 0802 | Email: mda@strategic.com.sg (TnG)
Need help?
Do you have a question about the ECH 7111S and is the answer not in the manual?
Questions and answers