Advertisement
Quick Links
Advertisement

Related Manuals for Aven 200X


Summary of Contents for Aven 200X
- Page 1 Digital Microscope for MAC REV.B...
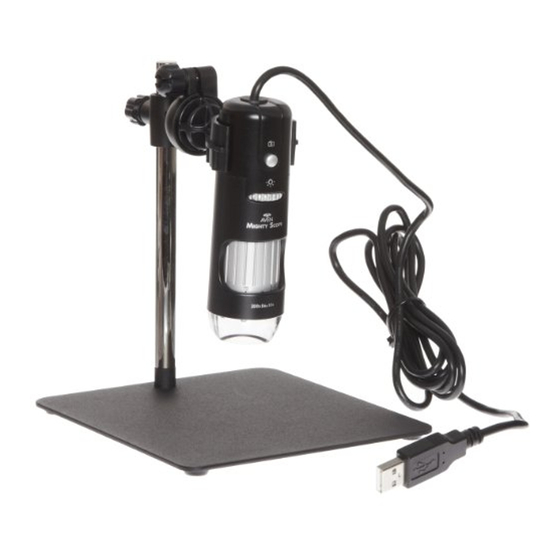
- Page 2 ● Mac OS X 10.6 or later ● Intel® Processor The 200X digital microscope provides a 10~200X adjustable magnification range, and the 500X microscope provides 500X magnification. The built-in high-performance LEDs can illuminate an object without using any auxiliary lighting. By adjusting the focus knob on the camera, the magnified image can be viewed, captured and recorded directly from the computer screen with dresolution.
- Page 3 8. A clear focused image can be obtained by adjusting the focus knob as well as Install Software (MAC) changing the distance between the object and the digital microscope.(fig.5) 9. If the image is blurred, adjust the focus knob to the right end and view the image of 1.Drag the MicroViewer to the Applications folder.
-
Page 4: Function Key Lists
Software application (Mac) Function Key Lists: 1. Double click the MicroViewer icon on your “Applications” folder. ICON Function Function Instruction ** Make sure the microscope is plugged into the USB port. Freeze the live image on the screen. Click Freeze icon again to back ** Key in the Mac OS version Serial Number which can be found on the paper CD envelope Freeze the live image. - Page 5 Preference: Image file type Set up the compression type of video. Click the Prefernce button and the following window will appear: If the full screen mode box is marked, MicroViewer will start on full-screen mode automatically. 4:3:Live video zone will remain in a 4:3 aspect ration. This Full mode is necessary for the measurement function.
- Page 6 Measurement: Measurement-Calibrate Click the Measurement button, and the measurement window will appear. You can calibrate or measure the image. 1. Place the camera on a ruler and adjust the focus knob untill the image is sharp.(fig.1) 2. Click the “Measurement” button, and the Measurement window will appear. Instructions for Measurement window Note: You must calibrate again if you change the distance between the object and microscope, Calibrate...
-
Page 7: Measurement-Angle
Measurement-Angle Measurement-Circle 1. After calibating you can begin measuring. Click the 1. After calibating you can begin “measure” button. Select the “Angle” of the Measure measuring. Click the “measure” button. Mode(fig.4) Select the “Circle” of the Measure Mode then click “show Cross Line” function. - Page 8 Measurement-Rectangle 3. Drag to the lower right of the object.(fig.9) 1. After calibating you can begin measuring. Click the “measure” button. Select the “Rectangle” of the Measure Mode. 2. Hold the button of the mouse at the upper left of the object. (fig.12) (fig.16) 3.Drag to the lower right of the object.
- Page 9 Compare: 4. Click the button of mouse at the third point of the object, and the 1.Click the Compare button and the second window will appear on the screen: triangle measurement will appear. The number means the base x length / 2 = area. (fig.20) Measurement-Radius/Arc 1.
Need help?
Do you have a question about the 200X and is the answer not in the manual?
Questions and answers